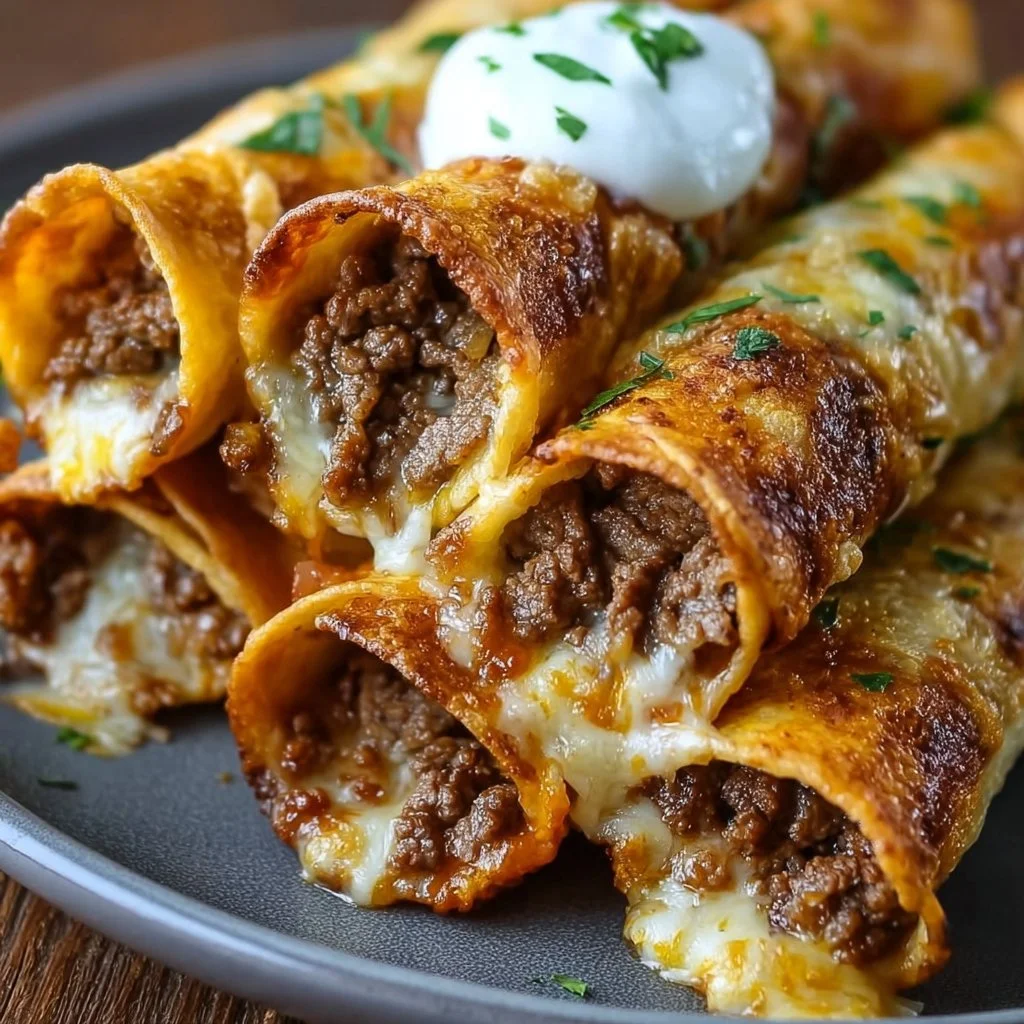
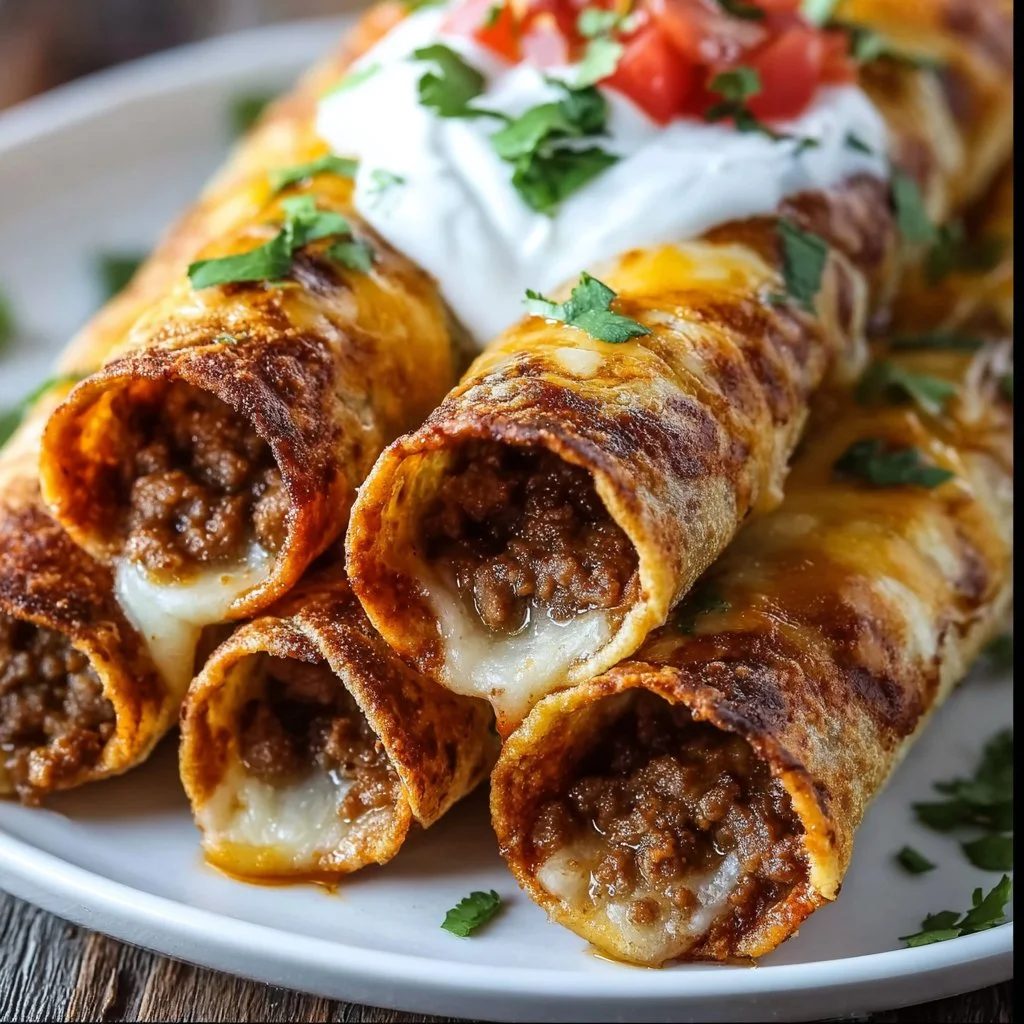
Crispy Cheesy Beef Taquitos sit at the top of my comfort-food list right now, and I have to tell you why. I remember a rainy Saturday when I decided to roll up everything cozy into little golden cylinders: seasoned ground beef, melting cheese, warm corn tortillas, and the smell of onions sizzling in the pan. You can taste the nostalgia in every bite. These taquitos use simple pantry ingredients like ground beef, shredded cheddar or Mexican-blend cheese, taco seasoning, and plain corn tortillas, and they come together fast — perfect for a chilly night or an easy weekend gathering. If you want a satisfying, shareable snack that feels both festive and homey, you and I are in the right kitchen.
Why You’ll Love This Recipe
- Quick and easy to prepare – less than 30 minutes of active work.
- Simple, accessible ingredients you probably already have.
- Perfect for game day, weeknight dinners, or cozy fall and winter evenings.
- Comforting, satisfying, and impressive when you bring them to the table.
What makes this version unique is the balance of crisp exterior and gooey, cheesy interior without being fussy. I tuned the seasoning for a bright, warm flavor and offer both baking and frying methods so you can choose healthier or extra-crispy. This recipe also builds your confidence: clear steps, visual cues, and mini tips mean you will get reliable results even on your first try.
Ingredients Needed
Grouped for clarity — everything rewritten and clarified so you know what to pick up at the store.
Main filling
- 1 pound lean ground beef (85 to 90 percent lean for flavor; use 93% lean if you prefer less splatter and fat)
- 1 tablespoon taco seasoning (store-bought or homemade blend; see notes for a quick mix)
Cheese
- 1 cup shredded cheese (choose sharp cheddar, Monterey Jack, or a Mexican-style blend for best melting and flavor)
Tortillas and fat for cooking
- 10 small corn tortillas (4 to 6 inch size; fresh tortillas are best — warm them briefly so they roll without cracking)
- Oil for frying (neutral oil like canola, sunflower, or vegetable oil) or cooking spray for baking
To serve
- Sour cream (for dolloping or dipping; plain Greek yogurt is a tangier swap)
- Salsa (mild to hot depending on your heat tolerance)
Optional garnishes (not included in base ingredient tally)
- Chopped cilantro, finely diced red onion, sliced avocado, or a squeeze of lime for brightness
Substitutions and clarifications
- Ground beef: you can use ground turkey or ground chicken if you want a leaner alternative. If you use turkey, add a teaspoon of olive oil when browning to keep it moist.
- Cheese: pre-shredded cheese often contains anti-caking agents that slightly reduce melt. If you can, shred a block of cheese for creamier melt.
- Tortillas: small flour tortillas can be used for a softer but still tasty taquito. Corn will give the more classic texture.
(If you love bold, cheesy dinners, I sometimes pair these with a side like Cajun steak tips with cheesy rigatoni for a fun surf-and-turf-for-two vibe.)
Ingredients & Equipment Notes (Optional)
- Skillet or large frying pan: a heavy-bottomed pan browns the meat evenly; nonstick is helpful when cooking the taquitos if frying.
- Baking sheet and wire rack: for oven-baked taquitos, a wire rack helps heat circulate so bottoms crisp.
- Tongs or flat spatula: for turning taquitos carefully during frying.
- Paper towels: for quick draining after frying to keep them crisp without extra grease.
- Shredding grater: if you choose to grate cheese from a block for better melt.
- Microwave or small skillet: to warm tortillas so they roll easily without cracking.
Small investments like a wire rack and a quality skillet make the process smoother and the results better, but none are essential.
Instructions – How to Make “Crispy Cheesy Beef Taquitos”
- Prep the oven or the oil.
- If you plan to bake, preheat the oven to 400°F (200°C). Line a baking sheet with foil and place a wire rack on top if you have one. This gives the taquitos an evenly crisp base.
- If frying, heat about 1/4 inch to 1/2 inch of neutral oil in a skillet over medium heat. You want it hot but not smoking. A small piece of tortilla should sizzle immediately when it hits the oil.
- Why this matters: preheating ensures consistent crispness. Visual cue: oil should shimmer, not smoke.
- Brown the ground beef.
- Add the ground beef to a skillet over medium heat and break it apart with a spatula. Cook until no pink remains and the pieces are nicely golden in spots, usually 6 to 8 minutes.
- Drain excess fat into a heatproof container or use a paper towel to blot the skillet surface.
- Why this matters: browning builds deep savory flavor. Visual cue: meat will change from pink to a rich brown and will release some juices.
- Season and melt in cheese.
- Stir in the taco seasoning and a splash of water (about 1 tablespoon) to help distribute the spices. Mix well so every crumb is seasoned.
- Turn off the heat and sprinkle in the shredded cheese, stirring until it melts into the meat, creating a creamy, cohesive mixture.
- Mini tip: keep the mixture slightly warm; it rolls better and helps the cheese act as a glue.
- Why this matters: the seasoning is the core flavor profile; melting cheese into the meat ensures cheesy pockets in each bite. Visual cue: glossy, slightly saucy appearance with melted streaks of cheese.
- Warm the tortillas so they are pliable.
- Either warm tortillas in a dry skillet for about 10 to 15 seconds per side or wrap a stack in a damp paper towel and microwave for 20 to 30 seconds. Keep them covered so they do not dry out.
- Why this matters: cold tortillas crack when rolled. Visual cue: the tortilla will bend easily and feel warm to the touch.
- Mini tip: work with a few at a time to keep the rest warm.
- Fill and roll the taquitos.
- Spoon a line of the beef and cheese mixture across the lower third of each tortilla. Roll tightly, tucking the filling as you go, and place seam-side down on a plate.
- Don’t overfill — aim for a 1 to 2 tablespoon stripe of filling, depending on tortilla size.
- Why this matters: a tight roll helps them hold together during cooking. Visual cue: firm, tube-like rolls with sealed seams.
- Bake or fry until golden and crispy.
- For baking: arrange the taquitos seam-side down on the rack or greased baking sheet. Spray lightly with cooking spray on top and bake at 400°F (200°C) for about 18 to 22 minutes, or until the edges are crisp and golden.
- For frying: carefully add the taquitos to the hot oil seam-side down, working in batches so you do not overcrowd the pan. Fry about 2 to 3 minutes per side, turning gently, until golden and crisp.
- Mini tip: if frying, maintain medium heat so the tortilla browns evenly without burning.
- Why this matters: baking uses less fat and is hands-off; frying gives extra crunch. Visual cue: uniform golden brown color and bubbling along the tortilla surface.
- Drain and rest briefly.
- Remove cooked taquitos from the oil or oven and place them on paper towels for 1 to 2 minutes to drain and firm up. If baked, a short rest helps the exterior crisp further.
- Why this matters: resting ensures the filling sets slightly, making them easier to handle and eat.
- Serve hot with classic toppings.
- Arrange on a platter and serve immediately with sour cream and salsa on the side. Add optional garnishes like cilantro, sliced avocado, or lime wedges.
- Mini tip: cut some in half at an angle for a pretty presentation and easier dipping.
- Visual cue: bubbling melted cheese when you cut into a freshly fried taquito, and a crunchy exterior that flakes when bitten.
If you want ideas for crunchy sides or a different flavor pairing, try a tangy fried accompaniment like a recipe I enjoy for crispy dill pickle parmesan chicken to make the meal more adventurous.
Serving Suggestions & Storage Tips
Serving ideas
- Make a taquito platter: arrange taquitos on a large board with ramekins of sour cream, salsa, guacamole, and pickled jalapeños for dipping.
- Taco bar: set out shredded lettuce, diced tomatoes, chopped cilantro, hot sauce, and lime wedges so everyone can customize.
- Bowl meal: slice baked taquitos and scatter over a bed of Mexican rice and black beans, then drizzle with crema for a deconstructed taquito bowl.
Presentation tips
- Stack the taquitos in a crisscross pattern to show off the golden edges.
- Garnish with a shower of finely chopped cilantro and a few lime wedges for color contrast.
- Use small dipping bowls for sauces and label them if you are hosting.
Pairings
- Simple sides: Mexican-style street corn salad, cilantro lime slaw, or a fresh pico de gallo.
- Drinks: sparkling water with lime, a fruity iced tea, or a virgin margarita-style mocktail.
- For a game-night spread, mix these with other bite-sized appetizers for variety.
Creative variations
- Make mini taquitos as bite-sized party snacks using appetizer tortillas.
- Add sautéed peppers and onions to the beef mixture for extra sweetness and texture.
- Swap cheeses for pepper jack if you want heat, or use Oaxaca cheese for stringy pull.
Storage
- Refrigerator: store cooled taquitos in an airtight container for up to 3 days.
- Freezer: arrange baked or fried taquitos on a baking sheet to freeze until solid, then transfer to a freezer bag for up to 2 months. Label with the date.
- Tips for freezing: freeze before saucing or garnishing. Reheat from frozen for best texture.
Best reheating methods
- Oven: Preheat oven to 375°F (190°C). Arrange taquitos on a baking sheet and bake for 10 to 15 minutes from refrigerated, or 20 to 25 minutes from frozen, until heated through and crisp.
- Air fryer: Place in a single layer at 350°F (175°C) for 6 to 10 minutes from refrigerated, or 10 to 12 minutes from frozen, flipping halfway.
- Avoid the microwave unless you plan to crisp them after; the microwave softens the tortilla. If microwaving, heat briefly then crisp in a hot skillet or under the broiler for a minute or two.
Helpful Notes & Variations
Ingredient substitutions
- Ground turkey or chicken: use the same amount; add 1 teaspoon olive oil if the pan is dry during browning.
- Vegetarian: swap the beef for seasoned cooked lentils, crumbled tempeh, or a plant-based ground beef alternative. Add a splash of soy sauce or smoked paprika to round out the flavor.
- Cheese alternatives: for lower-fat, use reduced-fat cheese but expect slightly less gooeyness.
Dietary adaptations
- Gluten-free: these taquitos are naturally gluten-free if you use certified corn tortillas and check taco seasoning ingredients.
- Lower-carb: use small low-carb tortillas or a lettuce wrap variant, though the texture will differ.
Flavor add-ins
- Fresh cilantro stirred into the warm filling right before rolling adds brightness.
- Finely minced chipotle in adobo or a pinch of smoked paprika adds smoky depth.
- A little lime zest in the beef mixture brings a surprising pop.
Common mistakes and how to avoid them
- Overfilling tortillas: leads to splitting during cooking. Use modest amounts and roll tightly.
- Using cold tortillas: they will crack. Warm them just until pliable.
- Overcrowding the frying pan: drops the oil temperature and makes them soggy. Fry in batches.
Experience-based tips
- Keep the filling warm but not piping hot when you roll, so the cheese binds without leaking.
- If you plan to make ahead and bake later, roll them and freeze them on a tray. When frozen, transfer them to a bag and bake from frozen — add a few minutes to the bake time.
- For ultra-crispness when baking, lightly brush a thin layer of oil on each taquito or spray with cooking spray rather than a heavy coat.
(A friendly note: if you want to explore another crispy comfort idea for breakfast or brunch, try my go-to for Crispy Feta Fried Eggs which pairs well with morning taquito-inspired plates.)
Conclusion
Crispy Cheesy Beef Taquitos are a joyful mix of comfort, crunch, and melty cheese that come together with minimal fuss and maximum reward. They shine because the technique is simple, the ingredients are honest, and the result is satisfying for all ages — perfect for cozy weeknights, casual parties, or game-day spreads. If you want more ideas for variations and slightly different baking techniques, check out a similar take on baked versions like Beef and Cheese Baked Taquitos – Kinda Healthy Recipes for inspiration. For a slightly different spin on the classic with helpful baking notes, see Baked Cheesy Beef Taquitos – Averie Cooks. And if you are curious about meal-prep strategies and protein-packed approaches, this write up on Baked Beef Taquitos with Cheese – Eat the Gains offers great practical tips. Try the recipe, leave a comment and star rating to tell me how yours turned out, and pin or share this post with friends who love hands-on comfort food.
Frequently Asked Questions
Can I make this recipe ahead of time?
Yes. You can assemble the taquitos and refrigerate them for up to 24 hours before baking. For longer storage, freeze them on a tray until solid, then move to a freezer bag for up to 2 months. When ready, bake from frozen and add a few extra minutes so they heat through.
How should I store leftovers and how long do they last?
Store cooled leftovers in an airtight container in the refrigerator for up to 3 days. For longer storage, freeze as suggested above for up to 2 months. Keep sauces separate until serving to prevent sogginess.
What is the best way to reheat or serve this recipe after storage?
Reheat in a 375°F oven for 10 to 15 minutes from the refrigerator, or 20 to 25 minutes from frozen, until hot and crisp. An air fryer works well too at 350°F for about 6 to 12 minutes depending on starting temperature and quantity.
Can I adjust or substitute ingredients to fit my preferences?
Absolutely. Use ground turkey or chicken for a leaner filling, swap cheeses for milder or spicier options, or try vegetarian fillings like seasoned lentils or crumbled tofu. Corn tortillas give the classic crunch; flour tortillas create a slightly softer wrap.
Do you have tips to ensure the best texture and flavor every time?
Warm the tortillas before rolling to prevent cracking, do not overfill, and roll tightly so they hold together. If baking, use a wire rack so air circulates. If frying, keep oil at medium temperature so they brown without burning. For extra flavor, mix fresh cilantro or a squeeze of lime into the filling right before rolling.
Crispy Cheesy Beef Taquitos
Ingredients
Method
- Preheat the oven to 400°F (200°C) if baking or heat oil in a skillet for frying.
- Brown the ground beef in a skillet over medium heat for 6 to 8 minutes until golden.
- Drain excess fat and stir in the taco seasoning with a splash of water.
- Add shredded cheese to the beef and mix until melted.
- Warm the tortillas in a skillet or microwave until pliable.
- Spoon the beef and cheese mixture onto the lower third of each tortilla and roll tightly.
- For baking, arrange on a wire rack and lightly spray with cooking spray. Bake for 18 to 22 minutes until crisp.
- For frying, add taquitos to hot oil seam-side down, frying for 2 to 3 minutes per side until golden.
- Drain cooked taquitos on paper towels for 1 to 2 minutes.
- Serve warm with sour cream and salsa, adding optional garnishes as desired.