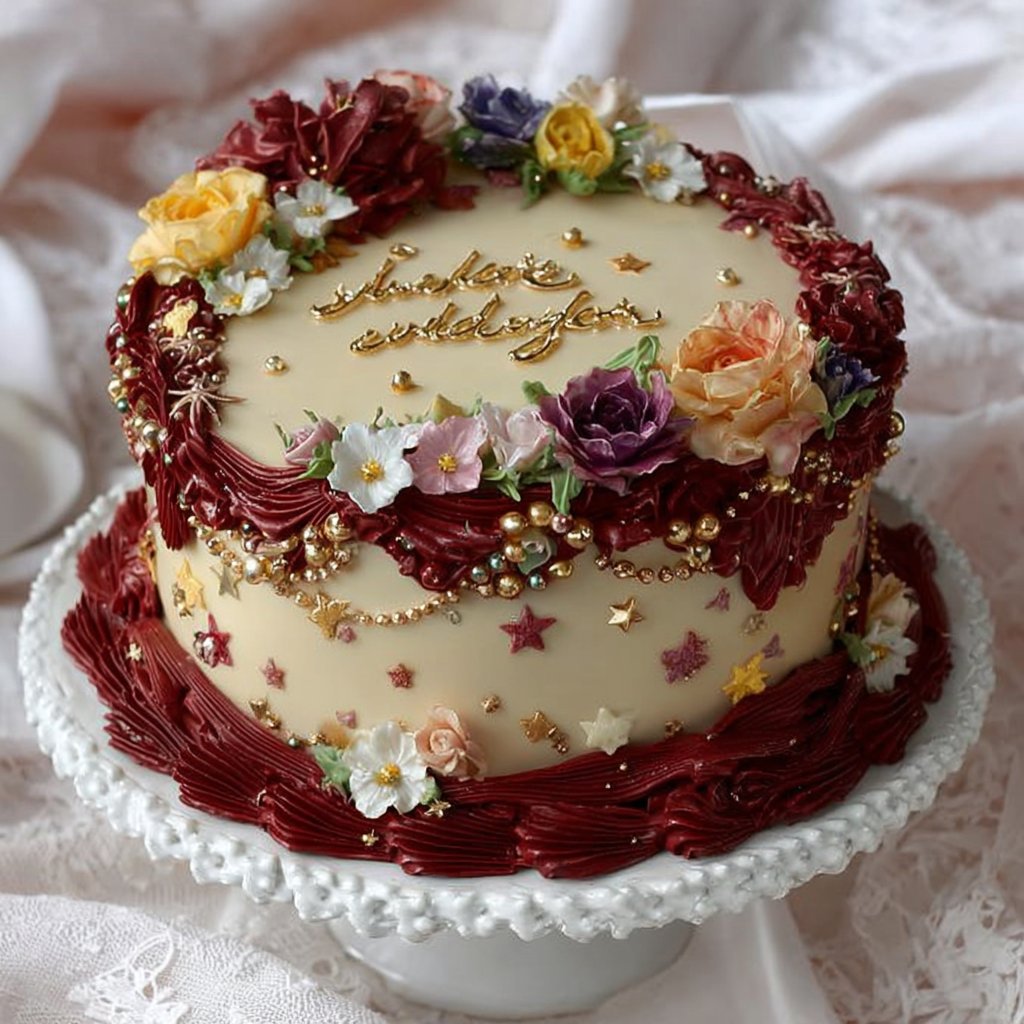
Pin by a manual labor of love on Cakes – I can hear you laughing already, imagining flour on your sleeves and frosting on your fingertips. Come sit with me for a minute. I made this vintage-inspired birthday cake after finding an old family photograph of birthdays past, and the whole kitchen blossomed into a cozy workshop of flavor and nostalgia. We are talking light, tender layers of vanilla cake, a dreamy buttercream with a hint of lemon, and just enough retro charm in the piping to make a guest of any age smile. The main ingredients are pantry staples—flour, sugar, butter, eggs, and a little vanilla—with a few optional touches like fresh berries and edible flowers for prettiness. If you enjoy small creative projects that yield big comfort, this recipe will feel like a true labor of love. For other pretty single-serve treats, I also adore the mini lemon cakes with lavender glaze as a whimsical companion to this layered vintage cake.
Why You’ll Love This Recipe
- Quick and easy to prepare once you gather your supplies – the batter comes together in one or two bowls.
- Simple, accessible ingredients you likely already have on hand.
- Perfect for spring and summer birthdays, garden parties, and any celebration that calls for feminine, vintage styling.
- Comforting and impressive – the results look bakery-level while tasting homemade and heartfelt.
What makes this version unique is the blend of old-fashioned technique and modern convenience. I keep the crumb tender by folding in a little sour cream for moisture while relying on a straightforward creaming method for reliable lift. The buttercream is balanced with lemon zest for brightness and a touch of milk for silky spreadability. Emotionally, this cake ties to the joy of making something by hand, the slow, attentive steps that let you breathe and remember. You do not need to be a pastry pro to feel confident here; I walk you through visual cues and mini tips so even the nervous baker ends up with a cake that has both personality and soul.
Ingredients Needed
Cake Layers
- 3 cups (375 g) all-purpose flour, spooned and leveled – for a slightly lighter crumb, use 1 cup cake flour and 2 cups all-purpose.
- 2 1/4 teaspoons baking powder – fresh is best for good rise.
- 1/2 teaspoon baking soda
- 1 teaspoon fine sea salt
- 1 cup (226 g) unsalted butter, room temperature – if using salted butter, reduce added salt by 1/4 teaspoon.
- 1 3/4 cups (350 g) granulated sugar
- 4 large eggs, room temperature – these help with structure and richness.
- 1 tablespoon pure vanilla extract
- 1 cup (240 ml) buttermilk or plain yogurt, room temperature – buttermilk gives tender texture; if not available, use 1 cup milk plus 1 tablespoon lemon juice or vinegar, let sit 5 minutes.
- 1/2 cup (120 g) sour cream, room temperature – optional but recommended for a moist crumb.
Lemon Buttercream Frosting
- 1 1/2 cups (340 g) unsalted butter, softened
- 6 cups (720 g) powdered sugar, sifted
- 2 tablespoons fresh lemon juice
- 2 teaspoons lemon zest, finely grated
- 2-3 tablespoons whole milk or cream, as needed for consistency
- Pinch of fine sea salt to balance sweetness
Decoration & Fillings
- 1 1/2 to 2 cups fresh berries (strawberries, raspberries, blueberries), hulled and halved as needed
- Edible flowers (optional) for vintage prettiness
- Sprinkles or crushed vintage-style candies, optional
- 1/4 cup jam or curd (lemon curd or raspberry jam) for layer brushing if you like extra fruitiness
Notes on ingredients and substitutions:
- Fresh vs frozen berries: fresh is best for decorating; frozen can be thawed and drained, but they release extra moisture so use sparingly between layers.
- Dairy substitutions: for lactose-intolerant guests, use plant-based butter and full-fat plant milk, but texture will vary slightly.
- Sugar alternatives: you can reduce sugar by up to 1/4 cup if you prefer less sweet frosting, but powdered sugar is necessary for structure.
Equipment You’ll Need
- Two 8-inch round cake pans or three 6-inch pans for thinner layers
- Parchment paper rounds
- Stand mixer or handheld mixer
- Rubber spatula and offset spatula
- Bench scraper or icing smoother for neat sides
- Piping bag and a medium round tip or star tip for decorative piping
- Cooling rack
Ingredients & Equipment Notes
Helpful tools and why they matter
- Stand mixer: gives consistent creaming of butter and sugar which is key to lift and texture. If you use a handheld mixer, work in bursts to avoid overworking batter.
- Parchment rounds: guarantee cakes release cleanly from pans so your layers stay intact.
- Offset spatula and bench scraper: make frosting look professional with minimal effort; a bench scraper is your best friend for smooth sides.
- Piping bag and tips: you can buy inexpensive disposable bags for easier cleanup and swap tips to match the vintage look you want.
Mini tip: Bring eggs and dairy to room temperature for better emulsification and even baking. If you forgot, put eggs in warm water for 5 minutes and let butter sit near a warm oven for a short while.
Instructions – How to Make “Pin by a manual labor of love on Cakes | Vintage birthday cakes, Creative birthday cakes, Pretty birthday cakes”
- Preheat and prep the pans
- Preheat your oven to 350 F (175 C). Grease two 8-inch cake pans and line the bottoms with parchment rounds. Lightly grease the parchment and dust with flour, tapping out excess.
- Why this matters: Properly prepared pans prevent sticking and keep edges even. Parchment also reduces the temptation to overbake while trying to remove layers.
- Combine the dry ingredients
- In a medium bowl, whisk together the flour, baking powder, baking soda, and salt until uniform.
- Visual cues: You want the dry mix to look even and free of clumps. This ensures an even rise and avoids pockets of baking powder.
- Cream butter and sugar
- In the bowl of a stand mixer fitted with the paddle attachment, cream the room temperature butter and sugar on medium speed for 3 to 4 minutes, until pale and fluffy.
- Why a step matters: Creaming traps air in the butter which helps the cake rise and gives a tender crumb. If your butter is too soft, the mixture will be greasy; if too cold, it will not aerate well.
- Add eggs and vanilla
- Add eggs one at a time, mixing for 20 to 30 seconds after each addition. Scrape the bowl down as needed. Mix in the vanilla extract.
- Mini tip: Adding eggs slowly keeps the batter emulsified so it does not curdle. If the batter looks a bit odd after the eggs, a splash of flour can help bring it back together.
- Alternately add dry mix and buttermilk
- Reduce mixer speed to low. Add one third of the dry ingredients, then half of the buttermilk, mixing just until incorporated. Repeat, ending with the remaining dry ingredients. Fold in the sour cream with a spatula if using.
- Visual cues: The batter should be smooth, thick, and ribboning slightly when spatula lifts. Avoid overmixing; stop when no streaks of flour remain.
- Divide batter and bake
- Divide the batter evenly between your prepared pans. Smooth the tops with an offset spatula. Bake 25 to 30 minutes for 8-inch pans, or 18 to 22 minutes for 6-inch pans. The cakes are done when a toothpick inserted into the center comes out clean or with a few moist crumbs.
- Why a step matters: Even division ensures uniform layers for stacking. Watch for golden color at the edges and slight spring back in the centers.
- Cool layers completely
- Let the cakes cool in the pans for 10 minutes, then invert onto a cooling rack and remove parchment. Cool completely before frosting.
- Mini tip: If you need to speed up cooling, place the cakes in the refrigerator uncovered for 20 minutes once they are no longer hot. Cold layers are easier to level and frost.
- Make the lemon buttercream
- In a clean bowl, beat softened butter on medium speed until smooth and slightly fluffy. Gradually add the powdered sugar, 1 cup at a time, mixing on low until combined. Add lemon juice, lemon zest, and a pinch of salt. Increase mixer speed to medium-high and beat for 2 to 3 minutes until light and silky. Add milk 1 tablespoon at a time to reach spreadable consistency.
- Visual cues: The final buttercream should be smooth, glossy, and hold soft peaks. If it looks curdled, continue beating; if too soft, chill briefly.
- Level and assemble the cake
- If layers are domed, level them with a serrated knife or cake leveler. Place the first layer on your cake board or plate, spread a thin layer of buttercream, and add a light smear of jam or curd if using. Scatter some fresh berries for bursts of flavor. Repeat with remaining layers.
- Why a step matters: Leveling creates stable layers that stack neatly and prevent leaning. A thin layer of frosting between layers, called a crumb coat, traps crumbs and makes final frosting smooth.
- Crumb coat and chill
- Apply a thin crumb coat of buttercream around the cake and refrigerate 15 to 20 minutes to set. This locks in crumbs and creates a smooth base for final decoration.
- Mini tip: The crumb coat does not need to be perfect. Chill until slightly firm to the touch.
- Final frosting and vintage piping
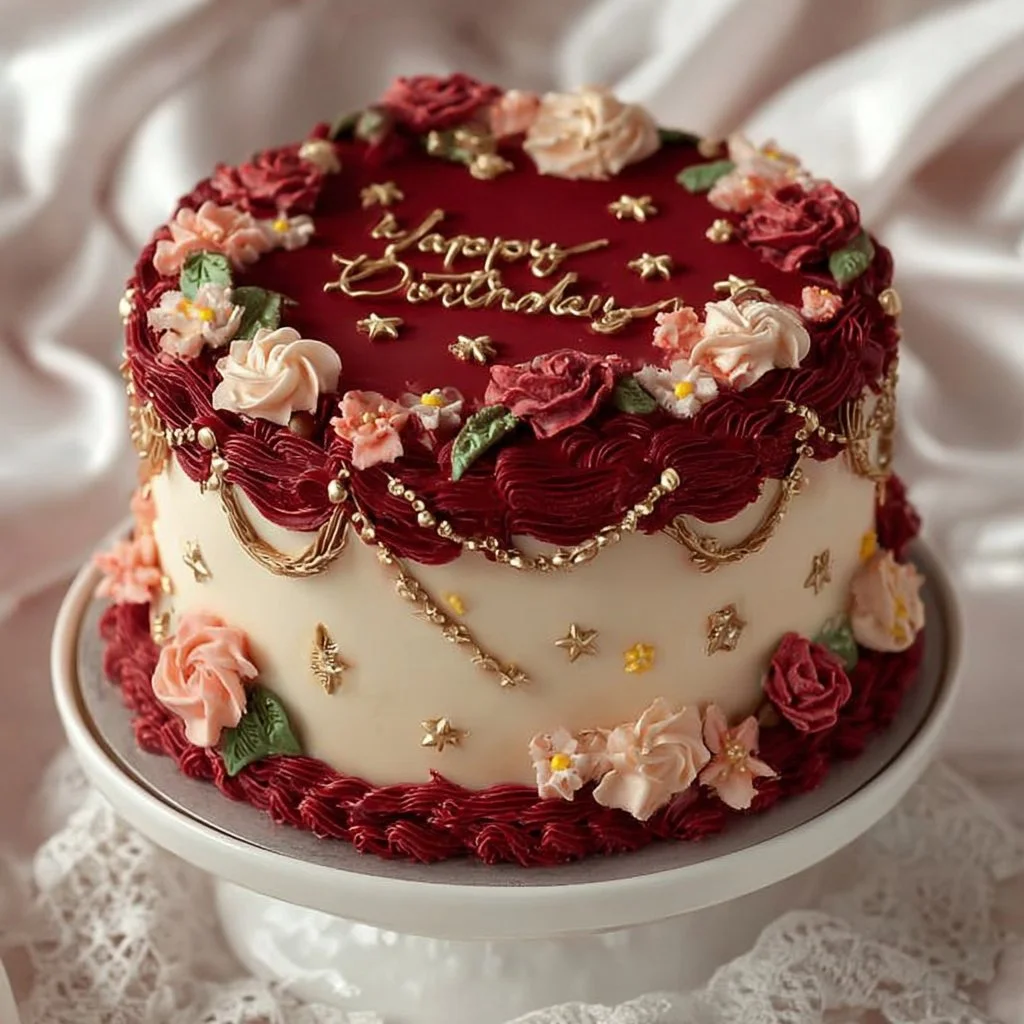
- Apply the final generous layer of buttercream, smoothing with an offset spatula and bench scraper until the sides are neat. Use a piping bag fitted with a small round tip or open star to pipe delicate rosettes, shells, or lattice work along the top edge to create that vintage look. Garnish with fresh berries and edible flowers.
- Visual cues: When smoothing, a gentle continuous motion with the bench scraper yields the neatest sides. Piping with steady pressure makes uniform decorations.
- Chill briefly, then serve
- Refrigerate the cake for 20 to 30 minutes to set the frosting before slicing. Bring to room temperature 30 minutes before serving for best texture and flavor.
- Mini tip: Use a sharp knife warmed under hot water and dried between slices for clean cuts.
Serving Suggestions & Storage Tips
Serving ideas:
- Serve slices with a small spoonful of fresh berry compote or a dollop of whipped cream for an extra indulgent touch.
- For a bridal shower or afternoon tea, plate small wedges with a sprig of mint and a few berries on the side for a picture-perfect presentation.
- Cut petite slices and pair with a light green salad and lemonade for a lovely springtime menu.
Presentation tips:
- Keep the cake center-focused: place a cluster of berries and one or two small flowers on the top center to draw the eye.
- For a vintage look, use pastel sprinkles sparingly and complement them with curled lemon zest.
- If you prefer minimalist style, a smooth buttercream finish with a single ring of berries around the top rim is both pretty and elegant.
Pairings:
- Non-alcoholic: fruity iced tea, lavender lemonade, or a chilled elderflower soda pair beautifully.
- For kid-friendly parties, pair with sparkling fruit mocktails or creamy vanilla milkshakes.
Creative variations:
- Swap the lemon zest in the buttercream for orange or lime for a citrus twist.
- Add a thin layer of chocolate ganache under the frosting for a decadent, retro-flavored layer.
- For a floral accent, steep a tablespoon of edible rose water into the buttercream, but add it sparingly to avoid overpowering the lemon.
Storage:
- At room temperature: Store in a cool, dry place covered loosely for up to 24 hours.
- In the refrigerator: Keep covered in an airtight cake carrier for up to 4 days. Bring to room temperature before serving for best texture.
- In the freezer: You can freeze individual unfrosted layers wrapped tightly in plastic wrap and foil for up to 2 months. Thaw overnight in the refrigerator before assembling and frosting.
Best reheating methods:
- For single slices, warm in a microwave for 8 to 12 seconds on low power to take the chill off, but be careful not to melt the frosting.
- Avoid prolonged heat which will soften buttercream excessively.
Helpful Notes & Variations
Ingredient substitutions:
- Flour: For a lighter cake, replace up to 1 cup of all-purpose flour with cake flour.
- Buttermilk: Plain yogurt thinned with milk works well as a substitute for buttermilk.
- Buttercream: For a lighter frosting, whip 1/3 cup of heavy cream and fold into the buttercream before finishing.
Dietary adaptations:
- Gluten-free: Use a cup-for-cup gluten-free flour blend that includes xanthan gum, and allow the batter to rest 15 minutes before baking for hydration.
- Dairy-free: Substitute coconut oil or plant-based butter and plant milk, but expect slight changes in flavor and texture.
Flavor add-ins:
- Fold 1/2 cup finely chopped toasted almonds or coconut into the batter for texture.
- For a retro strawberry swirl, fold 1/2 cup homemade strawberry puree into half the batter and swirl before baking.
Common mistakes and how to avoid them:
- Overbeating batter: Stops the cake from developing proper structure. Mix only until combined after adding dry ingredients.
- Frosting too soft: Chill the bowl or add more powdered sugar if the buttercream becomes too loose.
- Not leveling layers: Unlevel layers can cause leaning. Use a cake leveler or serrated knife for uniform cakes.
Experience-based tips:
- Bake one test layer if you are unsure about your oven; oven temperatures vary. Rotate pans halfway through baking for even color.
- If you plan to decorate with edible flowers, ensure they are pesticide-free and suitable for consumption.
- Keep tools clean and dry; powdered sugar can cake up if introduced to moisture.
Conclusion
This Pin by a manual labor of love on Cakes | Vintage birthday cakes, Creative birthday cakes, Pretty birthday cakes recipe brings together cozy nostalgia and approachable technique so you can create a showstopping cake without stress. The tender, moist layers paired with lemon-tinged buttercream produce a comforting balance of sweet and bright, while the vintage piping and fresh berry accents make every slice feel like a memory worth saving. Try it for birthdays, showers, or whenever you want to turn an ordinary afternoon into something special. If you want inspiration from professional bakeries or similar mini desserts, check out the gorgeous offerings at Desserts by Dana – Best Bakery in Newark, DE, the beautiful mini mousse cakes featured in Mini Blueberry Mousse Cakes with Mirror Glaze | Love and Olive Oil, or browse creative styling ideas at Creative Cakes Bistro – Best Bakery in Mandeville, LA. If you make this cake, please try the recipe, leave a comment and star rating, and share a photo on Pinterest or social media so we can celebrate your labor of love together.
- Frequently Asked Questions
Can I make this recipe ahead of time?
Yes. You can bake the cake layers a day ahead and wrap them tightly in plastic wrap. Keep them refrigerated if you will assemble within 48 hours, or freeze for longer storage up to 2 months. Make the frosting and store it in an airtight container in the fridge; bring to room temperature and re-whip briefly before using.
How should I store leftovers and how long do they last?
Store leftover cake in an airtight container in the refrigerator for up to 4 days. If the cake is left at room temperature and the buttercream is the only filling, it will be fine for about 24 hours in a cool kitchen. For longer storage, freeze slices wrapped tightly in plastic wrap and foil for up to 2 months.
What is the best way to reheat or serve this recipe after storage?
To serve refrigerated cake, remove it from the fridge 30 to 60 minutes prior to serving to take the chill off. For single slices, warm in short bursts in the microwave for 8 to 12 seconds, checking between intervals. Avoid heat that will melt the frosting.
Can I adjust or substitute ingredients to fit my preferences?
Absolutely. You can substitute buttermilk with yogurt or thinned milk, use gluten-free flour blends, or replace citrus in the buttercream with other flavorings such as almond or orange. If using dairy-free options, expect a slight change in texture.
Do you have tips to ensure the best texture and flavor every time?
Use room temperature ingredients for better emulsification, measure flour by spooning into the cup and leveling, and do not overmix after adding dry ingredients. Fresh baking powder and soda help with rise. Finally, allow the cake to rest at room temperature before serving for ideal flavor and mouthfeel.
Additional internal resources and recipe ideas:
- If you want a savory inspiration for a main dish to pair with your celebration, consider this spinach garlic meatballs recipe.
- For a chilled dessert to serve alongside cake or as a summer alternative, try the sea salt honey protein ice cream for an easy, creamy treat.
- Looking to pair the cake with a bright, fresh entrée, the baked cajun salmon with avocado lime sauce makes a delightful main for a celebratory meal.
- For additional small-batch cake ideas that echo the vintage feel, revisit the mini lemon cakes with lavender glaze for elegant single-serve charm.
Thank you for baking with me today. I hope this recipe helps you create a cake that becomes part of someone else’s happy memory. If you try it, please come back and tell me how it went.
Vintage Birthday Cake
Ingredients
Method
- Preheat your oven to 350 F (175 C). Grease two 8-inch cake pans and line the bottoms with parchment rounds. Lightly grease the parchment and dust with flour, tapping out excess.
- In a medium bowl, whisk together the flour, baking powder, baking soda, and salt until uniform.
- In the bowl of a stand mixer fitted with the paddle attachment, cream the room temperature butter and sugar on medium speed for 3 to 4 minutes, until pale and fluffy.
- Add eggs one at a time, mixing for 20 to 30 seconds after each addition. Scrape the bowl down as needed. Mix in the vanilla extract.
- Reduce mixer speed to low. Add one third of the dry ingredients, then half of the buttermilk, mixing just until incorporated. Repeat, ending with the remaining dry ingredients. Fold in the sour cream with a spatula if using.
- Divide the batter evenly between your prepared pans. Smooth the tops with an offset spatula. Bake 25 to 30 minutes for 8-inch pans, or 18 to 22 minutes for 6-inch pans.
- Let the cakes cool in the pans for 10 minutes, then invert onto a cooling rack and remove parchment. Cool completely before frosting.
- In a clean bowl, beat softened butter on medium speed until smooth and slightly fluffy. Gradually add the powdered sugar, 1 cup at a time, mixing on low until combined. Add lemon juice, lemon zest, and a pinch of salt.
- If layers are domed, level them with a serrated knife or cake leveler. Place the first layer on your cake board or plate, spread a thin layer of buttercream, and add a light smear of jam or curd if using.
- Apply a thin crumb coat of buttercream around the cake and refrigerate 15 to 20 minutes to set.
- Apply the final generous layer of buttercream, smoothing with an offset spatula and bench scraper until the sides are neat.
- Refrigerate the cake for 20 to 30 minutes to set the frosting before slicing. Bring to room temperature 30 minutes before serving.