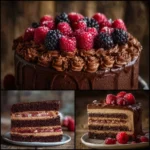
Kahlua Coffee Chocolate Layer Cake, can I be honest with you? I remember making this for a chilly Sunday when the house smelled like roasted coffee and cocoa, and I kept sneaking little crumbs because the flavors felt like a warm blanket. This cake blends rich cocoa, strong brewed coffee, and a deep coffee-liqueur flavor without overpowering sweetness, and the mocha buttercream holds it all together like a cozy hug. I use pantry staples like all purpose flour, cocoa, eggs, milk, and a non-alcoholic Kahlua-style coffee syrup so everyone can enjoy a slice. If you love layered celebration cakes, you might enjoy this as much as my take on Guinness Chocolate Cake with Irish Buttercream, which also balances deep flavors beautifully.
Why You’ll Love This Recipe
- Quick and easy to prepare with straightforward techniques and no temperamental steps
- Simple, accessible ingredients you likely already have in your pantry
- Perfect for autumn, winter gatherings, or anytime you crave a comforting dessert
- Comforting and impressive at the same time; it looks bakery-level but feels homemade
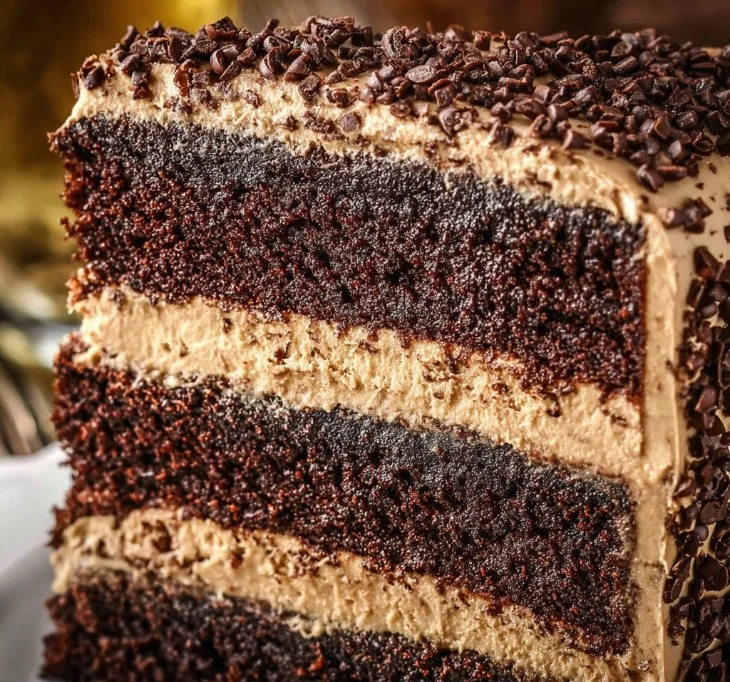
What sets this version apart is the emphasis on texture and balance. The batter is intentionally thin so the crumb stays moist and tender, and the frosting is a smooth mocha buttercream that melts on the tongue without being cloying. I bake these layers at a lower temperature to keep them even and dark without drying, and I rely on clear visual cues to know when the layers are just right. This is the kind of cake that makes you feel confident in the kitchen because each step has a purpose and a reassuring result.
Decadent Layers Ahead
Ingredients Needed
Below I list everything grouped so you can gather items before starting. I have clarified which items should be at room temperature versus hot, and suggested straightforward substitutions.
Dry ingredients – cake:
- 2 cups (260 g) all purpose flour, spooned and leveled (or use a 1:1 gluten-free flour blend if needed)
- 2 cups (414 g) granulated sugar
- 3/4 cup (85 g) natural unsweetened cocoa powder, sifted for a smoother crumb
- 2 teaspoons baking soda
- 1 teaspoon fine salt
Wet ingredients – cake:
- 3 large eggs, at room temperature for better emulsification
- 3/4 cup (180 ml) milk, warmed slightly to room temperature (whole milk gives best richness; use oat milk for dairy-free)
- 1 cup (240 ml) neutral vegetable oil, such as canola or light sunflower oil
- 1/2 cup (120 ml) non-alcoholic Kahlua-style coffee syrup, or use a decaf coffee liqueur substitute if you prefer no alcohol flavors
- 1 teaspoon pure vanilla extract
- 3/4 cup (180 ml) hot strong-brewed coffee, freshly brewed and hot (allows the cocoa to bloom and deepen the chocolate notes)
Frosting – mocha buttercream:
- 7 tablespoons (75 ml) non-alcoholic Kahlua-style coffee syrup, warmed very gently
- 3 tablespoons instant espresso powder, dissolved into the warmed Kahlua-style syrup
- 1 1/2 cups (336 g) unsalted butter, softened to room temperature
- 1 1/4 cups (236 g) solid vegetable shortening, at room temperature
- 10 1/4 cups (1208 g) powdered sugar, sifted for smooth frosting consistency
Decoration:
- Chocolate jimmie sprinkles, for pressing into the base and topping the piped edges
Notes on key swaps:
- If you prefer to avoid any coffee syrup, replace the indicated Kahlua-style measures with additional hot coffee reduced to a syrupy consistency, or a strong coffee extract diluted with a little simple syrup for sweetness.
- For a dairy-free cake, use plant-based butter and shortening, plant milk, and a vegan powdered sugar brand.
- For less sweetness, reduce powdered sugar in the frosting by up to 1 cup, adjusting Kahlua-style liquid to maintain spreadable texture.
Ingredients & Equipment Notes (Optional)
A few smart tools make this cake easier and improve the final result:
- Three 8-inch cake pans lined with parchment circles help the layers release cleanly. If you have only two pans, bake in shifts and keep the batter chilled briefly.
- A stand mixer or heavy-duty hand mixer gives the smoothest frosting texture when you beat butter and shortening together until light.
- Digital scale for measuring flour and sugar yields consistent cakes every time.
- An offset spatula and an icing smoother or decorating comb make achieving a professional-looking exterior much simpler.
- A toothpick or cake tester helps check doneness; you want a few moist crumbs, not a dry crumbless stick.
- A cooling rack prevents steam buildup under the cakes so they do not become soggy.
If you enjoy experimenting with robust chocolate cakes, you may also like the flavor balance in this Smores Chocolate Cake, which uses a similar approach to moisture and topping for a playful twist.
Instructions – How to Make “Kahlua Coffee Chocolate Layer Cake”
- Prepare pans and preheat the oven.
- Line the bottoms of three 8-inch cake pans with parchment circles and lightly grease the sides. This prevents sticking and helps the layers release with clean edges.
- Preheat your oven to 300°F (148°C). The lower temperature helps the layers bake evenly and retain moisture, giving a tender crumb rather than a domed, cracked top.
- Whisk dry ingredients together.
- In a large mixing bowl sift or whisk together 2 cups all purpose flour, 2 cups granulated sugar, 3/4 cup unsweetened cocoa powder, 2 teaspoons baking soda, and 1 teaspoon salt.
- Combining these first ensures even distribution of leavening and cocoa so each bite has consistent texture and chocolate flavor.
- Add the wet ingredients to the dry mix.
- Crack in 3 large eggs, pour in 3/4 cup milk, 1 cup vegetable oil, 1/2 cup non-alcoholic Kahlua-style coffee syrup, and 1 teaspoon vanilla extract.
- Mix on medium speed until combined and smooth. Scrape the bowl to erase any flour pockets. The batter will feel thinner than a typical cake batter.
- Stir in the hot coffee.
- Pour 3/4 cup hot strong-brewed coffee into the batter and mix until smooth. The heat helps bloom the cocoa and gently thins the batter.
- Visual cue: the batter should be very thin, almost pourable. That is expected and what creates a moist, tender crumb.
- Divide batter and bake.
- Evenly distribute the thin batter between the three prepared pans. Weighing the batter or using a measuring cup helps ensure identical layers.
- Bake for 32 to 35 minutes. Test by inserting a toothpick into the center; you should see a few moist crumbs attached, not raw batter. Avoid overbaking which dries the cake.
- Cool the cakes.
- Let the cakes cool in the pans for about 5 minutes to set slightly, then gently invert onto cooling racks and remove the parchment.
- Allow them to cool completely before assembling. Cooling fully prevents the frosting from sliding and helps the buttercream spread smoothly.
- Make the mocha Kahlua-style syrup for frosting.
- Warm 7 tablespoons of the non-alcoholic Kahlua-style coffee syrup until it just begins to steam and the edges shimmer. Do not boil vigorously.
- Stir in 3 tablespoons instant espresso powder until completely dissolved. This concentrated coffee syrup is the flavor backbone of the frosting.
- Cream the fats for frosting.
- In a large mixer bowl, beat 1 1/2 cups room-temperature unsalted butter and 1 1/4 cups room-temperature shortening until the mixture is pale and silky, about 3 to 5 minutes.
- Why this matters: fully creamed fat creates structure and stability, and it traps air that lightens the frosting.
- Build the buttercream in stages.
- Add roughly half of the sifted powdered sugar to the creamed fats and mix on low to combine, then increase speed until smooth. This staged method prevents clouds of sugar and helps avoid overworking the frosting.
- Add about half of the cooled Kahlua-style espresso mixture, mixing until smooth. Alternate adding remaining powdered sugar and final Kahlua mixture until the frosting reaches a spreadable consistency.
- Adjust frosting texture.
- If the buttercream is too stiff, add more of the Kahlua-style syrup a teaspoon at a time. If it is too loose, chill briefly and then whip again.
- Mini tip: an ideal frosting will hold soft peaks on a spatula and smooth out under only gentle pressure.
- Level the cake layers.
- If the cake layers have domes, use a serrated knife or cake leveler to trim them flat. Flat layers stack evenly and reduce the chance of sliding.
- Assemble the cake.
- Place the first cake layer on a serving plate. Top with 1 cup frosting, spread to an even layer using an offset spatula.
- Add the second cake layer, another cup of frosting, then position the final layer on top.
- Crumb coat and chill.
- Apply a thin crumb coat of frosting to the outside of the stacked cake and refrigerate for 20 to 30 minutes to set. This seals crumbs so the final coat looks clean.
- Final frost and texture.
- Frost the outside of the cake with the remaining buttercream. For a smooth finish use an icing smoother; for texture use a decorating comb to create ridges around the sides.
- Visual cue: the sides should be evenly covered and the top edges neat. If you want a perfectly smooth bakery finish, chill and then re-smooth with a warm spatula.
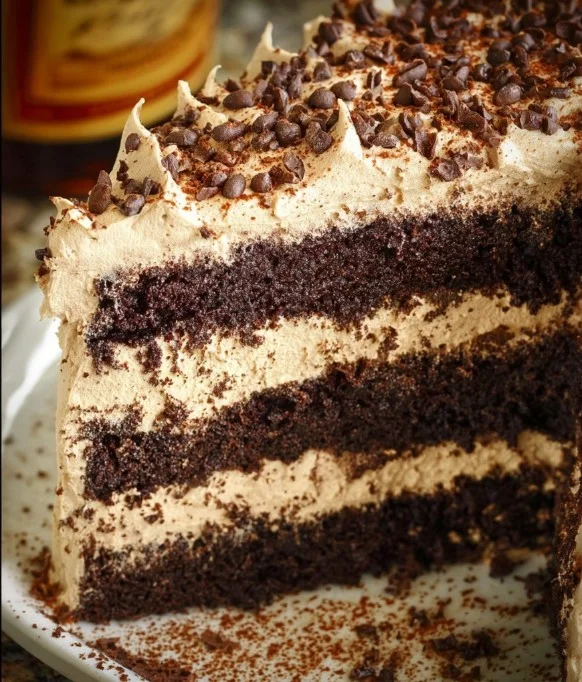
- Decorate with sprinkles and piping.
- Press chocolate jimmie sprinkles into the bottom edge of the cake for a playful border.
- Pipe swirls around the top edge using a piping bag fitted with a large star tip (Ateco #844 or similar) and add a few additional sprinkles in each swirl for sparkle.
- Store properly.
- Place the finished cake in an airtight container. It keeps best at room temperature if your kitchen is cool, or in the fridge if warmer. The cake stays fresh for 2 to 3 days.
Why a few steps matter:
- Lower temperature baking prevents cracking and encourages even rise.
- Hot coffee blooming the cocoa deepens chocolate flavor.
- A cooled, dissolved espresso in the Kahlua-style syrup integrates into buttercream evenly, avoiding gritty spots.
- Layer leveling and a crumb coat give a neat presentation and reduce frosting waste.
Mini tips:
- If your frosting becomes too soft while decorating, chill the bowl for 10 minutes and re-whip briefly.
- For a stronger coffee note, add an extra teaspoon of instant espresso to the warmed Kahlua-style syrup.
- Use the back of a spoon dipped in hot water to smooth the top of the cake for a glossy finish.
Serving Suggestions & Storage Tips
Serving ideas:
- Slice this cake into generous wedges and serve with a dollop of lightly whipped cream and a few fresh raspberries for a bright contrast.
- For a dessert platter, accompany small slices with espresso or decaf coffee for a cohesive coffee-chocolate experience.
- Make mini layer cakes in smaller pans or use leftover batter for cupcakes topped with mocha buttercream.
Presentation tips:
- For an elegant look, shave a few curls of dark chocolate across the top and dust with a fine sprinkle of cocoa powder.
- Pipe small rosettes and place a single chocolate jimmie or a coffee bean on each for a refined finish.
- Serve on a white or neutral platter to let the rich chocolate color pop.
Pairings:
- Serve with a cup of single-origin coffee to complement the mocha notes, or offer a bright dessert wine for adults who prefer a pairing; since this recipe uses non-alcoholic coffee syrup, it remains family-friendly.
- Fresh fruit such as strawberries or orange segments can cut through the richness.
Storage:
- At room temperature: keep in an airtight container for up to 2 days in a cool room.
- In the refrigerator: store for up to 4 days; bring slices to room temperature before serving for best texture.
- In the freezer: wrap whole cake tightly in plastic and then foil, or freeze individual slices on a tray then bag them. Frozen for up to 2 months. Thaw overnight in the fridge and then come to room temperature.
Best reheating methods:
- For best texture, avoid microwaving whole slices. Instead, let refrigerated slices sit at room temperature for 30 to 45 minutes.
- If you prefer warm cake, place a single slice on a microwave-safe plate and heat for 10 to 12 seconds to take the chill off, or warm in a 300°F (150°C) oven for 5 to 10 minutes until slightly warm.
Helpful Notes & Variations
Ingredient substitutions:
- Non-alcoholic Kahlua-style syrup: swap both Kahlua quantities for a homemade coffee-simple syrup made from reduced strong coffee and sugar, or use high-quality coffee extract diluted to taste.
- Butter and shortening: fully replace shortening with additional softened butter for richer flavor, but expect a slightly softer frosting at room temperature.
- Flour: for gluten-free, use a 1:1 gluten-free flour blend and add 1/2 teaspoon xanthan gum if your blend lacks it.
- Milk alternatives: whole milk gives best texture, but almond, oat, or soy milk work well; use full-fat alternatives for stability.
Dietary adaptations:
- To make this vegan: use plant-based butter and shortening, non-dairy milk, and ensure your powdered sugar is vegan. Replace eggs with a commercial egg replacer or flax egg equivalent, though texture will vary.
- Lower-sugar option: reduce the sugar slightly in the cake by up to 1/3 cup and reduce powdered sugar in the frosting up to 1 cup. Add a touch more liquid if needed to maintain spreadability.
Flavor add-ins:
- Stir in 1/2 cup chopped dark chocolate or chocolate chips to the batter for pockets of melted chocolate.
- Fold in 1/2 cup toasted chopped hazelnuts between layers for crunch and contrast.
- Add a teaspoon of orange zest to the cake batter for a chocolate-orange twist.
Common mistakes and how to avoid them:
- Overmixing the batter: mix until just combined. Overmixing can develop gluten and produce a dense cake.
- Baking at too high a temperature: watch for domed or cracked tops. Use an oven thermometer to ensure accuracy.
- Frosting too warm: if the buttercream feels runny, refrigerate briefly and then re-whip for stability.
- Assembling while cakes are warm: always cool completely for less sliding and cleaner slices.
Practical tips from experience:
- I like to weigh out batter for each pan to ensure perfectly even layers.
- Keep a small bowl of boiling water nearby when frosting; dipping and wiping your spatula in the hot water helps smooth frosting seamlessly.
- If you want to add a soak layer for extra flavor, brush each cake layer lightly with 1 to 2 tablespoons of the non-alcoholic Kahlua-style syrup before frosting.
If you enjoy playing with textures and chocolate combinations, you might like this playful celebration cake idea in my Biscoff Cookie Butter Cake recipe for inspiration on layering flavors and crunch.
Conclusion
This Kahlua Coffee Chocolate Layer Cake stands out because it balances deep chocolate richness with bright coffee notes while staying approachable for home bakers. The thin, delicate cake layers soak up flavor and remain moist, and the mocha buttercream ties everything together with a silky, spreadable finish. Whether you are hosting a holiday gathering or simply treating your family to a cozy weekend dessert, this cake offers comfort, flavor, and a touch of show-stopping presentation. Try the recipe, and please leave a comment and star rating to let me know how it turned out—your feedback helps others bake with confidence. For more inspiration and variations, I recommend checking these related takes on coffee-chocolate cakes: Kahlua Coffee Chocolate Layer Cake – Life Love and Sugar, an alternate adaptation for similar flavors; Kahlua Coffee Chocolate Layer Cake – Punchfork, which compiles user variations; and Kahlua Cake With Mocha Buttercream for another mocha-focused buttercream idea.
Frequently Asked Questions
Can I make this recipe ahead of time?
Yes. You can bake the layers up to two days in advance and store them wrapped tightly in plastic at room temperature or in the refrigerator if your kitchen is warm. For best results, assemble the cake on the day you plan to serve. The assembled cake keeps well for 2 to 3 days refrigerated.
How should I store leftovers and how long do they last?
Store leftovers in an airtight container in the refrigerator for up to 4 days. If your kitchen is cool and you prefer room temperature, keep the cake covered and serve within 48 hours. For longer storage, freeze slices wrapped tightly and placed in freezer bags for up to 2 months.
What is the best way to reheat or serve this recipe after storage?
For serving, allow refrigerated slices to come to room temperature for 30 to 45 minutes. To gently warm a slice, microwave for 10 to 12 seconds or warm in a 300°F oven for 5 to 10 minutes. Avoid overheating which can change the buttercream texture.
Can I adjust or substitute ingredients to fit my preferences?
Absolutely. Replace the Kahlua-style syrup with a non-alcoholic coffee syrup or concentrated coffee reduction. Swap dairy for plant-based alternatives, use gluten-free flour blends as needed, and alter sugar levels slightly. Keep in mind texture adjustments when making substitutions and tweak liquid and fat amounts accordingly.
Do you have tips to ensure the best texture and flavor every time?
Yes. Use room-temperature eggs and fats for smooth emulsification, weigh dry ingredients to ensure consistency, and do not overbake the layers. Bloom the cocoa with hot coffee for deeper chocolate flavor and chill the cake briefly between the crumb coat and final coat to achieve a clean finish.
Kahlua Coffee Chocolate Layer Cake
Ingredients
Method
- Line the bottoms of three 8-inch cake pans with parchment circles and lightly grease the sides.
- Preheat your oven to 300°F (148°C).
- In a large mixing bowl, sift or whisk together dry ingredients.
- Add wet ingredients to the dry mix and mix on medium speed until combined and smooth.
- Stir in the hot coffee and mix until smooth.
- Evenly distribute the thin batter between the three prepared pans.
- Bake for 32 to 35 minutes, testing with a toothpick for doneness.
- Allow cakes to cool in the pans for 5 minutes before inverting onto cooling racks.
- Warm Kahlua-style syrup and dissolve espresso powder in it.
- Beat together the butter and shortening until pale and silky.
- Gradually add powdered sugar and Kahlua mixture while mixing until smooth.
- Adjust texture as needed.
- Level the cake layers if domed.
- Place first layer on a plate, top with frosting, and repeat for layers.
- Apply a crumb coat and chill for 20-30 minutes.
- Frost with remaining buttercream and decorate with sprinkles.
- Store in an airtight container, in room temperature or refrigerator.