Death by Chocolate Cake, my friend, is the kind of dessert that prompts a delighted, slightly guilty grin the moment the first forkful touches your lips. I remember baking this on a rainy Sunday, wrapping my hands around a warm mug as the kitchen smelled like rich cocoa and vanilla – pure comfort. This recipe uses pantry-staple ingredients like all-purpose flour, granulated sugar, unsweetened cocoa, eggs, whole milk and butter, and finishes with a glossy dark chocolate buttercream made with melted dark chocolate and a splash of cream. If you want a showstopping chocolate layer cake that is moist, intense and reliably crowd-pleasing, you are in the right place. Before we dive in, if you love indulgent, gooey chocolate desserts, try my take on a s’mores chocolate cake for a campfire-style twist.
Why You’ll Love This Recipe
- Quick and easy to prepare – active time is reasonable, and most steps are straightforward.
- Simple, accessible ingredients you likely already have on hand.
- Perfect for cozy fall gatherings, birthdays, or any day you need a serious chocolate pick-me-up.
- Comforting, satisfying, and impressively rich without being fussy.
What makes this version unique is the balance between deep cocoa flavor and an ultra-moist crumb. Combining boiling water with the batter intensifies the chocolate and gives a tender texture, while the dark chocolate buttercream adds glossy richness without overpowering the cake. I wrote this recipe to build confidence – even if you do not bake often, the steps are clear and forgiving. You will finish feeling proud, and probably tempted to hide a slice for yourself.
Ingredients Needed
Below I have grouped and clarified the ingredients from the classic recipe so you can shop and prep with confidence.
Cake dry ingredients
- 2 cups (250 g) all-purpose flour – spoon and level for accuracy, or weigh for best results
- 2 cups (400 g) granulated sugar
- 3/4 cup (75 g) unsweetened cocoa powder – use Dutch-processed for deeper flavor, natural cocoa is fine too
- 1 1/2 teaspoons baking powder
- 1 1/2 teaspoons baking soda
- 1 teaspoon fine salt
Cake wet ingredients
- 2 large eggs, at room temperature – brings richness and structure
- 1 cup (240 ml) whole milk – for creaminess; you can substitute buttermilk for a slight tang
- 1/2 cup (120 ml) neutral vegetable oil – keeps the cake extra moist; sub with melted coconut oil if preferred
- 2 teaspoons pure vanilla extract
- 1 cup (240 ml) boiling water – added at the end to bloom the cocoa and thin the batter
Buttercream and finishing
- 1 cup (226 g) unsalted butter, softened to room temperature – for a silky, stable frosting
- 4 cups (480 g) powdered sugar, sifted – adjust for sweetness and consistency
- 1 cup (170 g) good-quality dark chocolate, melted and cooled slightly – 60 to 70 percent cacao is ideal
- 1/4 cup (60 ml) heavy cream – yields a spreadable, glossy finish
Notes on clarifications and substitutions
- Cocoa powder: If using Dutch-processed cocoa and baking powder, the chemistry changes slightly but this recipe uses both baking powder and baking soda to be forgiving. If you only have natural cocoa, the flavor is still fantastic.
- Milk choice: Whole milk is specified for richness. For a lighter cake, use 2% milk. Non-dairy milks like oat or almond will work but may slightly change crumb and flavor.
- Oil: Vegetable oil maintains moisture better than butter in the batter. If you prefer, replace half the oil with softened unsalted butter for flavor, but expect a slightly denser crumb.
- Chocolate: Use a dark chocolate you enjoy eating; the buttercream flavor depends on it.
- Powdered sugar: Sifting helps remove lumps and gives a smooth frosting.
Ingredients & Equipment Notes (Optional)
- Two 9-inch round cake pans – greased and floured, or lined with parchment for clean removal.
- Electric mixer – a hand mixer or stand mixer speeds up mixing, but whisking by hand works with a bit more elbow grease.
- Rubber spatula – for scraping batter and folding in boiling water.
- Cooling racks – let layers cool completely for easier frosting.
- Instant-read thermometer is nice but not necessary – visual cues are reliable for this cake.
Why these tools matter
- Proper pans and parchment help you get even layers with smooth sides for professional-looking assembly.
- An electric mixer ensures a light, well-aerated batter and a silky buttercream. If you are hand mixing, mix thoroughly for even results.
Instructions – How to Make “Death by Chocolate Cake”
- Preheat and prepare pans
- Preheat your oven to 350°F (175°C). Grease the bottoms and sides of two 9-inch round cake pans and lightly dust with flour, or line the bottoms with parchment circles.
- Why this matters: The prebaked surface and gentle greasing help the cakes release cleanly after baking. Accurate oven temperature ensures even rise.
- Combine dry ingredients
- In a large mixing bowl, whisk together the all-purpose flour, granulated sugar, unsweetened cocoa powder, baking powder, baking soda, and salt until evenly blended.
- Visual cue: The dry mix should be uniform in color with no lumps of cocoa, and it should smell faintly of chocolate.
- Mini tip: Whisking aerates the mix slightly, contributing to a tender crumb.
- Add eggs and wet ingredients
- Add the eggs, whole milk, vegetable oil and vanilla extract to the dry ingredients. With an electric mixer on medium speed, beat for about 2 minutes until the batter is smooth and well-combined.
- Why this step matters: Proper mixing distributes leaveners and fat, creating structure and moisture. Do not overmix after adding flour – two minutes is enough.
- Visual cue: The batter will be thick and glossy before the water is added.
- Stir in boiling water
- Carefully stir in the boiling water by hand using a rubber spatula. The batter will become thin; that is correct.
- Why this step matters: Hot water blooms the cocoa, intensifies the chocolate flavor and helps dissolve sugar for a moist, tender cake.
- Mini tip: Pour the boiling water slowly while stirring to avoid splashes. If you prefer a denser cake, use warm instead of boiling water.
- Pour batter into pans and bake
- Divide the batter evenly between the prepared pans and smooth the tops with an offset spatula.
- Bake in the preheated oven for 30 to 35 minutes. The cakes are done when a toothpick inserted into the center comes out with a few moist crumbs but no wet batter.
- Visual cues: The edges will pull away slightly from the pan and the centers will spring back lightly when touched.
- Why timing matters: Overbaking dries the cake; underbaking yields a gummy center. Check at 30 minutes, then every few minutes until done.
- Cool the layers
- Allow the cakes to cool in their pans for about 10 minutes, then carefully invert onto cooling racks to cool completely.
- Why this step matters: Cooling for a short time in the pan allows the crumb to set so the layers do not fall apart when removed.
- Mini tip: If the top domes slightly, level them with a serrated knife once cooled for neat stacking.
Frosting and Assembly
- Make the dark chocolate buttercream
- In a large bowl, beat the softened unsalted butter until light and creamy. Gradually add the sifted powdered sugar, mixing on low speed to avoid sugar clouds, then increase speed until smooth.
- Add the melted dark chocolate and the heavy cream, and continue beating until the frosting is glossy and spreadable. Adjust consistency with a touch more cream to loosen or more powdered sugar to thicken.
- Visual cue: The buttercream should be glossy and silky, holding soft peaks but spreading easily.
- Why this method matters: Creaming the butter first traps air for a lighter frosting; adding chocolate and cream afterward ensures even color and texture.
- Assemble the cake
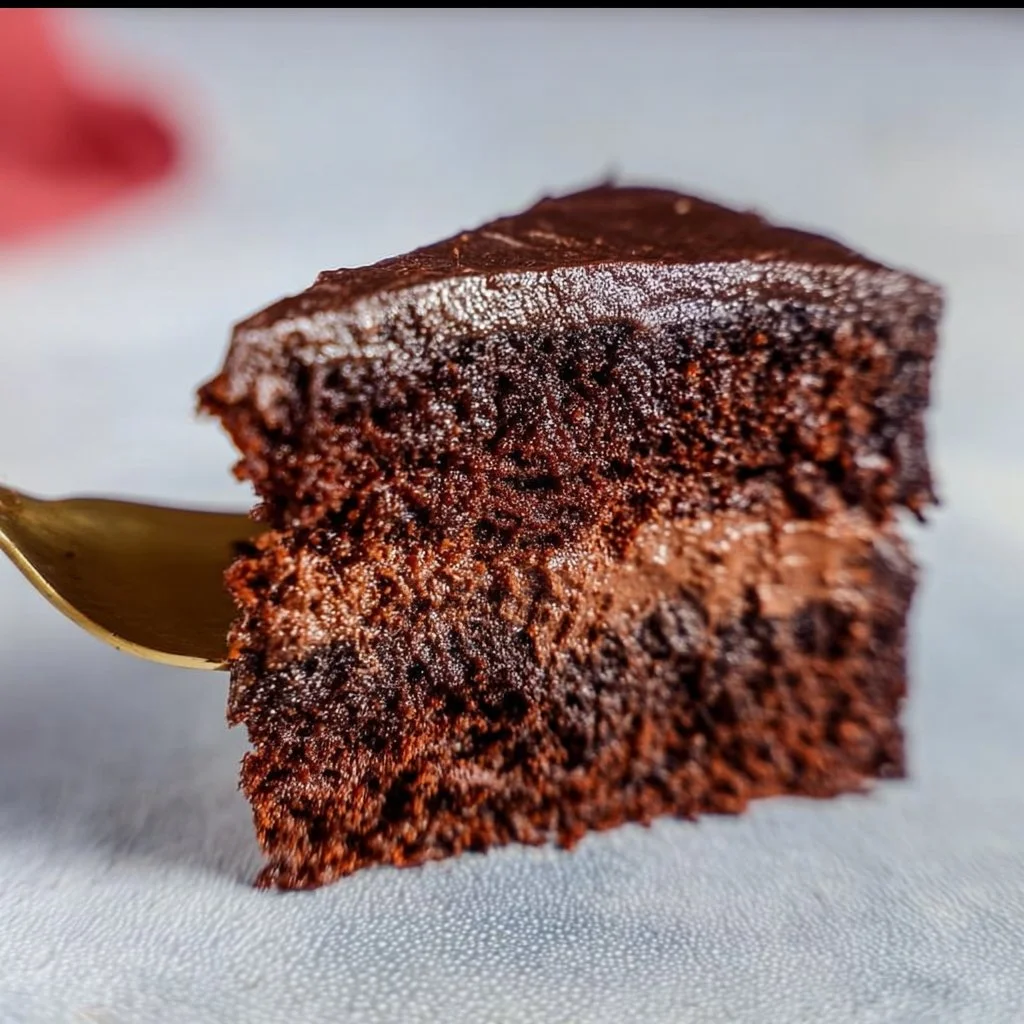
- Place one cooled layer on a cake plate or pedestal. Spread a generous layer of chocolate buttercream across the top. Add the second cake layer and frost the top and sides smoothly using an offset spatula.
- Mini tips: To get crisp edges, chill the crumb-coated cake for 15 to 30 minutes, then apply a final thin coat of frosting. Use a bench scraper for smooth sides.
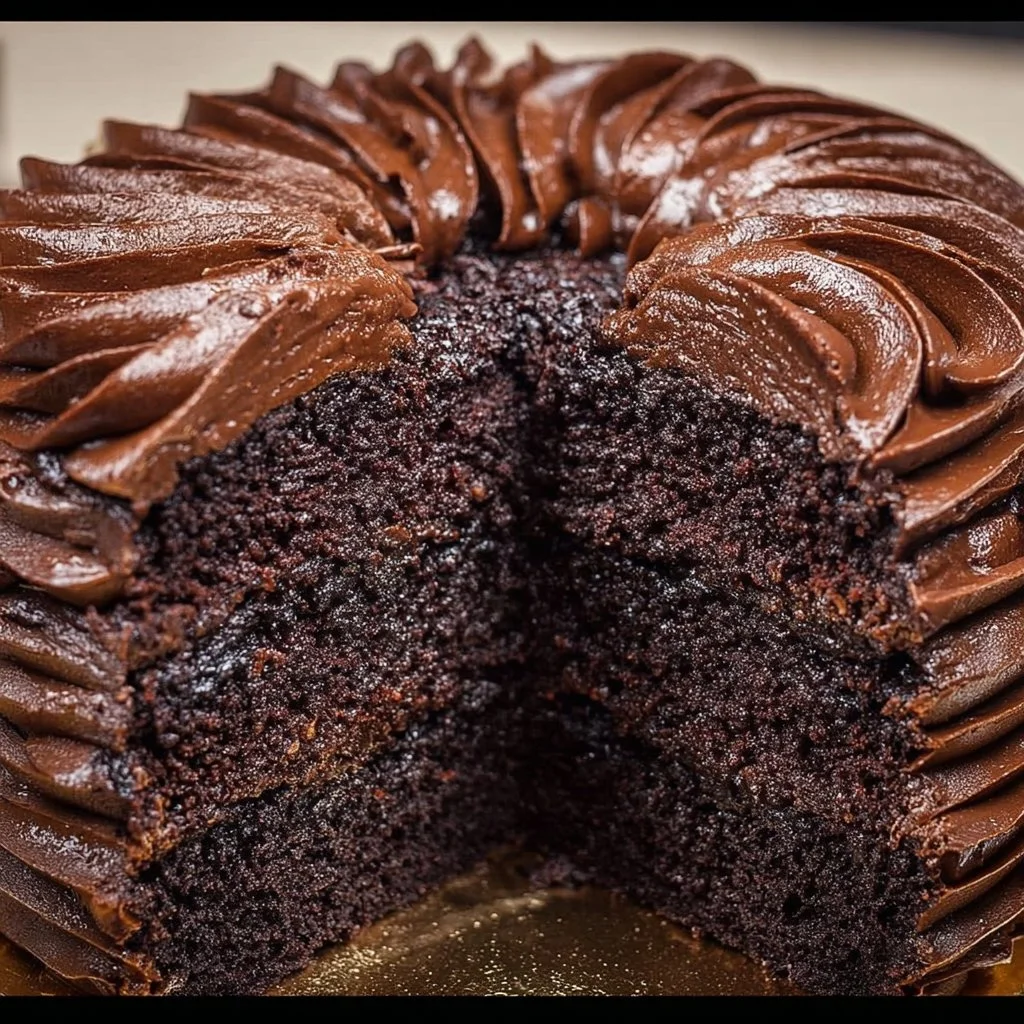
- Visual cues: The finished cake should look glossy and even, with any decorative swirls or piped accents you prefer.
- Serve and enjoy
- Slice with a sharp knife warmed under hot water and wiped dry for clean cuts. Enjoy immediately or follow the storage tips below.
- Why serving technique matters: Warming and drying the knife prevents tearing the frosting for tidy slices.
Serving Suggestions & Storage Tips
Serving ideas
- For an elegant dessert, serve each slice with a small scoop of vanilla bean ice cream and a dusting of cocoa or a few fresh berries for contrast.
- For a cozy gathering, plate slices with warm salted caramel sauce or a dollop of lightly sweetened whipped cream.
Presentation tips
- Add chocolate shavings, toasted nuts, or a sprinkle of flaky sea salt for texture and visual appeal.
- Use a piping bag and star tip to pipe rosettes around the top edge for a professional look.
Pairings
- Pair with strong coffee, decaf for late-night dessert, or a creamy hot chocolate for an extra indulgent experience.
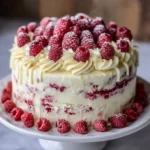
- Fresh raspberries or tart cherry compote cut the richness and brighten each bite.
Creative variations
- Make a layer of chocolate ganache between the layers for extra intensity.
- Fold in a handful of finely chopped dark chocolate or chocolate chips into the batter for pockets of melted chocolate.
Storage – fridge and freezer
- At room temperature: If your kitchen is cool, you can keep the cake covered for up to 24 hours.
- In the refrigerator: Store covered for up to 4 days. Bring slices to room temperature before serving for the best texture and flavor.
- Freezing: Wrap individual slices tightly in plastic wrap and foil, or freeze the entire frosted cake in an airtight container for up to 2 months. Thaw in the refrigerator, then bring to room temperature before serving.
Best reheating methods
- For refrigerated slices, let sit at room temperature for 30 to 60 minutes to let the buttercream soften.
- For a warm slice, microwave a single piece for 10 to 15 seconds to slightly soften the cake and frosting, but avoid overheating which will melt the buttercream.
Helpful Notes & Variations
Ingredient substitutions
- Oil swap: Replace vegetable oil with light olive oil or melted coconut oil for subtle flavor changes. Avoid butter-only substitution if you want the same moistness.
- Cocoa swap: If you have high-quality Dutch-processed cocoa, you will get a deeper, less acidic chocolate flavor. If using natural cocoa, the cake will be brighter in flavor.
- Milk swap: Use buttermilk instead of whole milk for a tender crumb and slight tang.
Dietary adaptations
- Gluten-free: Substitute a 1-to-1 gluten-free flour blend that contains xanthan gum. The texture may be slightly different but still delicious.
- Lower-sugar: Reduce sugar slightly in the cake batter by 10 to 15 percent, but keep powdered sugar in the frosting for structure – or use confectioners sugar substitute designed for baking.
Flavor add-ins
- Espresso powder: Add 1 teaspoon of instant espresso dissolved in the boiling water to amplify chocolate flavor without adding coffee taste.
- Citrus twists: A touch of orange zest in the batter or buttercream adds a classic chocolate-and-orange pairing.
- Spices: A pinch of cinnamon or ground cardamom in the cake dry mix can lend a warm nuance.
Common mistakes and how to avoid them
- Overmixing after adding flour can lead to a tough crumb – mix just until combined and then add the hot water as instructed.
- Skipping the boiling water step changes the cake texture and reduces intense chocolate flavor – do not skip it.
- Frosting a warm cake will cause buttercream to melt and slip – make sure layers are completely cool.
Experience-based tips
- For even layers, weigh the batter and divide equally between pans.
- Chill the crumb-coated cake before a final frosting pass – it makes smoothing easy.
- If you plan to transport the cake, refrigerate it slightly so the frosting firms and is less likely to shift.
Conclusion
This Death by Chocolate Cake stands out because it combines deeply chocolatey flavor with a reliably moist, tender crumb and a gleaming, rich dark chocolate buttercream. It is a cake you can confidently serve at celebrations or make on a quiet weekend to comfort a loved one – it rewards effort with dramatic results. The technique of adding boiling water unlocks the cocoa, and the buttercream gives a professional finish that stays true slice after slice. If you want a different shape or look, you can find a beautiful Bundt version at Pretty Providence, a layered take with playful garnishes at Sprinkle Bakes, or a naturally elegant approach at Baker by Nature. Try the recipe, leave a comment and star rating so I know how it went, and share your slice on Pinterest or social media to brighten someone else’s day.
- Frequently Asked Questions (H2)
Can I make this recipe ahead of time?
Yes. You can bake the cake layers up to two days ahead and store them wrapped in plastic at room temperature if your kitchen is cool, or in the refrigerator. For longer lead time, freeze individual layers wrapped tightly for up to 2 months and thaw in the refrigerator before frosting. If you plan to frost the cake ahead, keep it refrigerated and bring it to room temperature before serving for the best texture.
How should I store leftovers and how long do they last?
Store leftover slices in an airtight container in the refrigerator for up to 4 days. If you prefer the cake at room temperature, remove slices about 30 to 60 minutes before serving to let the buttercream and cake soften. For longer storage, freeze slices as directed above.
What is the best way to reheat or serve this recipe after storage?
For a warm slice, microwave an individual piece for about 10 to 15 seconds to slightly soften the frosting and warm the cake – avoid overheating. More gently, let refrigerated slices sit at room temperature for 30 to 60 minutes. If frozen, thaw overnight in the refrigerator, then bring to room temperature before serving.
Can I adjust or substitute ingredients to fit my preferences?
Yes. You can swap whole milk for buttermilk for extra tenderness, replace vegetable oil with melted coconut oil for a hint of coconut, or use a gluten-free 1-to-1 flour blend for a gluten-free version. Keep in mind moisture and texture can shift with substitutions, so small adjustments in baking time or frosting consistency might be necessary.
Do you have tips to ensure the best texture and flavor every time?
Use room temperature eggs and butter for even mixing, measure flour accurately by spooning and leveling or by weight, and do not overbake – start checking at 30 minutes. Use good-quality cocoa and dark chocolate for the frosting – the better the chocolate, the better the final flavor. Finally, allow the layers to cool completely before frosting to keep your buttercream stable and your slices neat.
Additional internal recipe inspiration and helpful reads:
- For a rich stout-inspired chocolate layer that leans into deep flavor, try this rich stout chocolate cake with buttercream.
- If you enjoy gooey, nostalgic chocolate treats, you may like this s’mores chocolate cake.
- For a different cookie-flavored celebration cake, check out this Biscoff cookie butter cake.
- Looking for a sweet brunch companion? This blueberry buttermilk pancake casserole makes mornings extra special.
Death by Chocolate Cake
Ingredients
Method
- Preheat your oven to 350°F (175°C). Grease the bottoms and sides of two 9-inch round cake pans and lightly dust with flour, or line the bottoms with parchment circles.
- In a large mixing bowl, whisk together the all-purpose flour, granulated sugar, unsweetened cocoa powder, baking powder, baking soda, and salt until evenly blended.
- Add the eggs, whole milk, vegetable oil, and vanilla extract to the dry ingredients. With an electric mixer on medium speed, beat for about 2 minutes until the batter is smooth and well-combined.
- Carefully stir in the boiling water by hand using a rubber spatula. The batter will become thin.
- Divide the batter evenly between the prepared pans and smooth the tops with an offset spatula. Bake in the preheated oven for 30 to 35 minutes or until a toothpick comes out with a few moist crumbs.
- Allow the cakes to cool in their pans for about 10 minutes, then carefully invert onto cooling racks to cool completely.
- In a large bowl, beat the softened unsalted butter until light and creamy. Gradually add the sifted powdered sugar, mixing on low speed, then increase speed until smooth.
- Add the melted dark chocolate and the heavy cream, and continue beating until glossy and spreadable.
- Place one cooled layer on a cake plate or pedestal. Spread a generous layer of chocolate buttercream across the top. Add the second layer and frost the top and sides smoothly.
- Slice with a sharp knife warmed under hot water and wiped dry for clean cuts. Enjoy immediately.