Log in or sign up | Easter cookies, Easter treats, Easter recipes
Easter is a time for color, comfort, and the sweet nostalgia of baking with family. These Easter cookies are an easy, from-scratch recipe that brings pastel-sprinkled joy to a spring table — soft buttery sugar cookies with bright citrus or almond notes, decorated with simple royal icing or a quick glaze. Whether you’re making a batch for an egg hunt, a cookie exchange, or cozy afternoons with tea, this recipe is worth trying for its seasonal appeal and flexibility. If you love pairing sweet homemade treats with comforting mains, you might also enjoy the savory balance of a comforting Thai potsticker soup for cozy nights in on chillier spring evenings.
Ingredients & Equipment
Ingredients
- 3 cups (360 g) all-purpose flour, plus extra for rolling
- 1/2 teaspoon fine sea salt
- 1 teaspoon baking powder
- 1 cup (227 g) unsalted butter, softened to room temperature
- 1 cup (200 g) granulated sugar
- 1 large egg, at room temperature
- 1 teaspoon pure vanilla extract
- 1/2 teaspoon almond extract (optional — great for a delicate flavor)
- Zest of 1 lemon (optional — for a fresh spring note)
- 2–3 tablespoons whole milk or heavy cream (to achieve dough consistency)
- Food coloring or natural dyes (beet powder, turmeric) for icing and accents
- Sprinkles, edible pearls, or chopped pistachios for topping
For a basic glaze
- 1 cup (120 g) powdered sugar
- 2–3 tablespoons milk or lemon juice
- 1/2 teaspoon vanilla extract
For royal icing (if you prefer a sturdier decoration)
- 2 cups (240 g) powdered sugar, sifted
- 1–2 tablespoons meringue powder (or 1 egg white, if you’re comfortable using raw egg)
- 2–3 tablespoons water, as needed
- Gel food coloring
Notes:
- Using room-temperature butter and egg helps create a smooth dough that rolls easily.
- If you want gluten-free cookies, substitute a 1:1 gluten-free flour blend and chill the dough longer to firm it up.
Equipment
- Stand mixer or hand mixer (helpful but not required)
- Mixing bowls (large and medium)
- Rubber spatula and wooden spoon
- Measuring cups and spoons, kitchen scale (recommended for accuracy)
- Rolling pin
- Cookie cutters in Easter shapes (eggs, bunnies, chicks) or round cutters
- Baking trays and parchment paper or silicone mats
- Cooling racks
- Wire whisk and small bowls for icing
- Piping bags and small round tips, or resealable plastic bags for simple icing
- Optional: bench scraper, food processor (to sift dry ingredients quickly), and a cookie scoop for even-sized dough portions
Also helpful: an oven thermometer to ensure accurate baking temperature, and a small paintbrush for applying edible luster or water for layering decorations. If you enjoy trying other comforting homemade dishes, check this creamy option for cozy nights: creamy Tuscan ravioli soup that’s comfort in every spoonful.
Step-by-Step Instructions (with tips)
-
Preheat and prep:
- Preheat your oven to 350°F (175°C). Line baking trays with parchment paper or silicone mats so cookies don’t stick and cleanup is easier.
- Tip: Use an oven thermometer if your oven runs hot or cold; cookies are sensitive to small temperature shifts.
-
Combine dry ingredients:
- In a medium bowl, whisk together 3 cups flour, 1/2 teaspoon salt, and 1 teaspoon baking powder. Set aside.
- Variation: For a richer cookie, replace 1/2 cup of flour with almond meal. For cocoa cookies, substitute 1/4 cup of flour with 1/4 cup unsweetened cocoa powder and increase the sugar by 1–2 tablespoons.
-
Cream butter and sugar:
- In a large bowl or mixer, cream 1 cup softened butter with 1 cup granulated sugar until light and fluffy, about 2–3 minutes.
- Tip: Scrape down the bowl to ensure even mixing; this helps the cookies rise evenly.
-
Add egg and extracts:
- Beat in the egg, 1 teaspoon vanilla extract, and 1/2 teaspoon almond extract (if using). Add lemon zest now if you want a citrus lift.
- Kitchen tip: If your egg is cold, mix in a very small drop of warm water to temper it and help it combine smoothly.
-
Bring in dry ingredients and milk:
- Gradually add the dry ingredients to the butter mixture, mixing on low speed until combined. Add 2 tablespoons of milk or cream; add a third tablespoon only if the dough feels too dry. The dough should be soft, slightly tacky, but not sticky.
- Variation: For a sturdier dough for cutouts, chill it for 30–60 minutes. For drop cookies, you can skip rolling and use a cookie scoop to portion.
-
Chill the dough (recommended for cutout shapes):
- Pat the dough into a disc, wrap in plastic, and chill at least 30 minutes. This firms up the butter so shapes hold while baking.
- Quick-chill tip: Flatten the disc to speed chilling. If you forgot to chill, roll dough between two sheets of parchment to avoid sticking.
-
Roll and cut:
- Lightly flour your work surface and rolling pin. Roll dough to about 1/4-inch thickness. Press cookie cutters firmly and transfer shapes to the prepared baking trays.
- Tip: Use a thin metal spatula to lift cut cookies onto the tray to keep delicate shapes intact.
-
Bake:
- Bake for 8–12 minutes, depending on size — small cookies take 8–9 minutes, larger cutouts 10–12. Edges should be just set and barely golden.
- Kitchen tip: Rotate your pans halfway through baking for even color. If your cookies spread, chill the cutouts for 10 more minutes before baking.
-
Cool:
- Let cookies cool on the tray for 2–3 minutes, then transfer to a cooling rack to cool completely before decorating. Decorating too soon can cause icing to melt.
-
Make icing and decorate:
- For a simple glaze, whisk powdered sugar with milk or lemon juice and vanilla until smooth. Dip cooled cookies or use a spoon to drizzle. For royal icing, mix powdered sugar, meringue powder, and water to piping consistency. Add gel color and pipe outlines first, then flood the center for smooth tops.
- Tip: Use a squeeze bottle or piping bag for precision. Add sprinkles immediately after icing so they stick.
- Flavor suggestion: Mix a teaspoon of orange or raspberry puree into a portion of glaze for fruity accents, or fold in finely grated lemon zest to give a zesty spark.
-
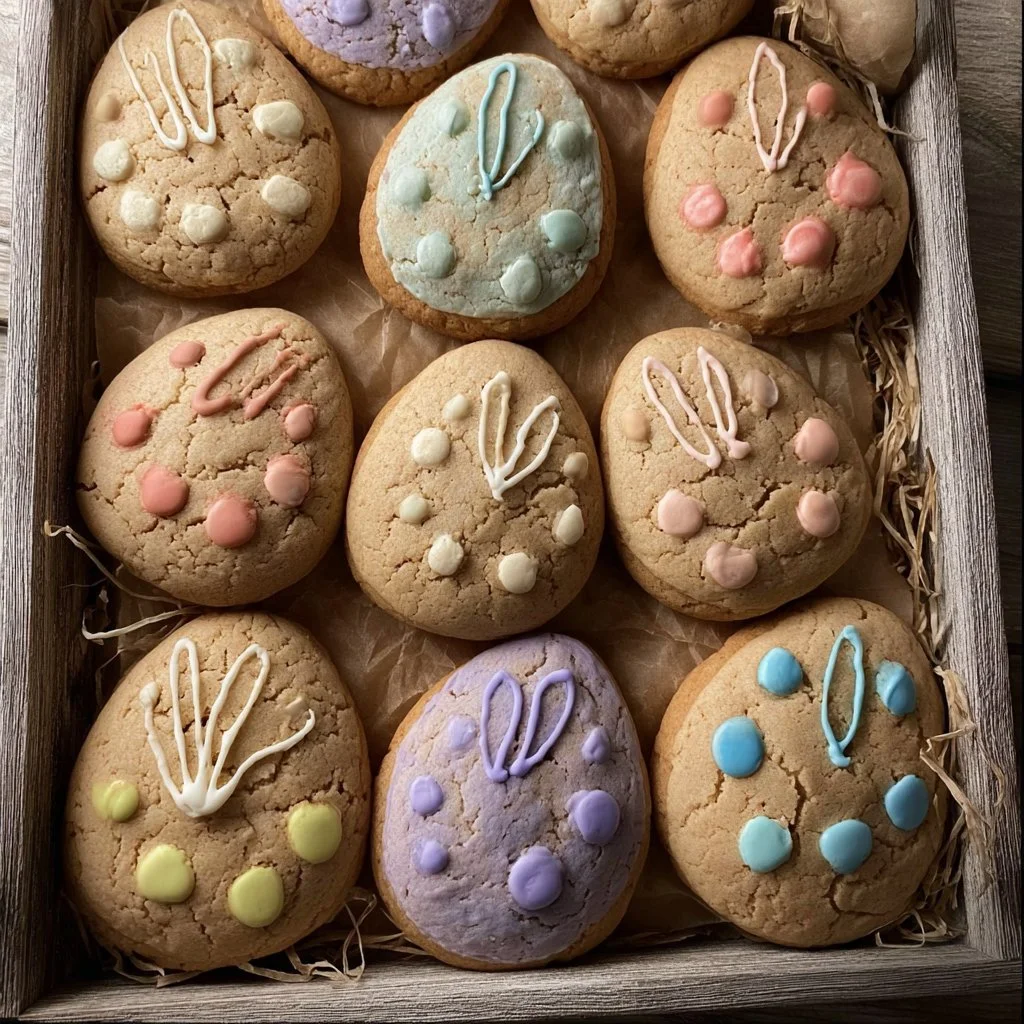
Variations and finishing touches:
- Chocolate-dipped: Half-dip cooled cookies in melted dark or white chocolate and sprinkle crushed pistachios or shredded coconut.
- Natural dyes: Use beet juice for pink, spinach or matcha for green, turmeric for yellow. Start with small amounts for soft pastel shades.
- Textured look: Layer a thin wash of colored glaze, let dry, then pipe a contrasting color for lines, dots, or cute faces on bunnies.
Always keep small bowls to mix different icing colors and label them if you’re working with kids. For inspiration on sweets and cake presentation, the cake-decorating ideas in this pin are lovely: vintage cake decorating ideas for charming presentation.
Storage, Freezing & Make-Ahead Tips
-
Storing baked cookies:
- Store decorated cookies in an airtight container at room temperature for up to 4–5 days. If cookies have perishable fillings or buttercream, refrigerate and bring to room temperature before serving.
- To prevent icing from sticking together, separate layers with parchment paper.
-
Freezing baked cookies:
- Freeze fully cooled, undecorated cookies in a single layer on a baking sheet for an hour, then transfer to a freezer-safe container or bag. They keep well for up to 3 months.
- Tip: Thaw at room temperature before icing to avoid condensation on your decorations.
-
Freezing dough:
- Portion cookie dough into discs or logs (for slice-and-bake cookies), wrap tightly in plastic, and freeze for up to 3 months. Thaw in the refrigerator overnight before rolling or slicing.
- If using chilled disc dough for cutouts, roll between sheets of parchment and freeze. You can cut shapes from partially frozen dough — they’ll hold together nicely when transferred to the tray.
-
Make-ahead planning:
- You can bake cookies a day ahead and decorate the morning of your gathering. Or bake and store undecorated for easy last-minute decorating with kids or guests.
- For parties, assemble small boxes or cellophane bags with a few cookies for guests to take home. Tie with pastel ribbon for an Easter-ready presentation.
How to Use / Serve This Dish
-
Serving ideas:
- Arrange cookies on a tiered cake stand with spring florals and chocolate eggs for a festive centerpiece.
- Pair with beverages: hot cross buns and coffee are classic, but these cookies are delightful with a pot of Earl Grey, chamomile, or a citrusy iced tea for warmer weather.
- For brunch: offer alongside fruit salad, yogurt parfaits, and a savory quiche to balance sweet and savory.
-
Creative variations:
- Cookie sandwich bites: Spread lemon curd, raspberry jam, or a flavored buttercream between two cookies for sandwich-style treats.
- Basket favors: Tie three or four cookies with baker’s twine and tuck into pastel Easter baskets as edible gifts.
- Cookie grazing board: Combine these decorated cookies with chocolate truffles, sugared nuts, and fresh berries for an easy dessert spread.
-
Pairings with savory dishes:
- If you’re serving an Easter dinner, these cookies make a sweet finish to dishes like roast lamb or glazed ham. For lighter spring menus, pair cookies with soups and salads; for example, a creamy protein-packed soup pairs nicely after a plate of sweet treats — try this garlic-forward option for a savory contrast: garlic Parmesan chicken soup that’s creamy and protein-packed.
FAQ
Q: Can I make these egg-free or dairy-free?
A: Yes. For an egg-free cookie, use a commercial egg replacer or replace one large egg with 1/4 cup applesauce or 1/4 cup mashed banana (note: banana will add flavor). For dairy-free, use vegan butter and a plant-based milk (almond or oat). Texture may vary slightly, so chill the dough longer if it feels soft.
Q: How long do decorated cookies last?
A: At room temperature in an airtight container, decorated cookies last 4–5 days. If your decoration uses fresh cream or a buttercream with dairy, refrigerate and consume within 3 days. For best texture, bring refrigerated cookies to room temperature before serving.
Q: My cookies spread — what went wrong?
A: Spread can happen if butter is too soft, dough is too warm, or the oven temperature is too low. Chill the dough longer before cutting and baking, and check your oven temperature with a thermometer. Also avoid excess sugar or liquid; follow measurements precisely and avoid overworking dough.
Q: Can I color the dough itself instead of icing?
A: Absolutely — add gel food coloring to the dough for marbled or pastel cookies. Start with a small amount and knead gently to avoid overworking the dough. Natural powders like matcha or beet powder can add color and subtle flavor.
Conclusion
There’s something especially comforting about making Easter cookies from scratch — the ritual of creaming butter and sugar, rolling dough into cheerful shapes, and watching colors come alive on a cooling rack. These cookies blend tradition with easy, seasonal flavors and lend themselves to creative decorating with family or friends. I hope this recipe fills your kitchen with warmth and bright little moments this spring. Give it a try, share a batch with neighbors, and tag someone who loves baking as much as you do — I’d love to hear how your cookies turned out!

Easter Sugar Cookies
Ingredients
Method
- Preheat your oven to 350°F (175°C) and line baking trays with parchment paper or silicone mats.
- In a medium bowl, whisk together flour, salt, and baking powder. Set aside.
- In a large bowl or mixer, cream softened butter with granulated sugar until light and fluffy.
- Beat in the egg, vanilla extract, and optional almond extract. Add lemon zest if desired.
- Gradually add the dry mix to the butter mixture, then add milk or cream as needed for dough consistency.
- Wrap the dough in plastic and chill for at least 30 minutes.
- Roll dough to about 1/4-inch thickness and cut shapes with cookie cutters.
- Bake for 8–12 minutes until edges are just set and barely golden.
- Cool cookies on trays for a few minutes then transfer to a cooling rack.
- Prepare glaze or royal icing as desired and decorate cooled cookies.