Korean BBQ Beef (Bulgogi)
Introduction
Korean BBQ Beef (Bulgogi) is one of those cozy, crowd-pleasing dishes that tastes like a warm hug on a plate — sweet, savory, slightly smoky, and impossibly tender. Made with thinly sliced beef (ribeye or sirloin) marinated in a bright soy-sesame blend, bulgogi shines in every season: summer for quick outdoor grilling, autumn for fireside dinners, and winter when you want something that feels like comfort from the inside out. If you love hands-on, from-scratch cooking, this bulgogi recipe is approachable, quick to pull together, and pairs beautifully with simple sides (and even comfort pasta recipes like BBQ Chicken Mac and Cheese) for a fun weeknight feast.
Ingredients & Equipment
Ingredients
- 1 lb beef (ribeye or sirloin), thinly sliced
- 1/4 cup soy sauce (or tamari for gluten free)
- 2 tablespoons sugar (or brown sugar/honey)
- 1 tablespoon sesame oil
- 1 tablespoon rice vinegar
- 3 cloves garlic, minced
- 1 teaspoon ginger, minced
- 1/4 teaspoon black pepper
- 2 green onions, chopped (for garnish and a bit in the marinade, optional)
- 1 tablespoon sesame seeds (for garnish)
- Cooked rice, for serving
- Kimchi, for serving
Notes on ingredients
- Beef: Choose well-marbled ribeye for the most tender, juicy result; sirloin works well and is more economical. Freeze the beef for 20–30 minutes to make very thin slicing easier.
- Soy sauce/tamari: Use tamari to keep this gluten-free. Reduce salt elsewhere if your soy is particularly salty.
- Sugar alternatives: Brown sugar, honey, or a little grated Asian pear can add depth and natural sweetness — grated pear is traditional and helps tenderize the beef.
- Garlic & ginger: Fresh is best. If you’re short on time, a quick pulse in a blender or mini chopper will speed prep.
Equipment
- Sharp chef’s knife and cutting board (or ask your butcher to slice thin)
- Mixing bowl (or a resealable freezer bag for marinating)
- Large skillet or cast-iron pan for stovetop cooking (or preheated grill or broiler pan)
- Tongs or a spatula
- Baking tray (if broiling/roasting)
- Meat thermometer (optional, handy if you want to check doneness precisely)
- Blender or food processor (optional — to smooth out marinade if using pear or onion)
Tip: A small blender makes quick work of turning grated pear or onion into a silky marinade base.
Step-by-Step Instructions (with tips)
-
Make the marinade.
In a medium bowl, whisk together 1/4 cup soy sauce (or tamari), 2 tablespoons sugar, 1 tablespoon sesame oil, 1 tablespoon rice vinegar, 3 cloves minced garlic, 1 teaspoon minced ginger, and 1/4 teaspoon black pepper until the sugar dissolves and everything is well combined. If you like a slightly thicker, sweeter glaze, grate a small pear or apple and mix it in — it also gently tenderizes the beef. -
Marinate the beef.
Add the thinly sliced beef to the marinade and toss or massage gently so each piece is coated. Cover and refrigerate for at least 30 minutes; for best flavor and tenderness, marinate 4–12 hours or overnight. If marinating overnight, use a resealable bag and press out extra air so the marinade contacts the meat evenly. (Tip: remove beef from fridge 20 minutes before cooking so it can come close to room temp.) -
Preheat your cooking surface.
Heat a grill or a heavy skillet (cast iron is ideal) over high heat. You want it hot enough to sear quickly and caramelize the marinade — that’s where the flavor magic happens. If using the oven, preheat the broiler and line a baking tray with foil. -
Cook the beef.
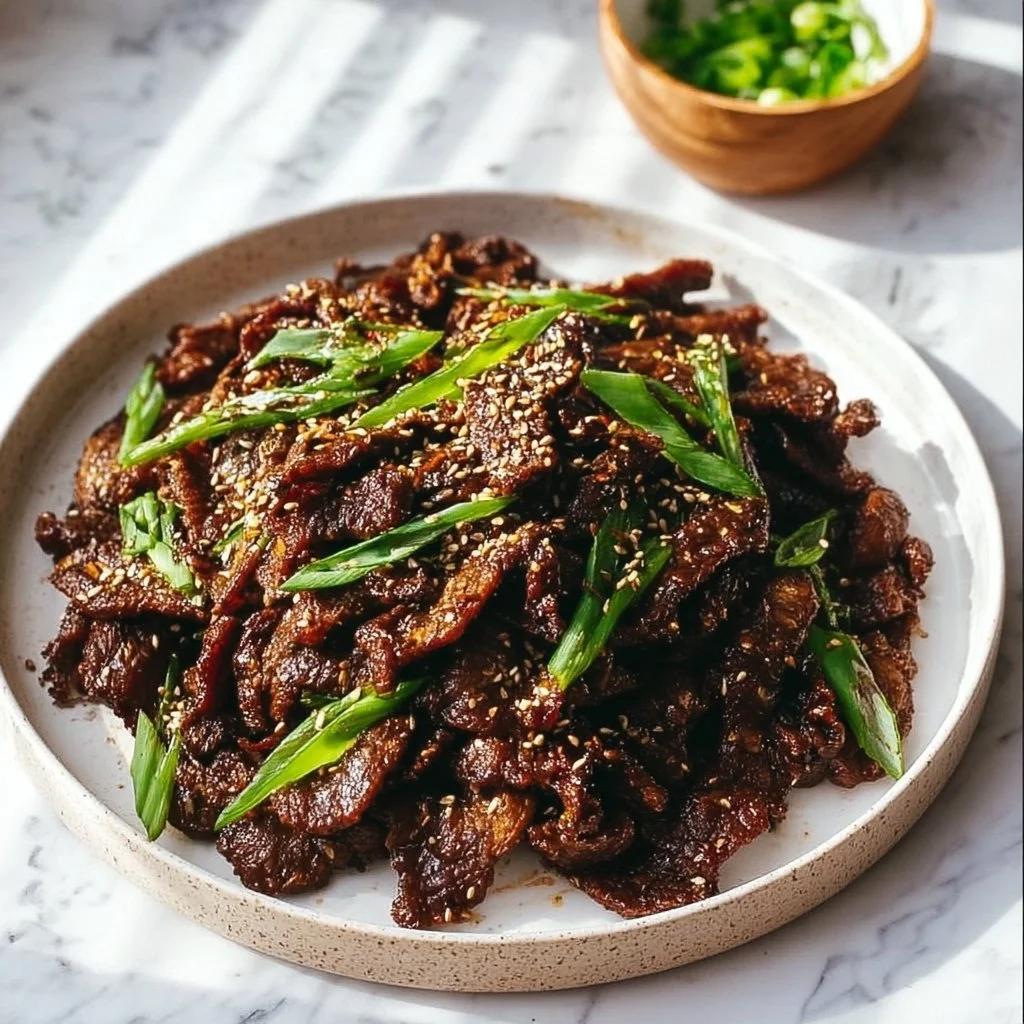
For skillet or grill: Working in batches (don’t overcrowd), lay slices in a single layer and cook 2–3 minutes per side until nicely browned and cooked through. Because the slices are thin, this is a fast, high-heat cook. Toss with the pan juices and remove to a serving dish.
For broiler/oven (roasting-style): Spread beef in an even layer on a foil-lined baking tray and broil 3–5 minutes, turn, then broil another 2–3 minutes until edges caramelize. Watch closely to avoid burning.
A less common alternative: For a saucier, stewed take, you can briefly sear the beef then simmer gently in the marinade for 8–10 minutes — this gives a different texture if you prefer "braised" flavors over charred bits. -
Finish and serve.
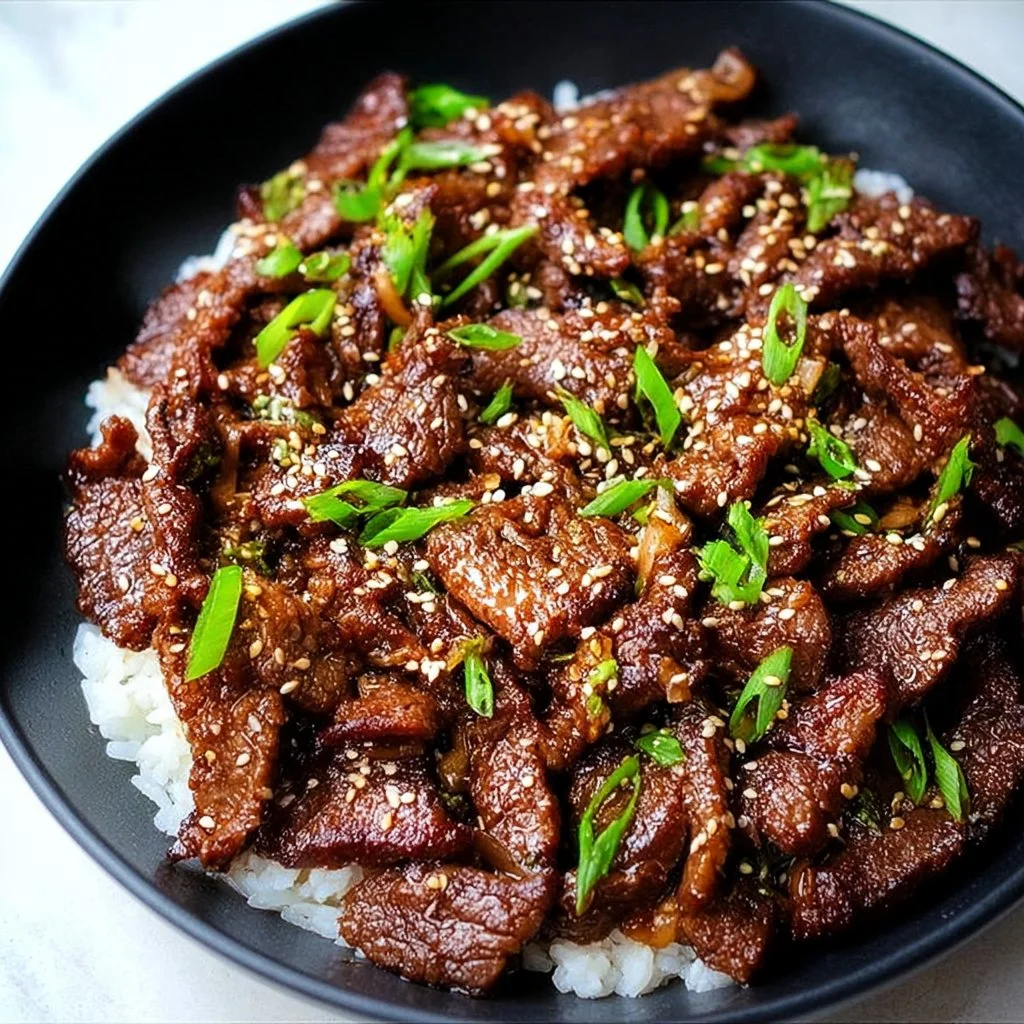
Serve immediately over steamed rice, garnish with chopped green onions and a sprinkle of sesame seeds. Offer kimchi at the table and extra rice or lettuce leaves for wrapping. Enjoy the contrast of warm, sweet-savory beef with the bright crunch of kimchi.
Cooking tips
- High heat = quick sear and caramelization. Don’t overcrowd the pan; doing so steams the meat instead of browning it.
- If you want more glaze, reserve a few tablespoons of the marinade before adding raw beef, then reduce it in a small saucepan and drizzle over the finished meat. Never reuse marinade that has touched raw meat unless boiled first.
- For a smokier outdoor flavor, grill thin slices over a hot direct flame for a minute per side — they cook quickly and char beautifully.
- If you’re using frozen-parch-sliced beef from the store, thaw slightly until slices can separate easily but are still cold for neat searing.
Storage, Freezing & Make-Ahead Tips
Storing leftovers
- Refrigerate cooked bulgogi in an airtight container for up to 3–4 days. Reheat gently in a skillet with a splash of water or broth over medium heat to avoid drying the meat. Microwaving is fine for a single portion; cover with a damp paper towel to maintain moisture.
Freezing
- Freeze cooked bulgogi in portion-sized, freezer-safe containers or heavy-duty freezer bags for up to 3 months. To reheat, thaw overnight in the fridge and rewarm in a skillet over medium heat. If reheating from frozen, use low heat and a splash of liquid, covering the pan to steam through.
Make-ahead tips
- Marinate the beef and keep it refrigerated for up to 24 hours before cooking — this is a terrific time-saver for hosting.
- You can also prep the dry ingredients (measure sugar, sesame seeds, chop green onions) a day ahead and assemble quickly before cooking.
- For meal prep, portion cooked bulgogi into containers with rice and kimchi for easy grab-and-go lunches.
Portioning advice
- 1 lb of thinly sliced beef usually serves 3–4 people as part of a meal with rice and sides. For heartier appetites or fewer sides, plan about 6–8 oz per person.
How to Use / Serve This Dish
Classic serving
- Serve Korean BBQ Beef (Bulgogi) over steamed short-grain rice with kimchi, pickled vegetables, and a simple cucumber salad. Lettuce leaves (ssam) for wrapping are a delightful way to eat it: place rice, a piece of bulgogi, and kimchi in a leaf and fold.
Creative pairings
- BulGoGi Taco Night: Fill warm tortillas with bulgogi, quick-pickled red onion, cilantro, and a drizzle of spicy mayo.
- Rice Bowls: Layer bulgogi, steamed greens (spinach or bok choy), a fried egg, and scallions for a nourishing bowl.
- Pasta Fusion: Toss slices of bulgogi into warm noodles with a touch of sesame oil and soy, or enjoy it alongside a creamy beef pasta for comforting variety — similar comfort profiles can be found in recipes like Creamy High-Protein Beef Pasta.
Flavor variations
- Make it spicy: Add 1–2 teaspoons gochujang (Korean chili paste) or a pinch of red pepper flakes to the marinade.
- Citrus lift: Stir in a teaspoon of yuzu or orange zest for bright top notes.
- Vegetarian twist: Use thinly sliced king oyster mushrooms or seitan marinated the same way and quickly seared.
Serving tips
- Keep garnishes simple — scallions, sesame seeds, and a squeeze of lime or a few drops of toasted sesame oil highlight the flavors.
- Offer small bowls of banchan (Korean side dishes) like seasoned spinach, bean sprouts, and kimchi to make the meal feel complete and festive.
FAQ
Q: Can I substitute chicken or pork for this bulgogi recipe?
A: Yes. Thinly sliced chicken thigh or pork shoulder can work well — adjust cooking times (chicken needs to be cooked through, pork a bit longer) and consider slightly longer marinating for pork to let flavors penetrate. Use the same marinade ratios but be mindful of safety with poultry.
Q: How long can I marinate the beef?
A: Marinate at least 30 minutes for decent flavor and up to 24 hours for maximum tenderness and depth. Avoid marinating beyond 24 hours; very long marinades (with enzymatic tenderizers like pear) can overly break down texture.
Q: Is it safe to reuse the marinade as a sauce?
A: Not unless you boil it first. Because the marinade contacts raw meat, bring it to a rolling boil for at least 1–2 minutes to kill bacteria, then reduce slightly if you’d like a glaze. Alternatively, reserve some fresh marinade before adding raw beef and use that for glazing.
Q: My bulgogi is dry. What went wrong?
A: Thin slices cook incredibly fast, so overcooking is the most common cause. Use high heat and quick searing, remove beef as soon as browned, and add a finishing splash of sesame oil or a light sauce to restore moisture when reheating.
Additional Tips & Troubleshooting
- If you can’t slice beef thinly at home, ask your butcher to slice it for you, or buy thin pre-sliced bulgogi-cut beef.
- For even quicker weeknight prep, slice the beef and marinate in the morning or the night before.
- If your stove smokes a lot when searing, lower the heat slightly after the initial sear and finish cooking; or use the broiler outdoors if possible.
Conclusion
Korean BBQ Beef (Bulgogi) is a timeless, comforting dish that brings bold, balanced flavors to your table with minimal fuss — sweet and savory, a touch smoky, and endlessly versatile. Whether you grill it for a summer cookout, broil it for a cozy weeknight, or mix it into bowls and wraps, this bulgogi recipe feels like home. For more inspiration and classic techniques, check out this beloved take on Korean Beef Bulgogi – Damn Delicious, an authoritative and popular version from the web, or explore traditional approaches with the well-known Bulgogi Korean beef BBQ recipe by Maangchi. If you’d like another home cook’s perspective full of tips and serving ideas, read this helpful Bulgogi (Korean BBQ Beef) article.
Give this recipe a try this week — take your time with the marinade, sear hot and fast, and share the results. I’d love to hear how your bulgogi turned out or what sides you paired it with — happy cooking!
Korean BBQ Beef (Bulgogi)
Ingredients
Method
- In a medium bowl, whisk together soy sauce, sugar, sesame oil, rice vinegar, minced garlic, minced ginger, and black pepper until the sugar dissolves.
- Add the thinly sliced beef to the marinade and toss gently to coat.
- Cover and refrigerate for at least 30 minutes; for best results, marinate for 4–12 hours or overnight.
- Preheat your cooking surface to high heat — grill or heavy skillet.
- For skillet/grill: Cook beef slices in batches for 2–3 minutes per side until browned. For broiler, spread beef on a foil-lined tray and broil for 3–5 minutes on each side.
- Serve immediately over rice, garnished with green onions and sesame seeds.