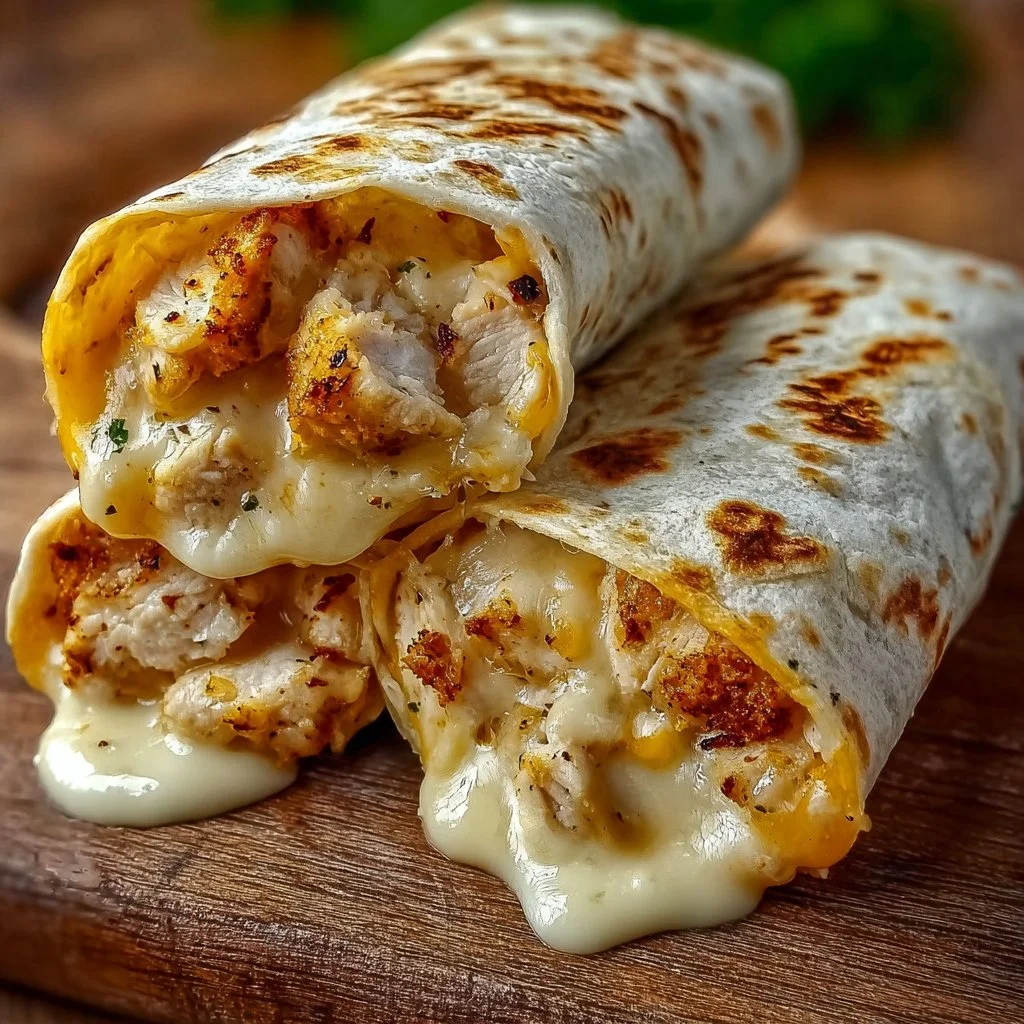
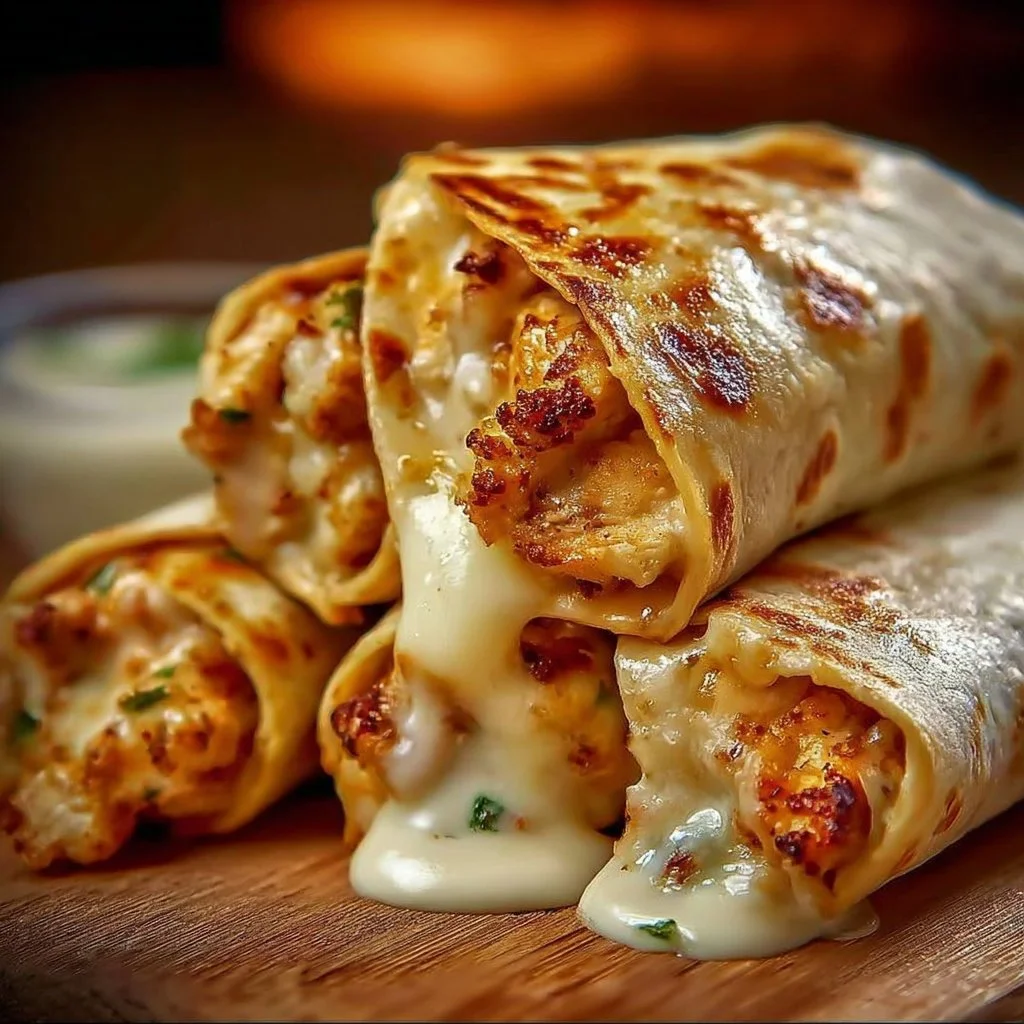
There’s something instantly comforting about a warm, cheesy wrap on a chilly afternoon — and Cozy Cheesy Garlic Chicken Wraps are exactly the kind of seasonal recipe that feels like a hug from the kitchen. Packed with tender cooked chicken, gooey cheese, and the savory warmth of garlic butter, these wraps are perfect for fall and winter evenings when you want something quick, homemade, and deeply satisfying. They also make weeknight dinners, game-day snacks, or even cozy lunchboxes effortless. If you enjoy riffing on comforting classics or want a low-effort crowd-pleaser, you might also like this take on low-carb cheesy garlic chicken wraps that trims carbs without sacrificing flavor.
Ingredients & Equipment
Ingredients
- 2 cups cooked shredded or diced chicken
- 1 cup mozzarella or cheddar cheese (shredded)
- 2–3 tbsp garlic butter or minced garlic
- ¼ cup mayonnaise or cream cheese
- 1 tbsp parsley or Italian seasoning
- Salt & black pepper to taste
- 4 large tortillas
- Optional: chili flakes, onions, bell peppers
Notes:
- Use leftover roast chicken, rotisserie chicken, or quickly poached breasts for the cooked chicken. If you prefer a lighter binder, Greek yogurt can replace mayo or cream cheese.
- For a sharper bite, choose aged cheddar; for a milder, creamier melt, pick mozzarella. Mixing both works beautifully.
Equipment
- Medium mixing bowl
- Non-stick skillet or griddle (for toasting)
- Spatula or tongs
- Cheese grater (if shredding block cheese)
- Baking tray (optional if baking wraps)
- Kitchen thermometer (optional, for cooking chicken)
- Optional helpful tools: blender (for a silky garlic spread), cutting board, sharp knife
If you want more cheese-forward spins or quesadilla-style ideas, check out this recipe inspiration for cheesy hot honey chicken quesadillas.
Step-by-Step Instructions (with tips)
Follow these simple steps for warm, melty Cozy Cheesy Garlic Chicken Wraps. The process is forgiving and easy to adapt.
-
Prepare the chicken
- If using leftover chicken, shred or dice it into bite-sized pieces. If cooking fresh, poach, roast, or pan-sear breasts until they reach 165°F (74°C), then let rest and shred. Roasting (425°F for 20–25 minutes) gives deeper flavor, while poaching or quick pan-cooking keeps the meat extra tender. For a speedy weeknight option, rotisserie chicken works great.
-
Make the garlic mixture
- In a medium bowl, combine 2–3 tablespoons of garlic butter (or 1–2 cloves minced garlic mixed with softened butter) with ¼ cup mayonnaise or cream cheese. Mix until smooth. If you like a tangier profile, add a squeeze of lemon or a teaspoon of Dijon mustard.
-
Mix the filling
- Add the shredded chicken to the bowl, then stir in 1 cup shredded cheese, 1 tablespoon parsley or Italian seasoning, and salt & pepper to taste. Toss gently until everything is evenly coated. If you like heat, sprinkle in chili flakes or fold in finely diced bell peppers and onions for texture and brightness.
-
Assemble the wraps
- Lay a tortilla flat and spread a thin layer of the chicken-cheese mixture down the center. Don’t overfill — leave about an inch at each edge to make rolling easier. Fold the sides in and roll tightly to form a compact wrap.
-
Toast for melty perfection
- Heat a non-stick skillet over medium heat. Lightly brush or spray the skillet (or brush the outside of the wraps with garlic butter). Place the wraps seam-side down and toast 2–3 minutes per side until golden brown and the cheese inside is melted. Press gently with a spatula for an even, crisp crust. Alternatively, place wraps on a baking tray and bake at 400°F for 8–10 minutes, flipping halfway through.
-
Rest and serve
- Let the wraps rest for 1–2 minutes so the filling sets a bit; this makes slicing neater. Serve whole or halved on a platter with your favorite dipping sauces.
Quick tip: If you want to speed things up, shredded rotisserie chicken is your best friend. For a richer texture, use cream cheese; for lighter creamily tang, use mayo or Greek yogurt.
Variation ideas:
- Veg-forward: Add roasted red peppers, caramelized onions, or wilted spinach for extra color and nutrients.
- Spicy kick: Fold in sriracha, harissa, or chopped pickled jalapeños.
- Low-carb swap: Use large lettuce leaves or low-carb tortillas (you might like this 20-minute honey garlic chicken recipe for a fast protein option if adapting to lower carbs).
- Herb and citrus: Add chopped chives, basil, and a little lemon zest for brightness.
Storage, Freezing & Make-Ahead Tips
Storing leftovers
- Refrigerator: Place cooled wraps in an airtight container or wrap individually in foil or plastic wrap. Refrigerate up to 3–4 days. For best texture, reheat in a skillet or oven to keep the outside crisp and the cheese melty.
Freezing
- To freeze, individually wrap each assembled (but not toasted) wrap tightly in plastic wrap, then place in a freezer-safe bag or container. Freeze up to 2 months for best quality. When ready to eat, thaw overnight in the refrigerator, then toast in a skillet or bake at 375°F for 12–15 minutes until heated through and golden.
Make-ahead options
- Assemble and store un-toasted wraps in the fridge for up to 24 hours; toast right before serving for the best crunch. Alternatively, fully toast, cool completely, then freeze — reheat directly from frozen in a 375°F oven for 15–20 minutes, flipping halfway.
Portioning advice
- These wraps are easy to portion: each large tortilla typically yields one serving. For a lighter meal, cut each wrap in half and serve with a hearty side salad or soup.
Reheating tips
- Avoid the microwave if you want crisp edges; a skillet over medium-low heat or a 350°F oven keeps the tortillas crisp and the cheese creamy. If using the microwave, place a damp paper towel over the wrap and microwave in 30-second bursts to prevent dryness.
How to Use / Serve This Dish
Cozy Cheesy Garlic Chicken Wraps are wonderfully versatile. Here are serving ideas and pairing suggestions to make the most of them:
- Weeknight dinner: Pair with a simple green salad, roasted root vegetables, or a bowl of tomato soup for a classic cozy combo.
- Game day or party platter: Slice wraps into bite-sized rounds and place on a board with pickles, olives, and dipping sauces (ranch, chipotle mayo, or honey mustard).
- Lunchboxes and picnics: Wrap tightly in foil and keep chilled in an insulated bag for on-the-go comfort.
- Brunch upgrade: Serve with a quick hash and a fried egg on top for a hearty brunch wrap.
- Salad topper: Slice and serve over mixed greens with a light lemon vinaigrette for a warm chicken salad bowl.
Flavor pairings:
- Dips: Garlic aioli, tzatziki, or a smoky chipotle sauce.
- Sides: Creamy coleslaw, roasted sweet potatoes, or a simple couscous salad.
- Drinks: A hot herbal tea on a cold night or a crisp cider for fall gatherings.
If you’re experimenting with healthier tortilla or wrap replacements, you may find recipes like the low-carb cheesy garlic chicken wraps helpful for inspiration on substitutions and texture tweaks.
FAQ
Q: Can I use raw chicken in this recipe?
A: This recipe assumes cooked chicken. If you want to use raw chicken, cook it fully first — poach, roast, or pan-sear until it reaches 165°F (74°C) — then shred or dice before mixing with the other ingredients. Cooking the chicken ahead gives you better texture and prevents soggy tortillas.
Q: What’s the best cheese to use for melting?
A: Mozzarella melts beautifully and gives a creamy stretch; cheddar adds a bolder flavor. A blend of both is my go-to. For a sharper flavor, try aged white cheddar; for a smoky touch, use smoked gouda.
Q: Can I make these dairy-free or vegan?
A: Yes. Use dairy-free shredded cheese and plant-based mayo or cream cheese alternatives. Swap garlic butter for garlic-flavored olive oil or vegan butter. Use shredded cooked jackfruit or seasoned chickpeas as a plant-based “chicken” substitute.
Q: How long do leftovers keep, and can I freeze them?
A: Refrigerate up to 3–4 days. Freeze assembled (but not toasted) wraps for up to 2 months and thaw overnight before toasting. If you’ve already toasted them, you can still freeze and reheat, but texture may change slightly.
Conclusion
Cozy Cheesy Garlic Chicken Wraps are one of those simple, seasonal recipes that deliver warmth, comfort, and big flavor with minimal fuss. Whether you’re winding down on a blustery evening or feeding a hungry crowd, these wraps are adaptable, forgiving, and endlessly satisfying. If you want a similar inspiration with a classic spin, try this Recipe: Cheesy Garlic Chicken Wraps for another take, or explore the bright, citrusy twist in the Grilled Lemon Chicken Flatbread Wrap for summer-style flavor. Give this recipe a try, tweak it to your tastes, and share your cozy creations — I’d love to hear how you make it your own!
Cozy Cheesy Garlic Chicken Wraps
Ingredients
Method
- If using leftover chicken, shred or dice it into bite-sized pieces.
- If cooking fresh, poach, roast, or pan-sear breasts until they reach 165°F (74°C), then let rest and shred.
- Roasting (425°F for 20–25 minutes) gives deeper flavor, while poaching or quick pan-cooking keeps the meat extra tender.
- In a medium bowl, combine 2–3 tablespoons of garlic butter (or 1–2 cloves minced garlic mixed with softened butter) with ¼ cup mayonnaise or cream cheese. Mix until smooth.
- If you like a tangier profile, add a squeeze of lemon or a teaspoon of Dijon mustard.
- Add the shredded chicken to the bowl, then stir in 1 cup shredded cheese, 1 tablespoon parsley or Italian seasoning, and salt & pepper to taste.
- Toss gently until everything is evenly coated.
- If you like heat, sprinkle in chili flakes or fold in finely diced bell peppers and onions.
- Lay a tortilla flat and spread a thin layer of the chicken-cheese mixture down the center, leaving about an inch at each edge.
- Fold the sides in and roll tightly to form a compact wrap.
- Heat a non-stick skillet over medium heat and lightly brush or spray the skillet.
- Place the wraps seam-side down and toast 2–3 minutes per side until golden brown and the cheese inside is melted.
- Alternatively, place wraps on a baking tray and bake at 400°F for 8–10 minutes.
- Let the wraps rest for 1–2 minutes before slicing.
- Serve whole or halved on a platter with your favorite dipping sauces.