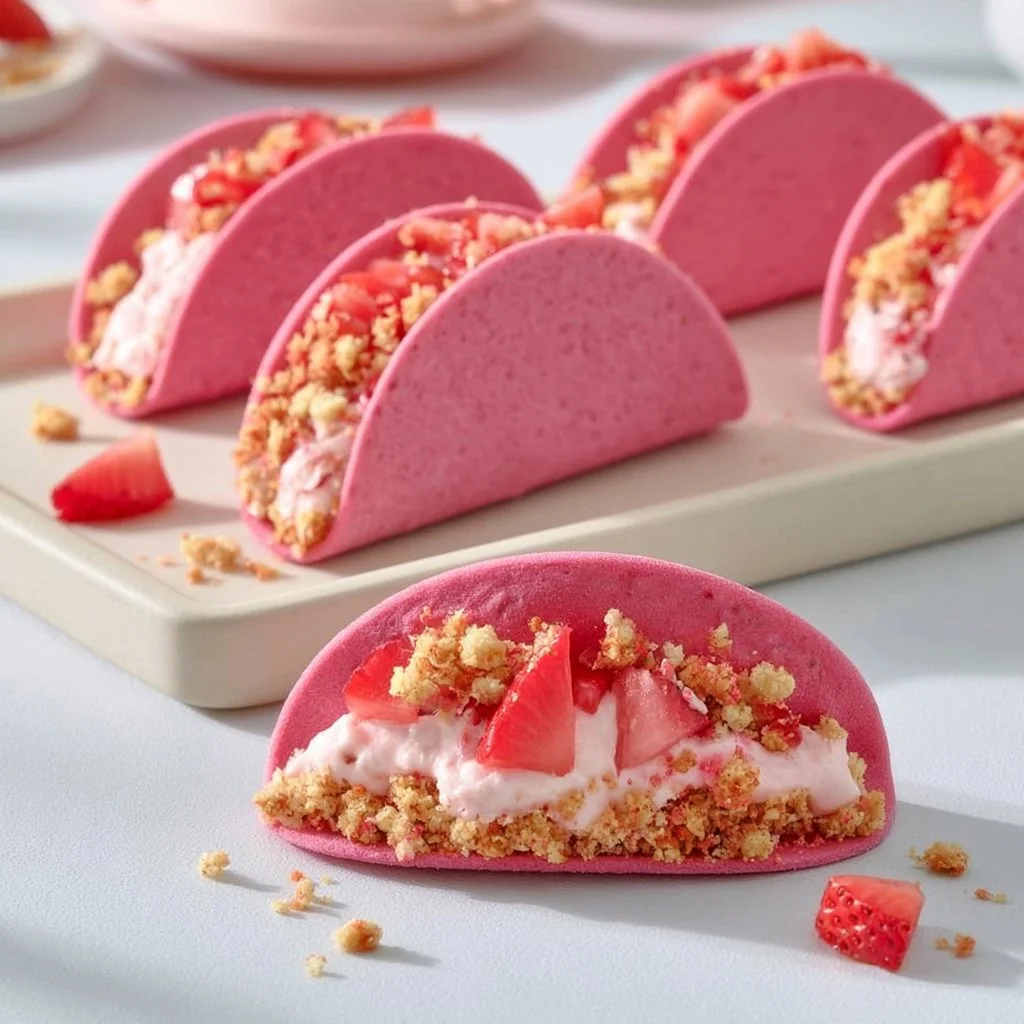
Crispy Cheesecake Dessert Tacos
Crispy Cheesecake Dessert Tacos are an irresistible twist on the traditional taco that will delight your taste buds and excite your kitchen. This mouthwatering dessert is filled with a creamy cheesecake mixture and encased in crunchy, golden taco shells, creating an explosion of flavors and textures in every bite. Perfect for a festive gathering or a simple family dessert night, these tacos come together with just a few simple ingredients, including cream cheese and your favorite toppings. Whether served as a satisfying end to a meal or a fun snack, these delightful creations are sure to impress everyone at your table! For those who love a southern twist, check out our crispy cotton candy cheesecake bombs for another indulgent option.
Ingredients & Equipment
To make these tasty dessert tacos, you will need the following ingredients: You may also find Crispy Fish Tacos With Slaw And Lime Crema useful.
- Small flour tortillas
- 1 cup crushed Golden Oreos
- 1 box strawberry Jell-O
- ½ stick butter, melted
- 8 oz cream cheese
- 1 cup powdered sugar
- 1 tsp vanilla
- 1 cup whipped topping
- Fresh strawberries (optional)
In addition to these ingredients, you’ll find it helpful to have the following equipment on hand:
- A frying pan or air fryer
- A baking tray for cooling
- A mixing bowl
- A piping bag or plastic zip-top bag for easier filling
Step-by-Step Instructions (with tips)
-
Prepare the Taco Shells: Start by cutting the small flour tortillas into taco shapes. You can either fry them in a pan with a bit of oil or use an air fryer to achieve that crispy texture. If air frying, aim for about 5-7 minutes at 375°F, turning halfway through.
-
Make the Crunch Coating: In a mixing bowl, combine the crushed Golden Oreos, strawberry Jell-O, and melted butter. This mixture forms the crunch coating that adds flavor and texture to your tacos. Mix until the ingredients are well incorporated.
-
Prepare the Cheesecake Filling: In another bowl, whip together the cream cheese, powdered sugar, vanilla, and whipped topping until smooth and creamy. This luscious filling is what will delight your taste buds!
-
Coat the Taco Shells: Once your taco shells have cooled, dip the edges into the crunch coating mixture. This will help the coating stick better.
-
Fill the Taco Shells: Using a piping bag or a zip-top bag with a corner snipped off, carefully fill each taco shell with the cheesecake filling. Be generous – you want them to be bursting with deliciousness!
-
Add Toppings: For an extra touch, top the filled tacos with fresh strawberries. They not only add sweetness but also a lovely pop of color.
-
Chill and Serve: For best results, chill the tacos in the fridge for at least 30 minutes before serving. This ensures the filling sets up nicely and makes them easier to eat.
If you enjoy tacos with a different filling, you might want to try our crispy ground beef tacos or the delightful crispy salmon tacos for a savory twist!
Storage, Freezing & Make-Ahead Tips
To keep your Crispy Cheesecake Dessert Tacos fresh, store them in an airtight container in the refrigerator. They are best enjoyed within a day or two for optimal crunch. While you can freeze the empty taco shells, it’s best to fill them fresh to prevent sogginess. If you’re planning ahead, prepare the filling in advance and store it separately, allowing you to assemble fresh tacos whenever you’re ready to serve.
How to Use / Serve This Dish
Crispy Cheesecake Dessert Tacos can be served as a delightful party treat or a unique dessert for family gatherings. Pair them with a refreshing homemade berry sauce or whipped cream for an added indulgence. For a festive spin, consider a variety of fillings, such as different flavored cream cheese mixtures or no-bake cheesecake versions for versatility.
FAQ Section
Q: Can I use a different type of jelly instead of strawberry Jell-O?
A: Yes, feel free to experiment with different flavored Jell-O or pudding mixes based on your personal preferences, ensuring they stay halal-friendly.
Q: How long do these tacos last in the fridge?
A: They are best eaten within 2-3 days of making them, but can be kept in the fridge for up to a week if stored properly.
Q: Can I use gluten-free tortillas?
A: Absolutely! You can substitute small corn or gluten-free tortillas for a suitable alternative.
Q: What other toppings can I use?
A: You can use various toppings like chocolate chips, crushed nuts, or different fruits to tailor your tacos to your taste!
Conclusion
Crispy Cheesecake Dessert Tacos are a fun, delicious, and visually appealing option that everyone can enjoy. They embody comfort and joy, making them perfect for any gathering. If you’re looking for other dessert taco ideas, you might want to explore Cherry Cheesecake Tacos or the delightful Cheesecake Dessert Tacos. Give these a try, and you won’t be disappointed!
Crispy Cheesecake Dessert Tacos
Ingredients
Method
- Cut the small flour tortillas into taco shapes. Fry them in a pan with a bit of oil or use an air fryer for about 5-7 minutes at 375°F, turning halfway through.
- In a mixing bowl, combine the crushed Golden Oreos, strawberry Jell-O, and melted butter until well incorporated.
- In another bowl, whip together the cream cheese, powdered sugar, vanilla, and whipped topping until smooth and creamy.
- Once the taco shells have cooled, dip the edges into the crunch coating mixture.
- Using a piping bag or a zip-top bag with a corner snipped off, carefully fill each taco shell with the cheesecake filling.
- Top the filled tacos with fresh strawberries for added sweetness and color.
- Chill the tacos in the fridge for at least 30 minutes before serving.