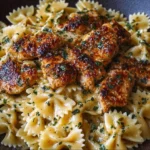
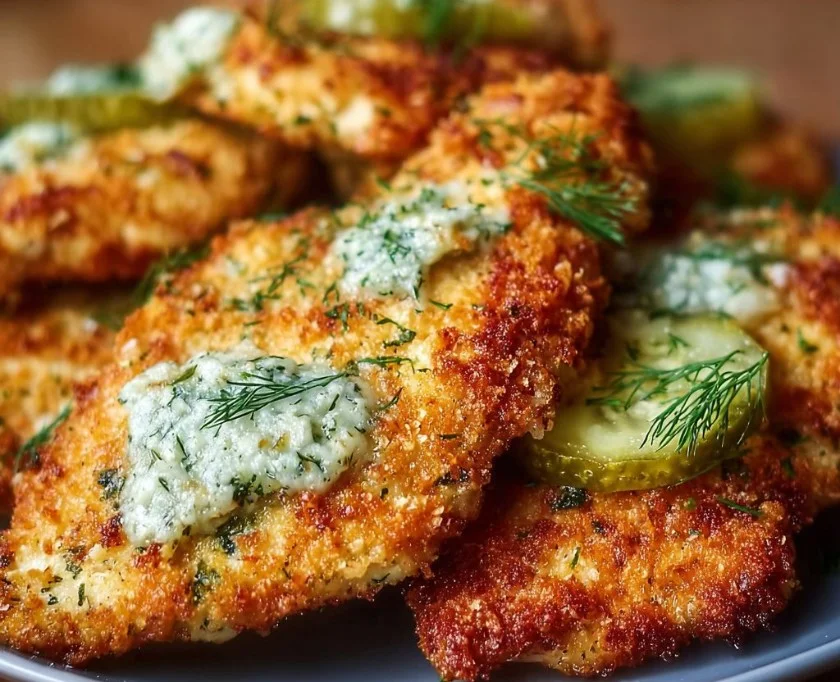
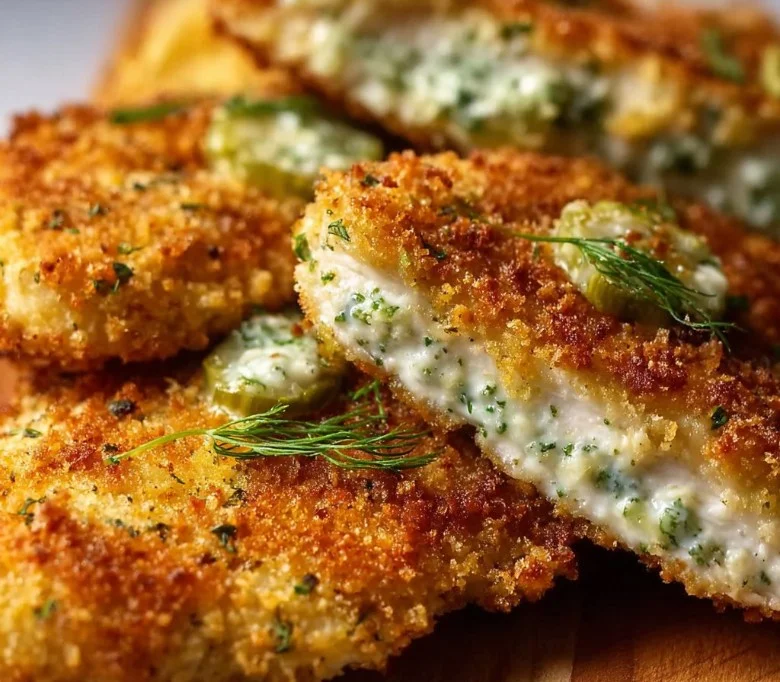
Crispy Dill Pickle Parmesan Chicken, hey friend — I can already hear you asking if something that sounds this playful could also be truly comforting. I browned the outside of these chicken breasts until the golden crust sang, and that tangy dill pickle juice marinade sneaks into the meat like a little burst of nostalgia. We’re talking boneless, skinless chicken breasts soaked in pickle juice, dredged in a seasoned flour, dunked in egg, and pressed into a Parmesan-breadcrumb crust that fries up crisp and proud. This recipe is perfect for busy weeknights, cozy dinners, or when you want a twist on fried chicken that feels comforting and exciting at once. If you want the step-by-step and tips for the best crunch, check out this crispy dill pickle parmesan chicken recipe I referenced while fine-tuning my technique.
Why You’ll Love This Recipe
- Quick and easy to prepare: minimal hands-on time and a short marinating window.
- Simple, accessible ingredients: pantry staples plus a jar of pickles.
- Perfect for spring and summer gatherings or cozy rainy nights.
- Comforting and satisfying: familiar fried-chicken vibes with a bright, tangy twist.
What makes this version unique is the brine-first approach with dill pickle juice that brightens the chicken inside out, paired with a Parmesan-forward breadcrumb coating that offers nutty, savory depth. You’ll notice the contrast between the juicy, slightly tangy chicken and the crunchy, golden crust — it hits both nostalgic and adventurous notes. I love how this recipe gives confidence to home cooks: even beginners can get restaurant-worthy crunch at home with a few visual cues and simple tips.
Ingredients Needed
Grouped and clarified so you can shop or swap easily:
Chicken
- 4 boneless, skinless chicken breasts — fresh is best; if thick, pound lightly to even thickness or slice horizontally into cutlets for faster cook time.
Marinade
- 1 cup dill pickle juice — use juice from a jar of dill pickles; do not substitute with vinegar-only solutions unless balanced with a bit of sugar.
Breading and Seasoning
- 1 cup seasoned breadcrumbs — panko or regular, depending on desired crunch; panko gives extra airiness.
- 1/2 cup grated Parmesan cheese — freshly grated for best melting and flavor; pre-grated works in a pinch.
- 1/2 cup all-purpose flour — for the initial dredge and to help the egg cling.
- 2 large eggs, whisked — room temperature eggs adhere better to the flour and breadcrumbs.
- 1 teaspoon garlic powder — use granulated garlic if you prefer a bit more texture.
- 1 teaspoon onion powder
- 1/2 teaspoon paprika — adds mild sweetness and color; smoked paprika can be used sparingly for a smoky note.
- Salt and freshly ground black pepper, to taste — adjust according to your breadcrumbs and Parmesan saltiness.
Frying
- Cooking oil for frying — neutral oil with a high smoke point such as canola, vegetable, or sunflower oil. Use enough to make about 1/2 inch depth in the skillet.
Notes on quantities and swaps
- If you prefer a lighter pan-seared option, reduce oil and finish in the oven, though crispness will be different.
- For a gluten-free version, use a 1-to-1 gluten-free flour and gluten-free breadcrumbs; check the seasoning level on substitutes.
- If you want less sodium, rinse store-bought pickles lightly and taste the juice before committing to the full 1 cup; you can dilute with a bit of water.
Ingredients & Equipment Notes (Optional)
Helpful tools and why they matter:
- A shallow dish or zip-top bag for marinating — a zip-top bag hugs the chicken for even brining and minimizes mess.
- Three shallow bowls or pie plates — makes the dredge-egg-breadcrumb process smooth and assembly-line fast.
- Instant-read thermometer — the single most reliable way to know chicken is done; target 165°F internal temperature.
- Heavy skillet (cast iron recommended) — holds heat evenly and gives the crust a steady sizzle for better browning.
- Wire rack and baking sheet — allow cooked chicken to drain and stay crisp; paper towels can make the bottom soggy.
- Kitchen tongs and a slotted spatula — for safe flipping and removing pieces without tearing the crust.
Practical tip: arrange your dredging station near the stove so you can go straight from coating to frying without chasing bowls across the kitchen. That keeps the coating intact and reduces flour mess.
Instructions – How to Make “Crispy Dill Pickle Parmesan Chicken”
- Marinate the chicken in pickle juice.
- Place the 4 boneless, skinless chicken breasts in a shallow dish or a zip-top bag. Pour 1 cup dill pickle juice over them so they are fully coated.
- Why this matters: the pickle juice lightly seasons and tenderizes the chicken, giving a subtle tang that penetrates the meat.
- Visual cue: the chicken will look slightly paler after 30 minutes to 2 hours of marinating. Do not exceed 2 hours for thin cutlets or you risk a mushy texture.
- Set up your breading station.
- In the first shallow dish, combine 1/2 cup all-purpose flour with 1 teaspoon garlic powder, 1 teaspoon onion powder, 1/2 teaspoon paprika, and salt and pepper to taste. Stir until blended.
- In the second dish, whisk the 2 large eggs until uniform and slightly frothy.
- In the third dish, mix 1 cup seasoned breadcrumbs with 1/2 cup grated Parmesan cheese. Press the Parmesan into the crumbs so the mixture is cohesive.
- Mini tip: use the palm of your hand to press breadcrumbs into the Parmesan to get an even coating that clings to the egg.
- Remove chicken from brine and pat dry.
- Take the breasts out of the pickle juice and pat them dry with paper towels. This step is crucial.
- Why this matters: excess surface moisture prevents the flour from sticking properly and leads to a soggy crust.
- Dredge the chicken: flour, egg, then breadcrumb-Parmesan.
- First, coat each piece lightly in the seasoned flour, shaking off excess. The thin flour layer helps the egg adhere.
- Next, dip the floured chicken into the whisked eggs, letting excess egg run back into the bowl.
- Finally, press the chicken into the breadcrumb-Parmesan mixture until evenly coated and slightly pressed so crumbs adhere well.
- Visual cue: the final coated piece should look uniformly golden-beige with visible Parmesan flecks and no bare spots of egg or flour.
- Heat oil over medium-high heat and test it.
- Pour enough cooking oil into a large skillet to reach about 1/2 inch depth. Heat over medium-high until the oil shimmers but is not smoking. Drop a small breadcrumb into the oil; it should sizzle and brown gently within 10 seconds.
- Why this matters: oil that is too cool will make the chicken greasy; oil that is too hot will burn the crust before the inside cooks.
- Fry the chicken until golden and cooked through.
- Carefully place the breaded chicken pieces into the skillet. Do not overcrowd; work in batches if needed. Fry for approximately 5 to 7 minutes per side, adjusting time for thickness, until the exterior is deep golden brown and the internal temperature reaches 165°F.
- Mini tips: lower the heat a touch if the crust is browning too quickly. Use tongs to flip gently to keep the coating intact.
- Visual and aroma cues: look for a steady, even browning and the irresistible aroma of Parmesan and garlic; the chicken should have a firm yet tender give when pressed gently.
- Drain and rest.
- Transfer cooked pieces to a wire rack set over a baking sheet to drain excess oil. Rest the chicken for a few minutes before slicing or serving.
- Why this matters: resting lets juices redistribute so the meat remains moist, and the wire rack avoids trapping steam that would soften the crust.
- Serve hot and enjoy.
- Slice against the grain for the most tender bites, or serve whole for a dramatic plate. Pair with your favorite sides and a cool dipping sauce if you like.
Serving Suggestions & Storage Tips
Serving ideas
- Classic dinner plate: pair the Crispy Dill Pickle Parmesan Chicken with a bright, crisp salad of mixed greens, cucumber, and cherry tomatoes dressed in a lemon vinaigrette to contrast the richness.
- Sandwich or bun: slice the chicken and tuck into a toasted brioche bun with shredded lettuce, thinly sliced pickles for extra crunch, and a smear of ranch or a garlic-dill mayo. This is a fun way to turn leftovers into a quick lunch.
- Comfort combo: serve with creamy mashed potatoes or buttery macaroni and cheese to lean into full-on comfort food territory.
Presentation tips
- Garnish with fresh dill or chopped parsley and a dusting of grated Parmesan for visual pop.
- Slice the breast and fan it over the starch on the plate so the golden crust is the star.
Pairings
- Light, crisp sides: coleslaw, roasted green beans, or a warm potato salad.
- Sauce pairings: garlic-dill aioli, mustard-mayo blend, or a cool cucumber-yogurt dip all complement the pickle brightness.
- For a lighter pairing, serve with steamed asparagus and lemon wedges.
Creative variations
- Make it a salad topper: slice the chicken and add to a bowl of butter lettuce, red onion, hard-boiled egg, and a drizzle of ranch or dill dressing.
- Turn it into tenders: cut chicken into strips before marinating for quicker frying and fun finger food for parties.
- Bake finish: to reduce oil, pan-sear the crust briefly and finish in a 400°F oven for 8 to 12 minutes until cooked through.
Storage (fridge, freezer)
- Fridge: store cooled chicken in an airtight container for up to 3 days. To help maintain crunch, place the chicken on a wire rack inside the container to avoid sitting in residual oil.
- Freezer: freeze wrapped pieces individually on a baking sheet, then transfer to a freezer bag for up to 2 months. Flash-freezing helps prevent clumping.
Best reheating methods
- Oven or toaster oven: reheat at 350°F on a wire rack until warm and crisp, about 10 to 15 minutes. This preserves the crust best.
- Air fryer: reheat at 350°F for 3 to 6 minutes until heated through and crisp.
- Microwave: not recommended if you want to keep crispness; the microwave will steam the crust. If microwaving, then pop it under the broiler for a minute to restore some texture.
Helpful Notes & Variations
Ingredient substitutions
- Breadcrumbs: swap seasoned breadcrumbs for plain panko plus a dash more seasoning. For gluten-free, select gluten-free panko or crushed rice cereal that mimics crumbs.
- Parmesan: Romano cheese can be used for a sharper bite, or Pecorino for saltier depth. Adjust salt accordingly.
- Oil: use oils labeled for high-heat frying such as avocado oil if you prefer a neutral flavor and high smoke point.
Dietary adaptations
- Lower-fat option: after breading, place the chicken on a baking sheet sprayed lightly with oil and bake at 425°F until golden and cooked through; flip halfway. The result is lighter but slightly less crunchy.
- Air fryer adaptation: preheat the air fryer to 375°F. Spritz the breaded chicken with oil and cook for 10 to 12 minutes, flipping halfway, until internal temperature is 165°F and crust is golden.
Flavor add-ins
- Add 1 teaspoon of dried dill to the breadcrumb-Parmesan mixture for extra herbaceousness.
- For a zesty kick, fold 1 tablespoon of lemon zest into the breadcrumb mix or add a pinch of cayenne to the flour mixture.
Common mistakes and how to avoid them
- Mistake: overcrowding the pan. Consequence: oil temperature drops and crust becomes soggy. Fix: fry in batches and allow oil to recover heat between batches.
- Mistake: not patting chicken dry after brining. Consequence: flour and egg won’t stick properly. Fix: pat very dry with paper towels.
- Mistake: frying oil too hot or too cold. Consequence: burnt crust or greasy chicken. Fix: always test with a breadcrumb and adjust heat to maintain a steady sizzle.
Experience-based tips
- Consistent thickness matters: pound uneven breasts to an even thickness so all pieces cook in the same time.
- Press breadcrumbs in firmly: gentle pressure helps create a compact crust that holds together during frying.
- Rest before cutting: this keeps juices in and produces clean slices.
Conclusion
Crispy Dill Pickle Parmesan Chicken stands out because it pairs the playful tang of pickle juice with a deeply savory Parmesan crust to create a dish that is both familiar and delightfully new. It gives you the comfort of fried chicken with the bright lift of a pickle marinade, making it ideal for weeknight dinners, casual gatherings, or meal-prep that stays interesting. If you love experimenting with texture and flavor, this recipe rewards patience with true crunch and surprising juiciness. For inspiration from similar family-tested recipes, take a look at this Dill Pickle Parmesan Chicken – I Am Homesteader and compare techniques with the Dill Pickle Parmesan Chicken Recipe – Allrecipes. Now go give it a try, and please come back to tell me how it turned out or leave a star rating if it became a new favorite.
Frequently Asked Questions
Can I make this recipe ahead of time?
Yes. You can marinate the chicken in pickle juice up to 2 hours ahead. For full make-ahead convenience, bread the chicken and refrigerate on a tray covered loosely with plastic wrap for a few hours before frying. If you need to prepare even earlier in the day, you can marinate in the morning and bread just before frying to retain the best texture.
How should I store leftovers and how long do they last?
Store cooled leftovers in an airtight container in the refrigerator for up to 3 days. To keep the crust from getting soggy, place the chicken on a wire rack inside the container rather than directly on the bottom. Frozen leftovers can be kept for up to 2 months when flash-frozen individually and stored in a freezer bag.
What is the best way to reheat or serve this recipe after storage?
The oven or an air fryer are the best ways to reheat and preserve crispness. Preheat the oven to 350°F and reheat on a wire rack for 10 to 15 minutes. In an air fryer at 350°F, 3 to 6 minutes usually does the trick. Avoid the microwave unless you plan to crisp it briefly under the broiler afterwards.
Can I adjust or substitute ingredients to fit my preferences?
Absolutely. Use panko for extra crunch, choose a different hard cheese like Romano if you prefer a stronger flavor, or opt for gluten-free flour and crumbs to make this recipe gluten-free. For less salt, taste the pickle juice first and dilute with a little water if it seems very salty. You can also bake instead of fry for a lighter version.
Do you have tips to ensure the best texture and flavor every time?
Yes. Keep the chicken an even thickness, pat it dry after brining, and set up an efficient dredging station so each piece gets an even coating. Maintain proper oil temperature — test with a breadcrumb — and use a wire rack to rest cooked chicken so the crust stays crisp. Finally, use freshly grated Parmesan and good-quality seasoned breadcrumbs, as those small details amplify flavor and texture.
Crispy Dill Pickle Parmesan Chicken
Ingredients
Method
- Place chicken breasts in a shallow dish or zip-top bag and pour dill pickle juice over them, ensuring they are fully coated.
- Marinate for 30 minutes to 2 hours, but do not exceed 2 hours for thin cutlets.
- In the first dish, combine flour, garlic powder, onion powder, paprika, salt, and pepper.
- In the second dish, whisk the eggs until uniform.
- In the third dish, mix breadcrumbs with Parmesan cheese, pressing the cheese into the crumbs.
- Pat the marinated chicken dry with paper towels.
- Dredge each piece in seasoned flour, dip in eggs, then press into the breadcrumb-Parmesan mixture until well-coated.
- Heat oil in a large skillet over medium-high heat.
- Test oil temperature with a breadcrumb; it should sizzle when ready.
- Carefully place breaded chicken in the skillet and fry for 5 to 7 minutes per side until golden brown and reaches an internal temperature of 165°F.
- Avoid overcrowding the pan; work in batches if necessary.
- Transfer cooked chicken to a wire rack to drain excess oil.
- Let the chicken rest for a few minutes before slicing or serving.
- Serve hot, sliced against the grain or whole, with your favorite sides.