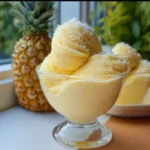
Healthy Ninja Creami Recipes (High Protein) – Basics With Bails is the collection I’ve been whispering about to friends and family — and now I’m sharing it with you. When I first started experimenting with the Ninja Creami, I remember calling my neighbor in the middle of a snow day and saying, “You have to taste this,” and she laughed because I had ice cream for breakfast. That kind of comfort-meets-nutrition magic is what this post is all about. Expect creamy bases built from bananas, Greek yogurt, protein powder, and almond milk, plus fruit, cocoa, nut butter, and creative mix-ins to keep things high protein and satisfyingly indulgent.
If you want to know more about why I started this frozen obsession and where my recipe ideas sprout from, you can peek at my story here: about me and my kitchen adventures.
Why You’ll Love This Recipe
- Quick and easy to prepare with a simple blender and your Ninja Creami
- Uses accessible, wholesome ingredients you likely already have
- Perfect for warm-weather mornings or as a cozy dessert any time of year
- High-protein and customizable for dietary needs – great for post-workout recovery
- Impresses guests with homemade, gourmet-style frozen desserts without fuss
What makes this collection unique is the emphasis on protein-rich bases and thoughtful, real-food mix-ins. Rather than relying on heavy cream and sugar, these recipes lean on Greek yogurt, protein powder, milk alternatives, and fruit for texture and sweetness. Emotionally, these recipes bring comfort — the kind that says “you’re allowed a treat that also fuels you.” They are also perfect for building confidence in the kitchen; once you master a few base recipes, the variations become a joyful, creative habit.
Ingredients Needed
Below are pantry-friendly ingredients grouped by purpose. These are the building blocks I use across the 33 Healthy Ninja Creami Recipes (High Protein) – Basics With Bails collection. Quantities vary by recipe; for a single 1-pint batch, adapt proportions as noted in the instructions section.
For the creamy base
- Ripe bananas (frozen if possible) – adds natural sweetness and creamy body
- Plain Greek yogurt (full-fat or 2%) – the protein backbone and silky texture
- Vanilla or unflavored whey or plant-based protein powder – boosts protein and flavor
- Unsweetened almond milk or other milk alternative – thins the mix to blendable consistency
- Cottage cheese (optional, low-sodium) – extra protein and creaminess for some variations
For natural sweetening and flavor
- Pure maple syrup or honey (use honey only if not serving to infants) – optional, to taste
- Pure vanilla extract – small amount brightens overall flavor
- Unsweetened cocoa powder – for chocolatey options
- Ground cinnamon or instant espresso powder – depth enhancers for some variations
For fruit and add-ins
- Frozen berries (strawberries, blueberries, raspberries) – bright, nutrient-dense fruit
- Mango or pineapple (frozen) – tropical variations
- Nut butters (almond, peanut, cashew) – protein and richness
- Dark chocolate chips or cacao nibs – for texture and a little indulgence
- Rolled oats or cooked quinoa – for thickening and chew
For mix-ins and optional boosters
- Chia seeds or ground flaxseed – texture, fiber, omega-3s
- Collagen peptides (optional) – neutral protein booster
- Greek yogurt swirls, fruit compote, or low-sugar jam – for layering and ribbons of flavor
Notes and substitutions
- Use frozen fruit for best texture unless a specific recipe states fresh. Frozen bananas should be peeled and chopped before freezing.
- Choose protein powder flavor carefully; vanilla and unflavored are the most versatile.
- For dairy-free options, use a plant-based yogurt with similar thickness and a plant protein powder.
(If you like a fruity breakfast bake to pair with lighter frozen treats, the berry croissant breakfast bake is a fun weekend companion: berry croissant breakfast bake.)
Ingredients & Equipment Notes
Helpful tools that make a difference
- Blender or high-speed immersion blender – for a smooth, lump-free base
- Ninja Creami with pint containers – designed for these recipes
- Measuring cups and spoons – accurate ratios matter for texture
- Small spatula or spoon – to press ingredients into pint edges
- Freezer space – pints need to be fully frozen for at least 24 hours for ideal results
- Fine-mesh sieve (optional) – to remove any bits if you prefer ultra-smooth ice cream
Why these tools help
- A powerful blender ensures frozen fruit and yogurt become uniformly smooth so the Creami can finish the job.
- The Ninja Creami’s unique re-spin and mix-in functions rely on pint containers filled and frozen properly, so following freezing times yields the perfect scoopable texture.
For extra context, a savory project like a marinated chicken dish influenced my approach to layering flavors — you can read about one of my full meals for inspiration on balance: a complete savory meal to contrast bright frozen desserts.
Instructions – How to Make “33 Healthy Ninja Creami Recipes (High Protein) – Basics With Bails”
Below is a detailed, step-by-step process for creating a single high-protein Ninja Creami pint. Use this base method as the template for the 33 variations in this collection — I’ll highlight how to tweak flavors and add mix-ins as we go.
- Plan your base and flavor profile
- Choose whether your base will be banana + yogurt, cottage cheese + milk, or blended fruit + protein powder. Each gives a slightly different mouthfeel: bananas add ultra-creamy body, cottage cheese yields denser creaminess, and fruit-forward bases are lighter and more sorbet-like.
- Tip: For beginners, start with a frozen banana + Greek yogurt base and vanilla protein powder — it’s forgiving and versatile.
- Measure and blend the base
- For one pint, combine roughly 1 large ripe banana (about 150 g, peeled and chopped), 1/2 to 3/4 cup plain Greek yogurt, 1 scoop protein powder (20-25 g), and 1/4 to 1/3 cup unsweetened almond milk in a blender.
- Blend until completely smooth. You want a thick milkshake texture that pours slowly but fills the pint container without being runny.
- Why this matters: Texture entering the freezer affects final mouthfeel. Too thin and the result can form ice crystals; too thick can be icy in the center or strain the Creami motor.
- Sweeten and flavor
- Taste the blended base; add 1 to 2 teaspoons pure maple syrup or a touch of honey if needed. Add 1/2 teaspoon vanilla extract for depth.
- For chocolate versions, add 1 to 2 tablespoons unsweetened cocoa powder and blend again.
- Mini-tip: If using a flavored protein powder (chocolate, vanilla, peanut butter), dial back extra sweeteners.
- Add mix-in elements (optional at blending stage)
- If you want swirls like jam or peanut butter ribbons, spoon 1 to 2 tablespoons into the pint after pouring the base (do not mix fully).
- For a thicker texture, a tablespoon of rolled oats or cooked quinoa can be blended in.
- Why this matters: Adding certain items before freezing (like whole chia seeds or oats) will hydrate and change texture; plan accordingly.
- Transfer to Ninja Creami pint container and freeze
- Pour the blended base into a 1-pint Creami container, leaving about 1/2 inch of headspace to allow expansion.
- Smooth the top and press any larger fruit pieces down so the lid seals flat.
- Freeze upright for at least 24 hours. For the creamiest results, 24-48 hours is ideal.
- Visual cue: The frozen pint should be solid with no sloshing when shaken.
- Process in the Ninja Creami
- Remove the pint from the freezer and place it in the outer bowl per your machine’s instructions.
- Run the “Ice Cream” program first. If the result is crumbly, run a “Re-spin” until smooth. If the base is too soft or looks like a milkshake, briefly freeze and re-spin later.
- If adding chunks (chocolate chips, nuts, fruit pieces), use the “Mix-in” function after forming a smooth base. Add up to 2 tablespoons of mix-ins in the designated hole, then use the mix-in setting to fold them in.
- Tip: If the texture is powdery after the first spin (dry crumbly), add 1 tablespoon of milk and re-spin. The reason is small: some protein powders absorb more liquid during freezing; the milk reincorporates moisture.
- Adjust and refine
- Taste and adjust sweetness or salt with a light sprinkle of sea salt if the chocolate needs brightening.
- For ribboned flavors (peanut butter, jam), gently swirl with a spoon after the first spin and optionally re-spin lightly to create delicate ribbons.
- Serve immediately or re-freeze briefly
- The Creami is best enjoyed right away for that soft-serve scoop; for firmer scoops, pop the pint back in the freezer for 10-20 minutes before serving.
- Serving cue: scoops should hold shape but be soft enough to scoop easily with a rounded spoon.
- Scaling and batch-making
- To make multiple flavors at once, prep and freeze separate pints. Label lids with flavor and date.
- Batch tip: Make a double batch of the base (without flavorings) and split into pints, then personalize each with different mix-ins.
- Handling common problems
- If ice crystals form: run a short re-spin or let thaw for 5-10 minutes, then respoon.
- If the motor stalls: the pint may be too dense; use a small amount of milk and re-spin.
- Why these steps matter: The Ninja Creami manipulates frozen texture; small adjustments of moisture and timing fine-tune the result.

Serving Suggestions & Storage Tips
Serving ideas
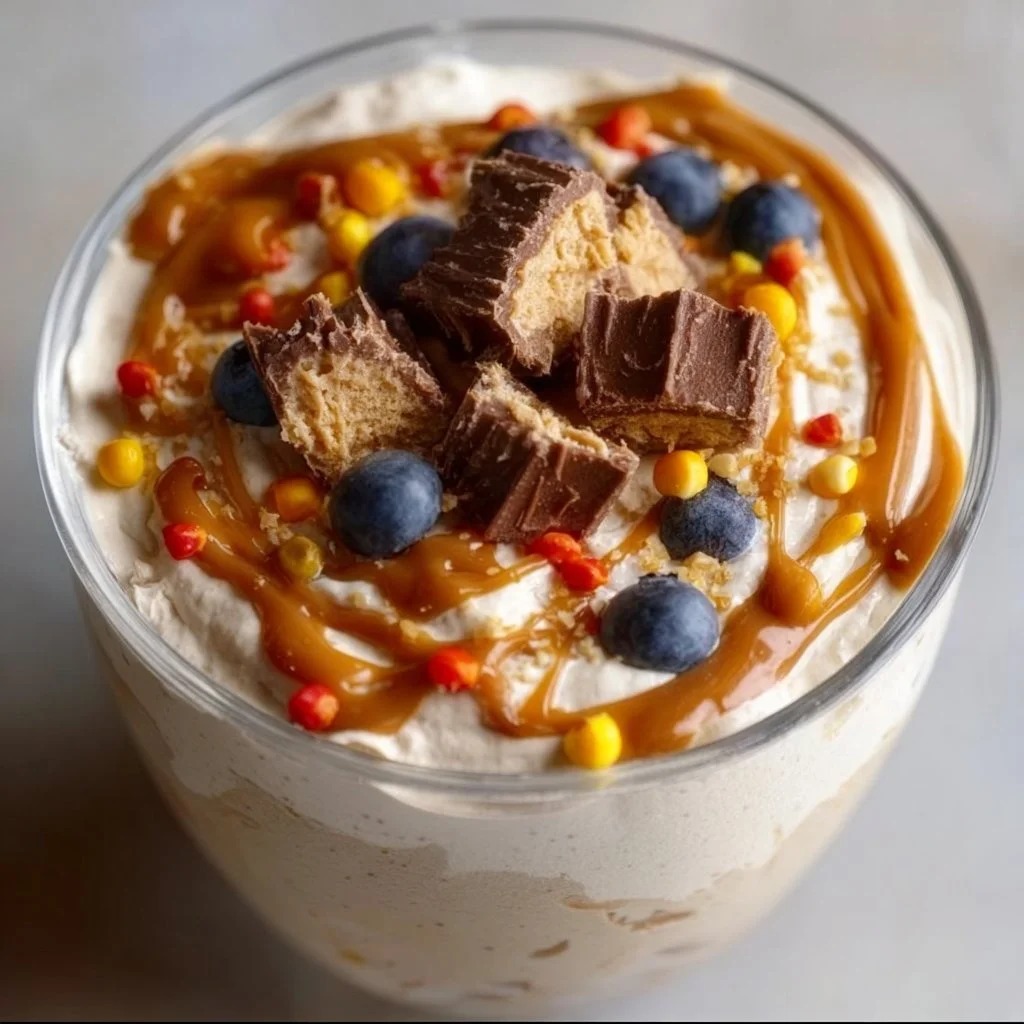
- Serve a scoop in a chilled bowl and garnish with a sprinkle of toasted chopped nuts, cacao nibs, or a drizzle of warmed peanut butter.
- Make mini sundaes by layering a scoop with fresh berries and a few tablespoons of granola.
- For a breakfast-style treat, top with sliced banana, hemp seeds, and a spoon of Greek yogurt.
Presentation tips
- Use chilled bowls or glasses to slow melting and maintain clean scoops.
- Create contrasting textures: a smooth base with crunchy toasted seeds or nuts looks beautiful and tastes balanced.
- Use small mason jars for shareable single-serve cups; add a small wooden spoon tied with twine for gifting.
Pairings and accompaniments
- A warm mug of coffee or espresso pairs wonderfully with chocolate or mocha pints.
- Fresh fruit salad or a citrus compote brightens berry-forward flavors.
- For a brunch feel, pair a lighter frozen fruit option with a warm baked good, such as pancakes or waffles.
Storage and reheating
- Refrigerator storage: If you’ve scooped into a bowl and have leftovers, store in an airtight container in the freezer — not the fridge. Creamy frozen desserts belong in the freezer; the fridge will make them turn into soup.
- Freezer storage duration: For best texture and flavor, use within 2-3 weeks. Over time, the ice cream may become icier.
- Make-ahead tips: Freeze pints fully and label with flavor and date. Pints are excellent for meal prep and entertaining.
- Best reheating methods: For swirls like peanut butter that get firmer in the cold, briefly microwave 5-8 seconds on low when serving to soften. Avoid prolonged microwaving which will melt completely.
Helpful Notes & Variations
Ingredient swaps and substitutions
- Dairy-free: Swap Greek yogurt for an unsweetened coconut or almond-based yogurt and use a plant-based protein powder.
- Lower sugar: Use a monk fruit-sweetened protein powder and skip additional sweeteners; fruit adds natural sweetness.
- Extra protein: Fold in 1 tablespoon unflavored collagen peptides or add an extra scoop of protein powder, but increase liquid slightly to maintain texture.
Flavor suggestions and mix-in ideas
- Chocolate Almond Crunch: Add 1.5 tablespoons cocoa powder, 1 tablespoon almond butter, and 1 tablespoon cacao nibs.
- Blueberry Lemon Swirl: Blend frozen blueberries into the base and add lemon zest. After first spin, ripple in a small blueberry compote.
- Peanut Butter Banana: Banana base, 1 tablespoon peanut butter stirred in as ribbons, and 1 tablespoon chopped peanuts for crunch.
- Tropical Mango Coconut: Mango base with a splash of coconut milk and a sprinkle of toasted coconut.
Dietary adaptations
- Low-carb/Keto-friendly: Use a low-carb protein powder and sweeten with erythritol or allulose. Use full-fat Greek yogurt or a high-fat coconut yogurt for creaminess.
- Gluten-free: Most ingredients are naturally gluten-free; choose certified gluten-free oats if using.
Common mistakes to avoid
- Not freezing pints long enough: If the pint isn’t fully frozen, the Creami can’t form the right texture.
- Overloading mix-ins: Too many chunky add-ins can prevent smooth spinning; stick to small amounts when using the mix-in function.
- Using watery yogurt: Thin yogurts can lead to icy texture — strain thinner yogurts briefly in a cheesecloth if needed.
If you want a dessert-inspired follow-up to these frozen treats, consider a kitchen baking project to pair with them; one of my favorite indulgent cakes (adaptable for sharing, though it uses different methods than frozen treats) is a rich chocolate cake I tested for special occasions: a chocolate cake for celebration moments.
Conclusion
These 33 Healthy Ninja Creami Recipes (High Protein) – Basics With Bails are designed to be your go-to guide for creamy, nourishing frozen desserts that feel like a hug and support your daily protein needs. Each recipe idea uses common pantry ingredients — bananas, Greek yogurt, milk alternatives, and protein powder — to build a dependable base you can riff on again and again. If you love the idea of making wholesome, customizable protein ice cream at home, check out my top tips and tricks for consistency and flavor in this helpful guide: 10 Ninja Creami tips for the best protein ice cream. For a deeper dive into ready-to-use recipe inspiration, the companion recipe book and collection of guilt-free frozen ideas make a helpful kitchen companion: Healthy NINJA CREAMI Magic on Amazon. And if you want the original lineup that inspired this post, the full collection is available here: 33 Healthy Ninja Creami Recipes (High Protein) – Basics With Bails.
Before you close this tab: give a flavor a try, leave a comment about what you created, and pin your favorite photo to inspire someone else. Which flavor will you make first?
Frequently Asked Questions
Q: How long should I freeze the pint before processing in the Ninja Creami?
A: Freeze your pint upright for at least 24 hours; 24-48 hours is ideal. The pint needs to be completely solid — no liquid movement when you shake it.
Q: Can I use any protein powder in the base?
A: Yes, but different protein powders absorb liquid differently. If your chosen powder makes the base dry after the first spin, add 1 tablespoon milk and re-spin. Start with vanilla or unflavored powders for versatility.
Q: My ice cream came out icy or crumbly. How do I fix it?
A: If crumbly, add 1 tablespoon milk and run a re-spin. If icy, let the pint warm for 5-10 minutes and re-spin. Also check that your pint was fully frozen and that your base had enough fat and sugar (from fruit or yogurt) to prevent large ice crystals.
Q: Can I make these ahead and store them?
A: Yes. Fully frozen pints store well for 2-3 weeks. For best texture, use within that window and avoid repeated thawing and refreezing.
Q: Are there dairy-free options that still stay creamy?
A: Absolutely. Use a thick coconut or almond yogurt and a plant-based protein powder. For extra creaminess, add a tablespoon of avocado or a splash of coconut cream.
Q: What are good mix-ins that won’t upset the machine?
A: Small quantities of chocolate chips, chopped nuts, cacao nibs, or fresh fruit chunks are safe when used sparingly. Avoid huge chunks of hard candy or very sticky ingredients that could strain the motor.
If you’d like, I can expand this single-pint method into 33 exact flavor recipes with precise measurements and nutrition estimates for each — just tell me which flavor families you want most (chocolate, fruity, nutty, breakfast-style, keto-friendly, or vegan) and I’ll draft them next.
Ninja Creami High Protein Ice Cream Base
Ingredients
Method
- Choose your base: banana + yogurt, cottage cheese + milk, or blended fruit + protein powder.
- Combine 1 large ripe banana, 1/2 to 3/4 cup plain Greek yogurt, 1 scoop protein powder, and 1/4 to 1/3 cup unsweetened almond milk in a blender.
- Blend until completely smooth; the mixture should have a thick milkshake texture.
- Taste the blended base and add sweeteners or flavorings as desired.
- Pour the blended base into a Ninja Creami pint container, leaving about 1/2 inch of headspace.
- Freeze upright for at least 24 hours, ideally 24-48 hours.
- Process the frozen pint in the Ninja Creami according to manufacturer instructions.
- Serve immediately for soft-serve or freeze for 10-20 minutes for firmer scoops.