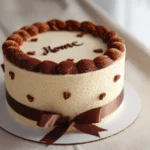
Pin by Griselda Guzman on 15 | Birthday cake decorating, Cake designs, Vintage birthday cakes — I know, that title sounds like a scrapbook page come to life and that is exactly what we are making together today. You and I are standing in my cozy kitchen, sleeves rolled up, spoons in hand, ready to recreate a vintage-inspired layered birthday cake that tastes like warm memories. I still remember the soft vanilla crumb, the tang of a classic buttercream, and the playful vintage piping that made every bite feel like a celebration. This recipe leans on pantry staples — flour, sugar, butter, eggs, milk, and vanilla — and adds simple decorating touches so you can make a cake that looks Pinterest-ready and tastes like home. If you love nostalgic cake designs, layered textures, and approachable decorating, you are in the right place. For more small-format treats with bright flavors, try my take on mini lemon cakes with lavender glaze for a complementary bite.
Why You’ll Love This Recipe
- Quick and easy to prepare for a vintage-inspired celebration
- Uses simple, everyday ingredients you likely already have
- Perfect for birthdays, intimate gatherings, or a cozy seasonal treat
- Comforting, nostalgic, and surprisingly impressive on the table
What makes this version unique is the gentle blend of old-fashioned cake structure with modern buttercream techniques. Instead of a fussy multi-day project, I give you straightforward steps that build confidence in the kitchen. There is a little nostalgia in the piped rosettes and relaxed ruffle finish, and there is a lot of warmth in the crumb and buttercream. The method allows you to personalize color, size, and decoration while keeping results consistent so even if you are decorating a cake for the first time you will find joy and calm in each step.
Ingredients Needed
Below I have grouped the ingredients so they are easy to follow. I made small clarifications and substitution options so you can adapt to what you have on hand.
Cake layers
- 2 1/2 cups (312 g) all-purpose flour, spooned and leveled (for a tender crumb you can substitute 1/2 cup with cake flour)
- 1 3/4 cups (350 g) granulated sugar
- 2 1/2 teaspoons baking powder
- 1/2 teaspoon fine sea salt
- 3/4 cup (170 g) unsalted butter, at room temperature (substitute plant-based butter for dairy-free)
- 3 large eggs, at room temperature
- 1 cup (240 ml) whole milk, warmed slightly (for dairy-free use oat or almond milk)
- 2 teaspoons pure vanilla extract
- Optional: 1 tablespoon fresh lemon zest for a faint citrus lift
Simple vanilla buttercream
- 1 1/4 cups (280 g) unsalted butter, softened
- 5 cups (600 g) powdered sugar, sifted
- 2 teaspoons pure vanilla extract
- 2 to 4 tablespoons heavy cream or milk, to reach spreading consistency (for dairy-free use plant-based cream)
- Pinch of fine sea salt to balance sweetness
Decoration and assembly
- 1/2 cup jam or curd (raspberry or apricot) for a thin filling layer, optional
- Gel food coloring (pink, mint, or vintage pastel tones work beautifully)
- Fresh edible flowers or sugar flowers for vintage charm
- Sprinkles or nonpareils in a muted palette, optional
- Piping bags and tips as noted in equipment section
Substitutions and clarifications
- If you prefer a denser crumb use 3/4 cup butter and reduce milk to 3/4 cup. If you want a lighter cake, replace up to 1/2 cup of all-purpose flour with cake flour.
- Room temperature eggs and butter incorporate better and give a lighter texture.
- Sift powdered sugar to avoid lumps in your buttercream, especially if you will be piping fine details.
Ingredients & Equipment Notes (Optional)
- Use an oven thermometer to ensure your oven reads correctly; cakes are sensitive to oven temperature.
- An electric mixer (stand or hand) is recommended for a light, smooth buttercream and well-creamed cake batter.
- Two 8 or 9 inch cake pans give a classic three-layer cake when baked twice; you can also use three 6 inch pans for a taller, more vintage silhouette.
- A bench scraper and an offset spatula make smoothing sides and applying buttercream easier.
- Piping tips I recommend: a medium round tip (for borders), a star tip (for rosettes), and a petal tip (for ruffles). Practice on parchment first.
- Disposable or reusable piping bags and a turntable speed up decoration and keep edges neat.
Baking the Layers – Quick Guide
Instructions – How to Make “Pin by Griselda Guzman on 15 | Birthday cake decorating, Cake designs, Vintage birthday cakes”
- Preheat and prepare pans
- Preheat your oven to 350 F (177 C). Grease two 8 inch pans and line bottoms with parchment circles. Lightly flour the sides to help the cakes release. This step ensures even baking and clean removal.
- Combine dry ingredients
- In a large bowl, whisk together flour, baking powder, and salt until well blended. Whisking aerates the flour and distributes the leavening so each bite rises evenly.
- Cream butter and sugar
- In a mixer bowl, beat room temperature butter and sugar on medium-high until pale and fluffy, about 3 to 4 minutes. You are looking for a ribbon-like texture where the mixture falls slowly when the beater is lifted. This incorporates air for lift.
- Add eggs and vanilla
- Add eggs one at a time, mixing well after each addition. Scrape the bowl to make sure everything is incorporated. Stir in vanilla extract. Proper incorporation prevents curdling and keeps texture uniform.
- Alternate dry ingredients and milk
- Reduce mixer speed to low. Add one third of the dry ingredients, then half of the warmed milk, then another third of dry ingredients, the remaining milk, and finish with the last third of dry ingredients. Mix just until combined. Over-mixing develops gluten and can make the cake tough.
- Divide and bake
- Divide batter evenly between prepared pans, smoothing tops with a spatula. Bake for 22 to 28 minutes until the tops are golden and a toothpick inserted in the center comes out clean or with a few moist crumbs. Rotate pans halfway through if your oven has hot spots for even color.
- Cool completely
- Let cakes cool in pans for 10 to 15 minutes, then run a knife around the edges and invert onto a rack. Peel off parchment and cool completely before frosting. Cooling prevents buttercream from melting when applied.
- Make the buttercream
- Beat softened butter on medium speed until smooth. Gradually add sifted powdered sugar, mixing on low until sugar is incorporated. Add vanilla and 2 tablespoons cream, then increase speed to medium-high and beat until light and fluffy, about 3 to 4 minutes. Adjust thickness with more cream or sugar. The texture should be spreadable but hold soft peaks for piping.
- Level and layer
- If the cake tops have domed, level them with a serrated knife or cake leveler. Place the first layer on a cake board or serving plate and pipe a thin border of buttercream around the edge to create a dam. Spoon or spread a thin layer of jam or curd inside the dam if using. Repeat with the next layer. The dam prevents filling from spilling out and keeps clean layers.
- Crumb coat
- Apply a thin coat of buttercream over the entire cake to trap crumbs. Smooth with an offset spatula and chill for 15 to 30 minutes until the crumb coat sets. This makes smoothing the final layer easier and cleaner.
- Final frosting
- Apply a generous final coat of buttercream and smooth sides with a bench scraper while rotating the cake on a turntable. For a vintage look, pull the bench scraper up in small lifts for a soft, textured finish, or use an offset spatula to create gentle swoops. The visual cues here are a uniformly covered cake with no visible cake peeking through.
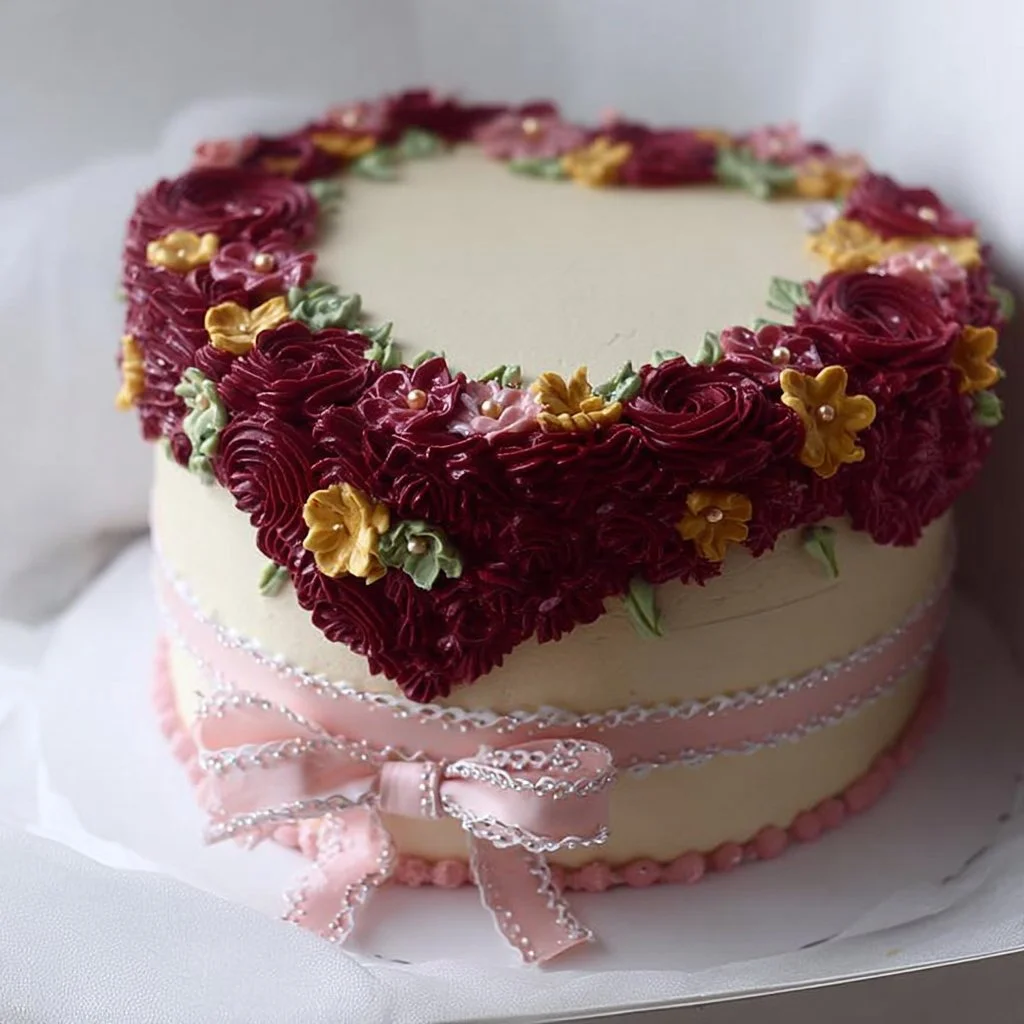
- Color and pipe
- Divide a small portion of buttercream into separate bowls if you are using multiple colors. Use gel colors sparingly for vintage pastels. Fit piping bags with tips and practice a rosette or shell on parchment to judge pressure and speed. Pipe rosettes, shells, or ruffles as desired. For rosettes, start in the center and spin outward in a spiral motion.
- Add final touches
- Place edible flowers or sugar flowers strategically, add a sprinkle of muted nonpareils, and dust with a tiny bit of powdered sugar for softness. Step back and adjust spacing to keep the cake balanced. Decoration is about rhythm and spacing as much as technique.
- Chill then serve
- Chill the finished cake for 20 to 30 minutes to set decorations, but bring to room temperature 30 minutes before serving so crumbs and frosting are tender and flavorful.
Why each step matters
- Preheating and pan prep ensure even rise and ease of removal.
- Creaming butter and sugar introduces tiny air pockets that give rise and tenderness.
- Alternating dry and wet ingredients avoids overdeveloping gluten.
- Crumb coat locks crumbs in so the final coat is pristine.
- Chilling at key points firms up butter for neater piping and slicing.
Mini tips
- If your buttercream is too soft, chill it 10 minutes and re-whip briefly.
- Warm the cake slightly in the oven for 2 minutes at 200 F if it feels very cold before slicing; this prevents sticking.
- For clean slices, use a long serrated knife dipped in hot water and wiped dry between slices.
Serving Suggestions & Storage Tips
Serving ideas
- Serve slices on vintage china with a small dollop of extra buttercream and a single edible flower for an elegant presentation.
- Pair with a light citrus salad or fresh berries to cut the sweetness and add a refreshing contrast. For a bold complementary dessert, try a slice after a savory course like a small platter with spinach garlic meatballs if you are planning a full dinner party menu.
- For a summer table, serve slightly chilled with a scoop of fruit-forward ice cream. Make a quick palate-pleasing duo with a light lemon dessert similar to this lemon blueberry cake on the side for guests who prefer a citrus note.
Presentation tips
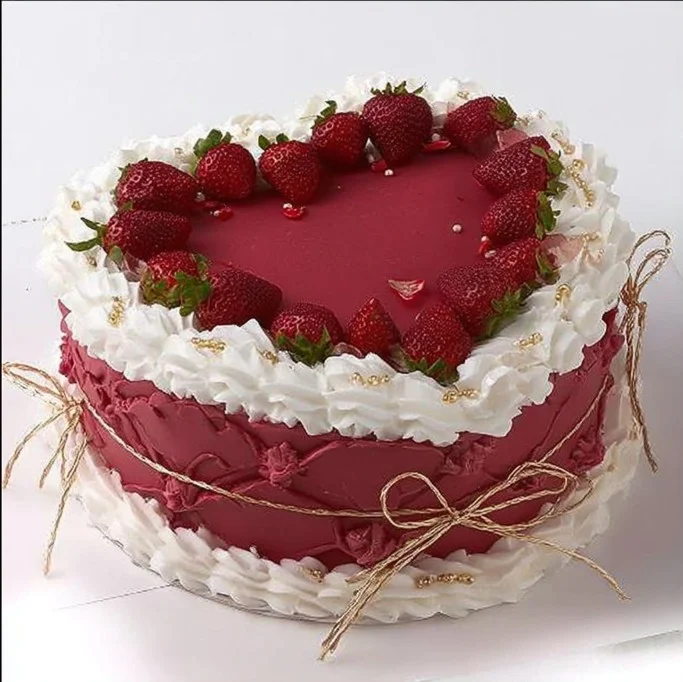
- Keep a consistent color palette: two or three muted pastels create that classic vintage look.
- Use negative space. A few well-placed flowers and a modest sprinkle of nonpareils look more refined than covering every inch.
- Consider a simple cake topper or handwritten tag for a personal touch during birthdays.
Storage
- Room temperature: If your kitchen is cool, store at room temperature for up to 24 hours in a cake carrier.
- Refrigerator: For longer storage, place cake in an airtight container or loosely cover with a large cake dome and refrigerate for up to 4 days. Bring to room temperature before serving.
- Freezer: Wrap individual slices tightly in plastic wrap and place in an airtight container. Freeze up to 3 months. Thaw overnight in the refrigerator then bring to room temperature before serving.
Best reheating methods
- Avoid microwaving a frosted slice. For unfrosted slices, microwave on medium in 10 second intervals to avoid drying out.
- For a fresh-baked feel, warm a slice in a 300 F oven for 5 to 7 minutes (uncovered) if it is unfrosted or lightly covered to protect decorations.
Pairings
- Tea: Earl Grey or Darjeeling complements the vanilla and butter notes.
- Coffee: A medium roast coffee balances sweetness without overpowering the cake.
- For non-alcoholic celebratory drinks, consider a sparkling apple or ginger brew.
Helpful Notes & Variations
Ingredient substitutions
- Dairy-free: Use plant-based butter and full-fat plant milk. Note the texture may vary slightly but flavor remains comforting.
- Gluten-free: Replace with a 1:1 gluten-free flour blend that includes xanthan gum. Expect slightly different crumb; add a teaspoon of extra moisture if needed.
- Reduced sugar: Reduce powdered sugar in buttercream by 1/2 cup but add a touch more cream to maintain spreadability.
Dietary adaptations
- Vegan adaptation: Use a vegan butter and replace eggs with 3/4 cup applesauce or a commercial egg replacer and 1 teaspoon extra baking powder. Taste and texture will shift toward a denser crumb.
- Lower fat: Substitute some butter with unsweetened applesauce in the cake, but keep full-fat buttercream for piping or use a stabilized whipped cream frosting for a lighter topping.
Flavor add-ins
- Citrus: Add 1 tablespoon lemon or orange zest to the batter for a fresh lift.
- Almond: Swap 1 teaspoon of vanilla for almond extract for a nutty, vintage flavor.
- Cocoa: For a chocolate vintage cake, replace 1/2 cup flour with 1/2 cup unsweetened cocoa powder and adjust sugar slightly.
Common mistakes and how to fix them
- Dry cake: This is usually from over-baking. Check for doneness earlier and test with a toothpick. If dry, serve with a drizzle of simple syrup or pair with a moist compote.
- Runny buttercream: Too much cream or warmth will make it soft. Chill for 10 to 15 minutes and re-whip.
- Crumbs in final coat: Apply a thorough crumb coat and chill before the final frosting. Use a bench scraper to smooth.
Experience-based tips
- Practice piping on parchment to warm your hands and steady your pressure.
- Use gel colors for vibrant hues without watering down buttercream.
- Keep decorations minimal if you want a truly vintage, understated look. Often less is more.
For a refreshing, protein-rich dessert pairing at the end of a longer meal, guests love a small scoop of sea salt honey protein ice cream alongside a thin slice of cake.
Conclusion
This Pin by Griselda Guzman on 15 | Birthday cake decorating, Cake designs, Vintage birthday cakes recipe brings together classic flavors and approachable decorating so anyone can create a cake that feels homemade and special. With simple pantry ingredients and a few accessible tools, you can bake layers that are tender, frost with a silky buttercream, and add vintage-inspired piping that reads nostalgic and elegant. Whether you are celebrating a milestone or making a cozy weekend treat, the method here gives you control and delight at every step. For inspiration beyond cake, try pairing this dessert with a rich savory like the Sweet Potato and Black Bean Tamales – Pati Jinich if you are serving a full celebratory spread, read personal stories about community in the California coronavirus obituaries: Lives lost to COVID-19 project for meaningful context during memorial gatherings, or explore local pastry talent with a guide to The 50 best cake shops and cake bakeries in Puerto Rico – Wanderlog. Try the recipe, leave a comment and star rating below, and pin your finished cake to share the joy.
Frequently Asked Questions
Can I make this recipe ahead of time?
Yes. You can bake the cake layers 1 to 2 days ahead and wrap them well in plastic wrap, storing in the refrigerator. For best texture, assemble and decorate the cake on the day you plan to serve. If you need to assemble earlier, assemble and refrigerate up to 24 hours ahead and bring to room temperature before serving.
How should I store leftovers and how long do they last?
Leftover cake can be stored in the refrigerator for up to 4 days in an airtight container or covered with a cake dome. For longer storage, freeze individual slices wrapped tightly in plastic wrap and placed in an airtight container for up to 3 months.
What is the best way to reheat or serve this recipe after storage?
Bring refrigerated cake to room temperature for about 30 to 45 minutes before serving to regain tenderness. For unfrosted slices, warm gently in a 300 F oven for 5 to 7 minutes for a freshly baked feel. Avoid microwaving frosted slices as it can melt decorations and change texture.
Can I adjust or substitute ingredients to fit my preferences?
Absolutely. You can use plant-based alternatives for dairy-free needs, gluten-free flour blends for gluten sensitivity, and different extracts or zests to change flavor profiles. Note that substitutions can alter texture slightly, so adjust moisture and leavening as needed.
Do you have tips to ensure the best texture and flavor every time?
Yes. Use room temperature ingredients for better mixing, avoid over-mixing once you add flour, check oven temperature with an oven thermometer, and chill the cake during the decorating process to firm the buttercream. Use high-quality vanilla and freshly sifted powdered sugar for the most consistent buttercream.
Vintage Layer Cake
Ingredients
Method
- Preheat your oven to 350°F (177°C). Grease two 8-inch pans and line bottoms with parchment circles.
- In a large bowl, whisk together flour, baking powder, and salt until well blended.
- In a mixer bowl, beat room temperature butter and sugar on medium-high until pale and fluffy for about 3 to 4 minutes.
- Add eggs one at a time, mixing well after each addition, and then stir in vanilla extract.
- Reduce mixer speed to low. Alternate adding dry ingredients and warmed milk until just combined.
- Divide batter evenly between prepared pans and bake for 22 to 28 minutes.
- Let cakes cool in pans for 10 to 15 minutes, then invert and cool completely before frosting.
- Beat softened butter until smooth. Gradually add sifted powdered sugar, incorporating well.
- Add vanilla and heavy cream, then beat until light and fluffy.
- Level the tops of the cooled cakes if domed. Place the first layer on a serving plate.
- Pipe a buttercream dam around the edge, fill with jam/curd if using, then repeat with the second layer.
- Apply a thin crumb coat of buttercream over the entire cake and chill to set.
- Finish with a generous coat of buttercream and smooth with a bench scraper.
- Decorate with food coloring, piping, and final touches as desired.