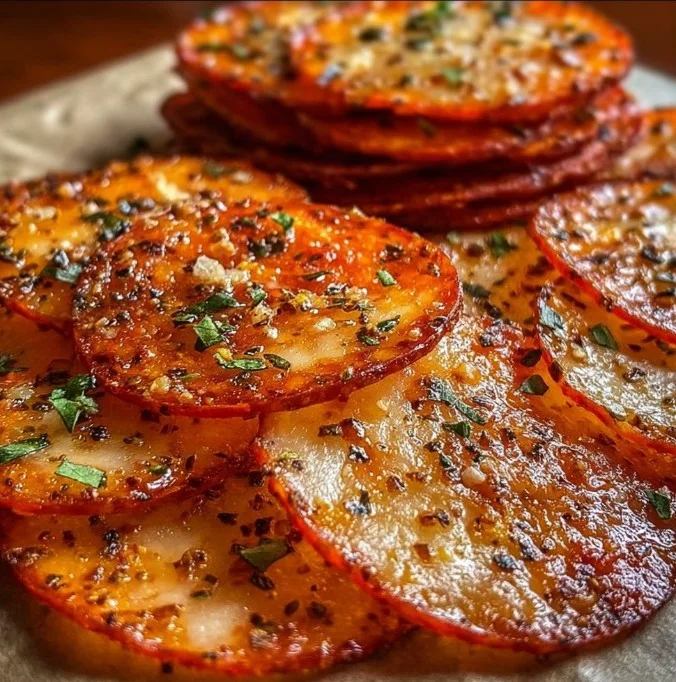
Pepperoni Cheese Crisps — hey friend, you and I both know the craving. I can still hear the tiny crackle when I bite into one, and that warm, cheesy hit that feels like a hug on chilly evenings. I started making these the first fall I moved into my own kitchen, when I wanted something indulgent but quick, and I remember pairing them with a steaming bowl of comfort—try them alongside a creamy vegetable soup like my favorite broccoli and potato cheese soup for a cozy night in. These crisps lean on three main ingredients you already trust: melty mozzarella, sharp cheddar, and salty Parmesan, with slices of turkey or beef pepperoni for that classic savory pop. They are small, impressive, and ridiculously satisfying whether you serve them as a snack, an easy appetizer, or a crunchy addition to a salad.
Why You’ll Love This Recipe
- Quick and easy to prepare
- Simple, accessible ingredients you likely have on hand
- Perfect for game day, cozy fall evenings, or last-minute guests
- Comforting, satisfying, and surprisingly impressive to serve
What sets this version apart is the balance I aim for: a deeply golden edge around the cheese, a slightly bubbled center, and pepperoni that crisps up but keeps a bit of chew so every bite is layered. I designed this recipe to boost your confidence in the kitchen by keeping steps clear, times precise, and troubleshooting ahead of you so there are no surprises. You will leave the oven with a tray of addictive crisps and a smile.
Ingredients Needed
Below I’ve rewritten and clarified the ingredient list so you can shop with confidence. Quantities are based on the classic small-batch tray that yields about 40-50 crisps depending on how generous you are with cheese.
- 1 cup shredded mozzarella cheese
- Use freshly shredded from a block if possible for better melting and fewer anti-caking agents. Whole milk mozzarella melts creamier.
- 1/2 cup shredded sharp cheddar cheese
- Sharp or extra sharp cheddar adds flavor contrast. Freshly shredded is best.
- 1/4 cup finely grated Parmesan cheese
- Real Parmigiano-Reggiano or a high-quality grated Parmesan gives a nutty, salty finish.
- 40 to 50 slices of turkey or beef pepperoni (about 4 ounces)
- Use turkey or beef pepperoni to avoid pork. If slices are large, plan to cut them in half. Choose thicker-cut varieties for more substantial crisps.
- 1 teaspoon Italian seasoning
- A dried blend of oregano, basil, thyme and rosemary adds aromatic warmth. Substitute with 1/2 teaspoon each dried oregano and dried basil if you prefer.
- 1/2 teaspoon garlic powder
- Provides background savory flavor without the moisture of fresh garlic.
- Optional: red pepper flakes, to taste
- For a spicy kick, sprinkle a pinch on each crisp or mix into the cheese blend.
- Optional: fresh parsley, finely chopped, for garnish
- Brightens the finished crisps and adds color.
Notes on ingredients and substitutions: use full-fat cheeses for the best texture; low-fat options will not crisp the same. Pre-shredded cheeses contain starches to prevent clumping, which can change the texture slightly, so if you can, shred on the spot. For a dairy-free version, see the Helpful Notes & Variations section below.
Ingredients & Equipment Notes (Optional)
- Baking sheet: A rimmed sheet works best to catch any cheese that oozes.
- Parchment paper or a silicone baking mat: Prevents sticking and helps crisp the cheese evenly.
- Medium mixing bowl and spatula: For tossing cheeses with the seasonings.
- Wire rack: Allows crisps to cool without steaming from the baking sheet.
- Oven thermometer: Ovens vary; an oven thermometer ensures accurate temperature for consistent results.
- Optional: Air fryer or toaster oven for reheating and small-batch baking. An air fryer can produce extra-crispy results in less time.
Why these tools matter: a silicone mat or parchment ensures easy removal and cleanup, a wire rack preserves crispness as the crisps cool, and an oven thermometer removes guesswork about temperature so your crisps brown evenly rather than burn or remain rubbery.
Instructions – How to Make “Pepperoni Cheese Crisps: The Ultimate Guide to Making Them at Home”
- Preheat your oven to 375°F (190°C).
- Why this matters: 375°F gives enough heat for the cheese edges to brown and become crisp while allowing the center to melt through. Use an oven thermometer if your oven runs hot or cool.
- Mini tip: Place the rack in the center position so the crisps brown evenly.
- Line a large baking sheet with parchment paper or a silicone baking mat.
- Why this matters: This surface prevents sticking and makes cleanup a breeze. If cheese oozes, the mat will still allow the underside to crisp rather than stick to the pan.
- Visual cue: The lined sheet should look smooth and ready, no wrinkles under the parchment.
- Combine the cheeses in a medium bowl: 1 cup shredded mozzarella, 1/2 cup shredded cheddar, and 1/4 cup grated Parmesan. Mix well so the three textures and flavors are evenly distributed.
- Why this matters: Even distribution ensures each crisp has a balance of stretch from mozzarella, sharpness from cheddar, and nutty salt from Parmesan.
- Mini tip: If you prefer an extra salty, more umami punch, add a tablespoon more Parmesan.
- Season the cheese mixture with 1 teaspoon Italian seasoning and 1/2 teaspoon garlic powder. If you like heat, fold in a pinch or two of red pepper flakes now. Toss thoroughly to coat all the cheese.
- Why this matters: Distributing the seasoning ahead of time means every crisp is flavorful, not just the ones on top.
- Prepare the pepperoni: if your slices are on the large side, cut each in half so pieces are roughly 1.5 to 2 inches wide. Lay slices out into a single layer on the prepared baking sheet, leaving a small space between each piece for the cheese to spread slightly.
- Why this matters: Proper spacing prevents the crisps from merging together and helps hot air circulate, which leads to more even crisping.
- Visual cue: You should see tidy circles or half-moons with at least a quarter inch between them.
- Top each pepperoni slice with a generous spoonful of the cheese mixture, pressing lightly so the cheese adheres. Aim for a small mound rather than a flat dusting so the cheese can pancake out and form a crisp edge.
- Why this matters: A generous topping creates that characteristic lace-like rim and a chewy center. Too little cheese will produce a thin crisp that may burn quickly.
- Mini tip: Use a small cookie scoop or the back of a teaspoon for consistent portions.
- Bake in the preheated oven for 8 to 10 minutes, or until the cheese is fully melted, bubbling, and edges are lightly golden brown. The pepperoni will begin to crisp around the edges and darken slightly.
- Why this matters: The timing provides a balance—cheese needs time to melt and brown, while the pepperoni needs time to crisp up without charring. Ovens vary so start checking at 7 minutes.
- Visual cues: Look for small brown spots across the cheese, a deepening color at the edges, and the pepperoni curling slightly.
- Remove the baking sheet from the oven and allow the crisps to cool on the pan for a few minutes. Transfer them carefully to a wire rack to cool completely so they firm up and retain crispness.
- Why this matters: Cooling on a rack prevents steam from collecting under the crisps which would make them soggy. A minute or two on the baking sheet makes them easier to lift off without breaking.
- Mini tip: Use a thin spatula to lift each crisp gently, or fold the parchment to slide them onto the rack.
- Serve warm or at room temperature. Garnish with freshly chopped parsley if you like a pop of color and herbal brightness.
- Why this matters: Fresh parsley cuts through the richness and adds a fresh note that makes the crisps feel finished and restaurant-worthy.
- Store any leftovers in an airtight container at room temperature for short-term enjoyment, or refrigerate for longer keeping. Reheat in a toaster oven, oven, or air fryer to restore crispness.
- Why this matters: Proper storage and reheating protect texture; reheating with dry heat helps bring back that crunch. See the Serving Suggestions & Storage Tips section below for specific methods.

Serving Suggestions & Storage Tips
Serving ideas and presentation tips
- Party platter: Arrange crisps on a wooden board with small bowls of marinara, olive tapenade, or a creamy herbed dip. Stack them in little fan-shaped layers for visual interest.
- Salad topper: Use 3 to 4 crisps per serving to add crunch and flavor to a mixed green salad or Caesar-style salad.
- Soups and stews: These crisps add texture to creamy soups; place gently on top just before serving so they stay crisp. They were made to pair with warm, soothing bowls and are delightful with a vegetable-based chowder or tomato basil soup.
- Sandwich accent: Layer a few crisps into a sandwich or inside a hot melt for extra crunch and savory depth.
Pairings
- Cheesy dips, garlic-infused olive oil, or a spicy tomato sauce complement the salty-sweet pepperoni and the three-cheese blend.
- For a lighter contrast, serve with a crisp green salad dressed simply with lemon and olive oil.
- If you want other snack companions, try a platter with roasted nuts, marinated olives, and sliced bell peppers.
Creative variations
- Turn them into mini nachos by topping each crisp with a tiny dollop of guacamole and a few minced pickled jalapenos.
- Make a caprese-style crisp with a tiny basil leaf and a halved cherry tomato just before serving.
- Swap in different cheeses such as smoked gouda or Gruyere for a deeper flavor profile.
Storage (fridge and freezer)
- Short-term room temperature: Store in an airtight container for up to 24 hours if your kitchen is cool and they were thoroughly cooled before storing. This keeps them mildly crisp for quick snacking.
- Refrigerator: For longer storage, place crisps in a single layer in an airtight container with parchment between layers. They will keep up to 4 days. Let them come to room temperature briefly before reheating.
- Freezer: Freeze on a single layer on a baking sheet until firm, then transfer to a freezer-safe airtight container with parchment between layers. Freeze up to 1 month. Reheat directly from frozen, adding an extra minute or two.
Best reheating methods to restore crispness
- Air fryer: 300°F for 2 to 4 minutes. Check often to avoid over-browning. This yields the most even, fast crisping.
- Toaster oven: 325°F for 3 to 6 minutes. Place on a rack or tray and watch closely.
- Conventional oven: Preheat to 350°F and bake on a lined sheet for 5 to 8 minutes.
- Microwave: Not recommended except in a pinch. Microwaving will make them soft. If you must use it, zap for 15 to 20 seconds and then crisp in a toaster oven or air fryer.
Presentation tips for serving to guests
- Serve on a warm plate for immediate snacking, or on a room-temperature platter so guest hands do not cool the crisps down too quickly.
- Garnish the platter with sprigs of parsley and small bowls of optional garnishes such as extra red pepper flakes, lemon wedges for brightness, or a simple herb dip.
Helpful Notes & Variations
Flavor Boosters
- Swap in a small sprinkle of smoked paprika into the cheese mix for a subtle smoky note that plays well with turkey or beef pepperoni.
- For an herby lift, fold in 1 teaspoon of finely chopped fresh rosemary or thyme into the cheeses.
- If you like an umami boost, add 1 tablespoon of finely grated aged Asiago or Pecorino Romano to the Parmesan.
Ingredient substitutions and dietary adaptations
- Pork-free: Use turkey or beef pepperoni, or a vegetarian pepperoni made from plant proteins. Many grocery stores sell plant-based pepperoni that crisps up well.
- Gluten-free: The base recipe is naturally gluten-free if your seasonings and pepperoni are labeled gluten-free.
- Vegetarian: Use plant-based pepperoni slices or omit meat and make pure cheese crisps. Add a few capers or sun-dried tomato pieces for flavor.
- Dairy-free: Use firm dairy-free melting cheese shreds; results vary greatly with brand, so test one or two before serving to a crowd.
Common mistakes and how to avoid them
- Mistake: Overcrowding the baking sheet. Result: crisps merge into each other. Fix: Leave space between pieces and use a second sheet if needed.
- Mistake: Using pre-shredded cheese only. Result: less uniform melting and more powdery texture. Fix: shred cheeses from blocks for best melt and crisp.
- Mistake: Baking at too high a temperature. Result: pepperoni burns before cheese sets. Fix: Stick to 375°F and watch closely in the last few minutes.
- Mistake: Not cooling on a wire rack. Result: steam makes them soggy. Fix: Transfer crisps to a wire rack as soon as you can lift them.
Experience-based tips I learned the hard way
- Let the sheet rest for a minute after baking before attempting to move the crisps. Freshly melted cheese can tear easily. A short rest firm up the edges just enough for safe handling.
- If you want a larger lacey edge, use a little more cheese per piece; for a thinner, more delicate crisp use slightly less. Keep portions consistent with a small scoop.
- If baking for a crowd, rotate pans halfway through baking for even color and texture across all trays.
Conclusion
These Pepperoni Cheese Crisps are such an easy way to bring cozy flavor and crisp texture to any gathering or quiet night in. They shine because they are fast, use straightforward pantry cheeses and savory turkey or beef pepperoni, and require almost no active prep time. You get buttery melted cheese with a crunchy, lacy edge and a bold, salty pepperoni bite in every piece. Try this recipe tonight and notice how quickly it becomes a favorite for casual entertaining and comfort snacking. If you want to explore similar crunchy cheese ideas, check out this detailed guide to making pizza at home for more inspiration, and if you love crisp cheese snacks try the Everything Parmesan Crisps recipe for another quick batch treat. If you make these, please leave a comment, a star rating, and pin this recipe to share the joy.
Frequently Asked Questions
Can I make this recipe ahead of time?
Yes, you can. Make the crisps completely, cool them, and store them in an airtight container. They hold well for up to 24 hours at room temperature in a cool kitchen or up to 4 days refrigerated. For a party, bake earlier in the day and re-crisp in a toaster oven or air fryer just before serving to restore that fresh-from-the-oven texture.
How should I store leftovers and how long do they last?
Leftovers are best stored in a single layer or with parchment between layers in an airtight container. At room temperature they are fine for about 24 hours if your kitchen is cool. In the refrigerator, plan on up to 4 days. For longer keeping, freeze crisps on a flat tray until solid, then stack in a freezer-safe container with parchment between layers, up to 1 month.
What is the best way to reheat or serve this recipe after storage?
The air fryer is the fastest and most reliable method: 300°F for 2 to 4 minutes brings back crispness. A toaster oven at 325°F for about 4 to 6 minutes also works well. If using a conventional oven, 350°F for around 5 to 8 minutes should do the trick. Avoid the microwave unless you only have a few seconds to warm them and then immediately crisp them in a toaster oven.
Can I adjust or substitute ingredients to fit my preferences?
Absolutely. Use turkey or beef pepperoni if you avoid pork, or plant-based pepperoni for vegetarian diets. Try smoked cheeses, diced sun-dried tomatoes, or add herbs for different flavor directions. Remember that shredding your own cheese from blocks produces the best melt and crisp texture.
Do you have tips to ensure the best texture and flavor every time?
Yes. Use freshly shredded cheese when possible, space the pepperoni so cheese can spread and lace outward, bake on a lined sheet and cool on a wire rack, and reheat with dry heat to restore crispness. Keep an eye on the oven in the final minute to avoid over-browning, and experiment with small changes like extra Parmesan for more savory depth.
Enjoy these little crisps as a reliable, comforting snack or an elegant mini-appetizer. If you give the recipe a try, tell me how you made it your own.
Pepperoni Cheese Crisps
Ingredients
Method
- Preheat your oven to 375°F (190°C).
- Line a large baking sheet with parchment paper or a silicone baking mat.
- Combine the shredded mozzarella, sharp cheddar, and Parmesan in a medium bowl. Mix well.
- Season the cheese mixture with Italian seasoning and garlic powder. If desired, add red pepper flakes.
- Prepare the pepperoni by cutting large slices in half.
- Lay the pepperoni slices in a single layer on the prepared baking sheet.
- Top each pepperoni slice with a generous spoonful of the cheese mixture, pressing lightly.
- Bake for 8 to 10 minutes until golden and crisp.
- Remove from the oven and let cool on the baking sheet for a few minutes. Then transfer to a wire rack.
- Serve warm or at room temperature, garnished with parsley if desired.