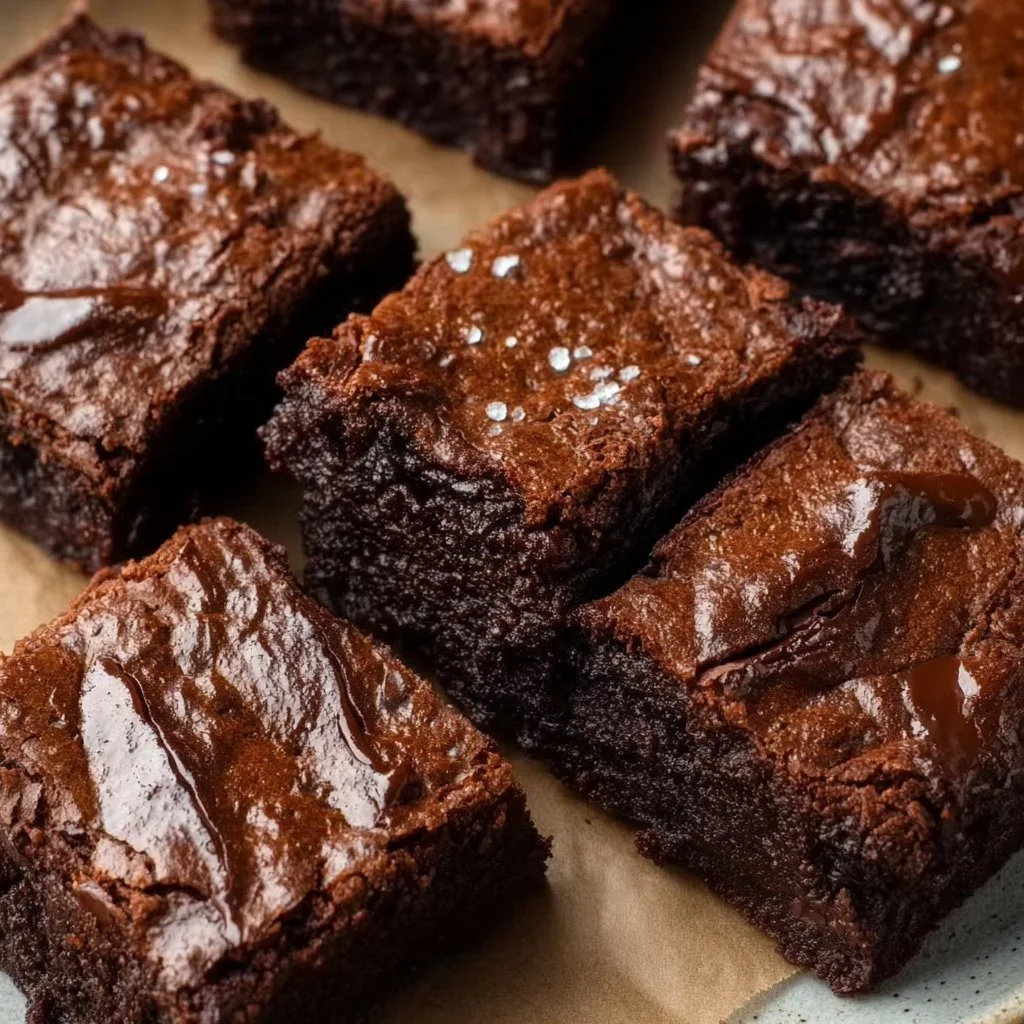
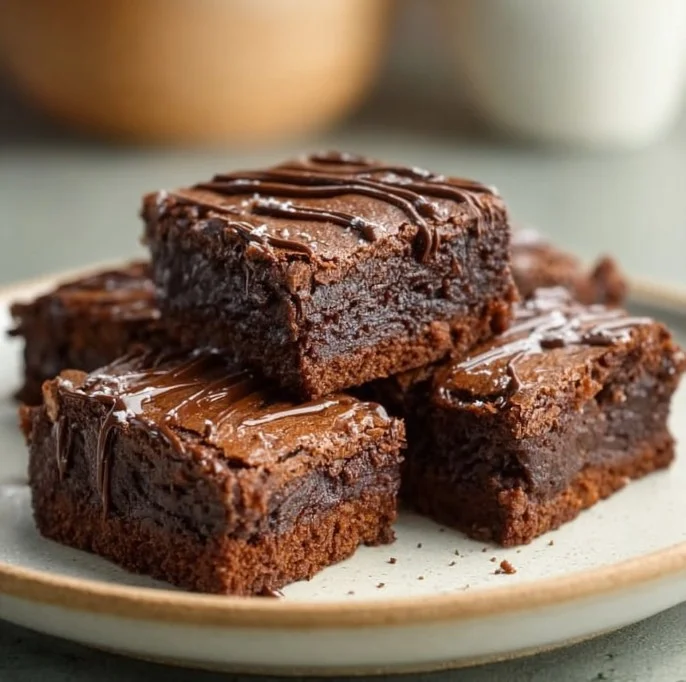
Flourless Greek Yogurt Brownies
There’s something infinitely comforting about sinking your spoon into a warm, fudgy brownie—especially when it’s a little lighter and whispers of tangy creaminess. Flourless Greek Yogurt Brownies are exactly that: rich, chocolatey squares made with pantry-friendly ingredients and a boost of protein from plain Greek yogurt. They’re perfect for cozy seasonal baking when you want a treat that’s both homey and a touch healthier than the classic. If you enjoy fudgy twists on favorites, like my take on banana bread brownies, you’ll find these flourless brownies satisfy the same comfort-food craving with less fuss.
Why Try Flourless Greek Yogurt Brownies?
- They’re naturally gluten-free (when you ensure cocoa and chips are GF), making them a great option for guests with sensitivities.
- Greek yogurt adds tang, moisture, and protein, balancing the sweetness and giving a tender crumb.
- Quick to mix up, minimal equipment, and flexible with sweeteners and toppings—perfect for seasonal variations.
Ingredients & Equipment
Ingredients:
- 1 cup plain Greek yogurt
- 2 eggs
- 1/2 cup unsweetened cocoa powder
- 1/2 tsp baking powder (optional for lift)
- 1/4 cup maple syrup or honey (or sweetener of choice)
- 1/2 tsp vanilla extract
- Pinch of salt
- Optional: chocolate chips for topping
Notes:
- Use full-fat Greek yogurt for the creamiest texture; low-fat works but may yield slightly less richness.
- Sweetener: maple syrup gives a warm, autumnal flavor; honey is floral and lovely in winter. Use a granulated sweetener (sugar, coconut sugar, or a granulated sugar substitute) if you prefer a firmer, less glossy top—reduce the amount slightly if swapping.
- Cocoa powder: Dutch-processed cocoa will yield a deeper flavor and darker color; natural cocoa gives a bright chocolate tang. Either works.
Equipment:
- 8×8-inch baking dish (or similar small square pan)
- Parchment paper or nonstick spray for lining/greasing
- Whisk and mixing bowl (or a blender for a super-smooth batter)
- Spatula for spreading
- Measuring cups and spoons
- Toothpick or cake tester to check doneness
- Oven (preheated to 350°F / 175°C)
- Optional helpful tools: a small food processor or blender to fully incorporate yogurt and eggs, an instant-read thermometer to check internal temperature (target around 200–205°F for a set center), and an offset spatula for smoothing.
If you like little chilled chocolate treats, try pairing flavors with a simple no-bake snack like chocolate strawberry yogurt clusters for dessert boards.
Step-by-Step Instructions (with tips)
-
Preheat and prepare:
- Preheat your oven to 350°F (175°C). Line an 8×8-inch baking dish with parchment, leaving some overhang for easy removal, or grease the pan well with butter or nonstick spray.
Tip: An aluminum pan heats fast; if using glass, lower the oven temperature by 25°F and expect a slightly longer bake.
- Preheat your oven to 350°F (175°C). Line an 8×8-inch baking dish with parchment, leaving some overhang for easy removal, or grease the pan well with butter or nonstick spray.
-
Combine wet ingredients:
- In a medium bowl, whisk together 1 cup plain Greek yogurt, 2 eggs, 1/4 cup maple syrup or honey (or sweetener of choice), and 1/2 tsp vanilla extract until smooth and slightly aerated.
Tip: For an extra silky batter, blend the wet ingredients briefly in a blender or food processor to break down any yogurt lumps.
- In a medium bowl, whisk together 1 cup plain Greek yogurt, 2 eggs, 1/4 cup maple syrup or honey (or sweetener of choice), and 1/2 tsp vanilla extract until smooth and slightly aerated.
-
Add dry ingredients:
- Stir in 1/2 cup unsweetened cocoa powder, 1/2 tsp baking powder (optional), and a pinch of salt until well combined. Scrape the bowl so there are no streaks of cocoa.
Tip: Sift the cocoa if it’s lumpy, or whisk vigorously. If you’d like a cakier brownie, add the baking powder; if you prefer dense fudginess, omit it.
- Stir in 1/2 cup unsweetened cocoa powder, 1/2 tsp baking powder (optional), and a pinch of salt until well combined. Scrape the bowl so there are no streaks of cocoa.
-
Transfer to the pan:
- Pour the batter into the lined or greased 8×8 pan and spread evenly with a spatula. Smooth the top for an even bake.
Tip: The batter will be thicker than a cake batter but pourable. If it’s unusually stiff, whisk in a teaspoon of milk or water to loosen.
- Pour the batter into the lined or greased 8×8 pan and spread evenly with a spatula. Smooth the top for an even bake.
-
Add toppings (optional):
- Sprinkle chocolate chips across the top for melty pockets, or press chopped nuts, sea salt flakes, or swirls of almond butter for variety.
Tip: Press the chips gently into the batter so they don’t sink entirely.
- Sprinkle chocolate chips across the top for melty pockets, or press chopped nuts, sea salt flakes, or swirls of almond butter for variety.
-
Bake:
- Bake for 20–25 minutes, or until the center is set. The edges should feel slightly firm and a toothpick inserted near the center will come out with a few moist crumbs but not wet batter.
Tip: Ovens vary—start checking at 18 minutes. If you prefer gooier brownies, err on the shorter side; for a more set, sliceable bar, aim toward 25 minutes. For precision, an internal temperature of about 200–205°F means done.
- Bake for 20–25 minutes, or until the center is set. The edges should feel slightly firm and a toothpick inserted near the center will come out with a few moist crumbs but not wet batter.
-
Cool and slice:
- Let the pan cool on a wire rack for at least 20–30 minutes. For the best texture and cleaner slices, chill in the fridge for an hour, then lift the parchment out and cut into squares.
Tip: These brownies firm up as they cool because of the yogurt, so resist the urge to slice hot.
- Let the pan cool on a wire rack for at least 20–30 minutes. For the best texture and cleaner slices, chill in the fridge for an hour, then lift the parchment out and cut into squares.
Variations and kitchen tips:
- Add-ins: stir in a handful of chopped walnuts, pecans, or a scoop of protein powder (reduce cocoa by a tablespoon if adding powder) for texture.
- Citrus twist: fold in 1 tsp finely grated orange zest to brighten the chocolate—seasonal and lovely in winter.
- Spiced version: add 1/4 tsp cinnamon and a pinch of ground ginger for a cozy fall or holiday profile.
- Dairy-free swap: use a thick, dairy-free yogurt alternative (coconut yogurt works best) to make vegan-friendly brownies, and replace eggs with a vegan binder like 2 tbsp ground flaxseed mixed with 6 tbsp water (let sit 5 minutes).
- If you find the batter too dense, whipping the eggs first until light will add lift and air for a softer crumb—just fold in gently.
Storage, Freezing & Make-Ahead Tips
Storing leftovers:
- At room temperature: Store cooled brownies in an airtight container for 1–2 days. Because of the yogurt, they’re best refrigerated if not eaten within a day.
- In the refrigerator: Keep brownies in an airtight container for up to 5 days. Place parchment between layers to prevent sticking.
- Pro tip: For the fudgiest texture, bring refrigerated brownies to room temperature for 15–20 minutes before serving, or warm briefly in the microwave (10–15 seconds).
Freezing:
- To freeze whole: Cool completely, wrap tightly in plastic wrap, then foil, and freeze for up to 3 months. Thaw in the refrigerator overnight.
- To freeze slices: Layer squares between parchment in a freezer-safe container or bag. Thaw individual pieces at room temperature or microwave for a few seconds to revive softness.
Make-ahead:
- Batter can be made and stored in the refrigerator for up to 24 hours before baking, but expect a marginally different rise and texture—stir well before pouring into the pan.
- Baked brownies can be prepared a day ahead for gatherings and chilled; serve slightly warmed or at room temperature.
Portioning advice:
- For party servings, cut into 24 small squares for bite-sized treats; for dessert plates, 9 large squares are satisfying. If serving with ice cream, smaller portions pair better to keep the calories balanced.
How to Use / Serve This Dish
Serving ideas:
- Classic: Serve warm with a scoop of vanilla ice cream and a drizzle of maple syrup or a sprinkle of flaky sea salt.
- Breakfast-ish treat: Top a square with a dollop of Greek yogurt and fresh berries for a brunch-friendly indulgence—protein-rich and sweet.
- Holiday dessert board: Include mini brownies as part of a seasonal board with nuts, dried fruit, and dark chocolate squares for guests to pick at.
- Guiltless pairing: A slice alongside strong black coffee or a spiced chai makes for a cozy seasonal afternoon snack.
Creative variations:
- Brownie parfait: Crumble cooled brownies and layer with Greek yogurt and raspberry compote for a trifle-like parfait. This echoes a lighter take on a dessert while leaning into the yogurt theme.
- Brownie bites: Press batter into a greased mini muffin tin and reduce baking time to 12–15 minutes for portable brownie bites—top with a nut, mini chip, or a dollop of jam.
- Add fruit: Fold chopped pears or mashed banana into the batter (use slightly less yogurt if the fruit is very moist) for a seasonal twist—pear is excellent in fall/winter; berry swirls work in spring/summer.
If you’re pulling together a full menu, the bright, savory notes of a simple lunch bowl balance sweets nicely—consider a recipe like these Greek chicken bowls for a savory main that pairs well with chocolate-based desserts.
FAQ
Q: Are these brownies really flourless and gluten-free?
A: Yes—this recipe uses no flour, relying on Greek yogurt, cocoa, eggs, and sweetener for structure. To keep them gluten-free, use certified gluten-free cocoa powder and chocolate chips.
Q: Can I substitute the eggs?
A: Eggs provide structure and moisture; for a vegan or egg-free version, try a flax "egg" (1 tbsp ground flaxseed + 3 tbsp water per egg) or a commercial egg replacer. Texture will be denser and may need slightly longer baking.
Q: How long will these keep at room temperature?
A: Because they contain yogurt, it’s safest to keep them at room temperature for no more than 1–2 days. Refrigerate for longer storage (up to 5 days).
Q: Can I use flavored yogurt instead of plain?
A: Plain Greek yogurt is recommended to control sweetness and maintain a balanced tang. Flavored yogurts will change the flavor profile—vanilla might work, but fruit-flavored yogurts can add unexpected tartness or sweetness.
Tips for Troubleshooting
- Too dense? Make sure eggs are fully whisked and consider beating them a bit longer to incorporate air; also avoid overpacking the batter.
- Too dry? Reduce baking time slightly next time, or add another tablespoon of yogurt to the batter to increase moisture.
- Sinking center? Check oven temperature with an oven thermometer—too hot or too cold can affect rise and setting. Also avoid opening the oven repeatedly during baking.
Conclusion
These Flourless Greek Yogurt Brownies are a cozy, seasonal twist on a classic that bring rich chocolate flavor without flour and with a pleasant tang from Greek yogurt. They’re flexible—perfect for weeknight baking, holiday gatherings, or when you want something indulgent but straightforward. If you’d like to explore similar recipes and variations, check out a few inspired takes like Greek Yogurt Brownies (Gluten Free, High Protein) for a protein-focused spin, Flourless Greek Yogurt Brownies – MattsfitChef for another simple method and tips, or this pared-down 4 Ingredient Yogurt Brownies (No Flour, Refined Sugar, Eggs, Butter …) to see how minimal ingredients can still yield big flavor. Try them this season, share a pan with loved ones, and tell me how you customize yours—I love hearing new idea swaps and topping suggestions!
Flourless Greek Yogurt Brownies
Ingredients
Method
- Preheat your oven to 350°F (175°C). Line an 8x8-inch baking dish with parchment or grease with butter or nonstick spray.
- In a medium bowl, whisk together Greek yogurt, eggs, maple syrup or honey, and vanilla extract until smooth.
- Stir in cocoa powder, baking powder, and salt until combined.
- Pour the batter into the prepared pan and spread evenly.
- Sprinkle chocolate chips on top or press nuts into the batter.
- Bake for 20-25 minutes. Check for doneness by inserting a toothpick.
- Let cool on a wire rack for at least 20-30 minutes before slicing into squares.