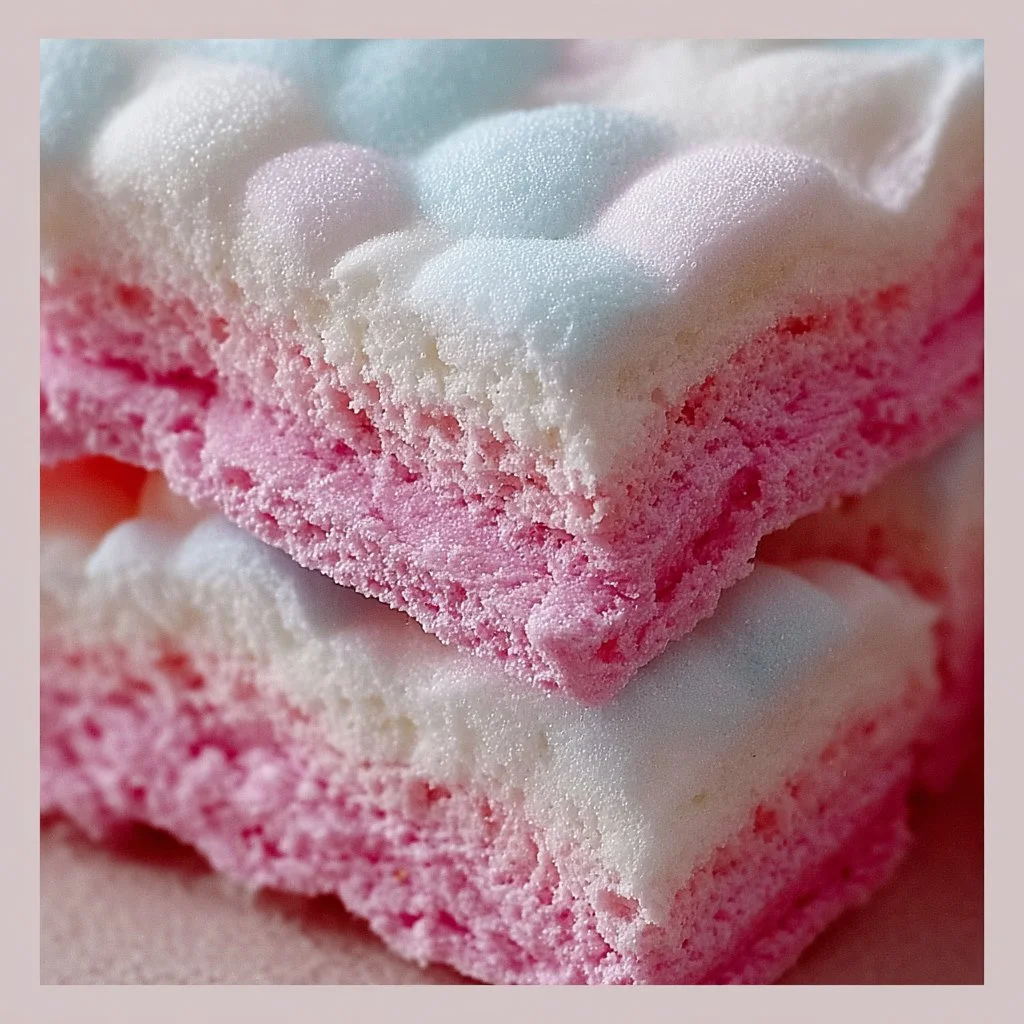
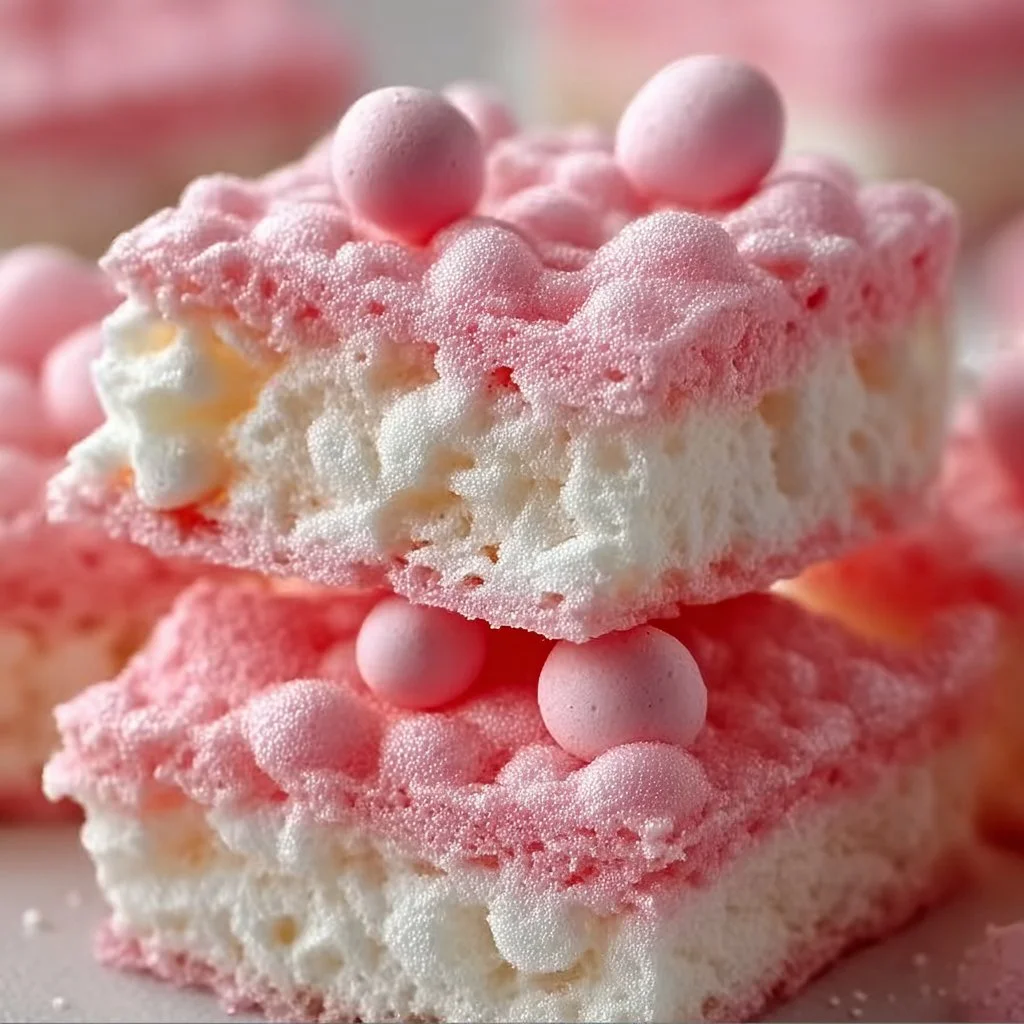
There’s something undeniably whimsical about a dessert that tastes like a childhood daydream — soft, sweet, and a little bit playful. Bubblegum Cloud Slices are exactly that: light-as-air puffed rice bars infused with bubblegum syrup and melty marshmallow, finished with optional sprinkles and pastel color. They’re perfect for seasonal gatherings (think spring picnics, Easter baskets, or a pastel-themed summer party) or any time you want to put a smile on someone’s face. With simple pantry staples and a few helpful tools, you can make these bright, comforting treats from scratch in under 30 minutes — and they hold together beautifully for sharing, gifting, or nibbling at home.
Ingredients & Equipment
Ingredients
- 2 cups marshmallows
- 1 cup bubblegum flavored syrup
- 1/4 cup unsalted butter
- 3 cups puffed rice cereal
- Food coloring (optional)
- Sprinkles (optional)
Equipment and helpful tools
- Large saucepan (or a heavy-bottomed pot)
- Silicone spatula (or wooden spoon) for stirring
- Greased 8×8-inch baking dish or similar size (or line with parchment)
- Measuring cups
- Microwave-safe bowl (optional, for melting mini batches)
- Candy thermometer (optional, if you like to monitor sugar temperature)
- Non-stick spray or butter for greasing
- Sharp knife for cutting, or cookie cutters for fun shapes
Notes
- Puffed rice cereal gives the bars a cloud-like, airy texture — you can substitute with crispy rice cereal if that’s what you have on hand.
- Bubblegum syrup varies in sweetness and intensity; taste as you go (see substitutions in the FAQ).
- Food coloring is optional but helps accentuate the bubblegum vibe; gel colors work best because they don’t add liquid.
Step-by-Step Instructions (with tips)
-
Prepare your pan and cereal
- Grease an 8×8-inch baking dish with butter or non-stick spray, or line it with parchment paper leaving a little overhang to lift the bars out easily. Measure out 3 cups of puffed rice cereal into a large mixing bowl so it’s ready to go.
- Tip: Lining with parchment makes cleanup and cutting neater.
-
Melt the butter
- In a large saucepan over low heat, melt 1/4 cup unsalted butter. Keep the heat low so the butter doesn’t brown — you want a gentle melt.
- Tip: Use a heavy-bottomed pan to distribute heat evenly.
-
Add marshmallows and bubblegum syrup
- Add 2 cups of marshmallows to the melted butter and pour in 1 cup of bubblegum flavored syrup. Stir continuously until the marshmallows are completely melted and the mixture is smooth and glossy.
- Tip: Use a silicone spatula to scrape the sides and bottom; marshmallows can stick and burn if left unattended. If the marshmallows are stubborn, cover the pan briefly (10–20 seconds) to trap steam and soften them, then stir.
-
Optional: Color the mixture
- If you want a pastel or vibrant bubblegum hue, add a few drops of food coloring and stir until evenly colored. Gel coloring is ideal for vivid shades without thinning the mixture.
- Tip: Start with a tiny amount — colors concentrate as you stir. You can always add more.
-
Combine with puffed rice cereal
- Remove the pan from heat. Pour the melted marshmallow-bubblegum mixture over the bowl of puffed rice cereal. Use the spatula to fold everything together gently but thoroughly so each grain is coated.
- Tip: Work quickly — marshmallow mixtures set as they cool. Wetting your spatula or hands lightly with water or butter can help prevent sticking when mixing and pressing into the pan.
-
Press into the pan
- Transfer the coated cereal into the prepared baking dish. Using a piece of parchment, wax paper, or a buttered spatula, press the mixture evenly into the dish. Press firmly enough to compress the bars into slices, but not so hard that they become dense.
- Tip: For extra sheen and smooth tops, press down with a piece of lightly buttered parchment and smooth it flat.
-
Add sprinkles (optional)
- If you’d like sprinkles on top, gently press them into the surface immediately after pressing the mixture into the pan so they adhere.
- Tip: Use small, non-melting sprinkles so they keep their shape and color.
-
Cool and cut
- Allow the pan to cool completely at room temperature for at least 30–60 minutes. Once set, lift the slab out using the parchment overhang and place on a cutting board. Use a sharp knife (run it under hot water and dry between cuts for cleaner slices) to cut into squares or shapes.
- Tip: If you prefer perfectly shaped slices, chill the slab for 10–15 minutes in the refrigerator before cutting.
-
Optional finishes
- Drizzle with melted white chocolate, press mini marshmallows on top, or sandwich two slices with a thin smear of frosting for a party treat.
- Variation: For a toasted flavor, carefully toast a few of the marshmallows over a gas burner or with a kitchen torch before melting them into the mixture; this adds a caramelized depth to the flavor.
Variations and kitchen tips
- Microwave method: Combine butter and marshmallows in a large microwave-safe bowl; microwave in 30-second bursts, stirring in between, until smooth. Stir in bubblegum syrup, then fold in cereal. This is faster but watch carefully to avoid scorching.
- Toffee-style: Add 1/4 teaspoon of salt and 1/2 teaspoon vanilla to contrast the sweetness.
- Crispy vs. chewy: Press more firmly for chewier bars; press lightly for lighter, cloudier bites.
- Roasting vs. boiling: You don’t need to boil anything here. If you like a smoky marshmallow flavor, roasting marshmallows before melting can simulate that charred, campfire note without changing the rest of the method.
Storage, Freezing & Make-Ahead Tips
Storing
- At room temperature: Place slices in an airtight container with layers separated by parchment or wax paper. They’ll stay fresh for 3–5 days at cool room temperature.
- Refrigeration: You can refrigerate to firm them slightly for easier cutting — keep in an airtight container. Refrigeration may make them a little chewier; bring to room temperature for softer bites.
Freezing
- To freeze individual slices, wrap each square tightly in plastic wrap, then place wrapped pieces in a freezer-safe bag or container. They’ll keep well for up to 2 months.
- Thawing: Transfer slices to the refrigerator for a few hours or leave at room temperature for 30–60 minutes before serving. Avoid microwaving frozen bars — they can get soggy.
Make-ahead tips
- Prepare the slab and cut just before serving for the freshest edges. If making ahead for a party, slice and arrange 1–2 days in advance and store layers separated with parchment.
- If you’re planning to transport them, press firmly in the pan and chill slightly to prevent shifting; store in a shallow, well-sealed container.
Portioning advice
- Standard 8×8 pan yields about 9–16 squares depending on size. For small party bites, cut into 1–1.5 inch squares. For gift boxes, wrap 2–3 per small box or cellophane bag with a ribbon.
How to Use / Serve This Dish
Serving ideas
- Party plates: Arrange Bubblegum Cloud Slices on a pastel platter with matching cupcakes, fruit skewers, or sugar cookies for a cohesive dessert table.
- Ice cream companion: Serve a slice alongside vanilla or cotton candy ice cream; crumble a bit over a scoop for extra texture and nostalgia.
- Snack packs: Wrap individual squares in parchment and tie with twine for favors at baby showers, birthday parties, or classroom events.
- Dessert kebabs: Thread small squares, mini marshmallows, and fresh berries alternately on wooden skewers for a playful dessert display.
Creative variations
- Sandwich cookies: Use two small cut-outs to sandwich a thin layer of marshmallow fluff or buttercream.
- Mini-trifle: Crumble slices into cups layered with whipped cream and fresh fruit for a whimsical parfait.
- Themed shapes: Use cookie cutters to make star, heart, or cloud shapes for seasonal themes like Valentine’s Day, Pride parades, or springtime celebrations.
Flavor pairings
- Drinks: Pair with a glass of cold milk, a lightly sweetened iced tea, or an aromatic herbal tea for contrast.
- Texture balance: Serve next to something tart (lemon bars, fresh raspberries) to balance the sweetness of the bubblegum syrup.
FAQ
Q: Can I substitute the bubblegum syrup with something else?
A: Yes. If you don’t have bubblegum syrup, you can use strawberry or raspberry syrup for a fruity pink version, or use vanilla extract plus pink food coloring as a mild alternative. Keep in mind the flavor profile will change — bubblegum syrup gives a distinctive candy-like taste that’s hard to replicate exactly.
Q: How long will these slices keep at room temperature?
A: Stored in an airtight container at cool room temperature, Bubblegum Cloud Slices will stay fresh for about 3–5 days. If your kitchen is warm or humid, refrigerate them to prevent sticking or softening.
Q: Can I make these vegan or dairy-free?
A: Yes — use dairy-free butter (such as plant-based sticks) and vegan marshmallows (be sure they’re gelatin-free). Confirm that your bubblegum syrup is vegan (some contain colorings or syrups derived from animal products). The texture will be very similar with the right vegan marshmallows.
Q: Why did my bars turn out too hard or too sticky?
A: Too hard can result from overcooking the marshmallow mixture or pressing too firmly when packing into the pan. Too sticky often happens when not enough cereal is used for the marshmallow ratio or when humidity is high. If the mixture seems runny, add a small handful more puffed rice cereal and press gently.
Q: Can I add mix-ins like chocolate chips or nuts?
A: Yes, but add mix-ins sparingly. Chocolate chips can melt into the warm mixture; fold them in last or press on top after pressing the slab into the pan. Nuts add great texture but choose finely chopped ones so they don’t make cutting difficult.
Conclusion
Bubblegum Cloud Slices are a joyful, seasonal treat that blend the comfort of homemade marshmallow bars with a playful bubblegum twist — perfect for celebrating bright spring mornings, pastel-themed parties, or whenever you want a nostalgic sweet. They’re quick to make, endlessly customizable, and delightful to share with friends and family. If you loved this recipe, you might enjoy seeing another take on the concept at Bubblegum Cloud Slices – Sweet and Fluffy Candy Treat, or explore a richer, fudge-style version at Bubblegum Cloud Fudge – NorthEast Nosh Recipes. Give these slices a try, snap a photo, and share them with someone who appreciates a little sweet whimsy — I’d love to hear how yours turn out!
Bubblegum Cloud Slices
Ingredients
Method
- Grease an 8x8-inch baking dish or line it with parchment paper.
- Measure out 3 cups of puffed rice cereal into a large mixing bowl.
- In a large saucepan over low heat, melt 1/4 cup unsalted butter.
- Add 2 cups of marshmallows and 1 cup of bubblegum syrup to the melted butter.
- Stir continuously until melted and smooth.
- If desired, add a few drops of food coloring and mix until uniform.
- Pour the marshmallow mixture over the puffed rice cereal and fold together gently.
- Transfer the mixture into the prepared baking dish and press it down evenly.
- Press sprinkles into the surface immediately after pressing the mixture.
- Allow cooling at room temperature for 30-60 minutes before cutting.