Cheesecake Recipes with Peach Filling | Peach Topping for Cheesecake, Cobbler Topping for Cheesecake, Peach Cobbler Pie
Cheesecake recipes with peach filling | Peach topping for cheesecake, Cobbler topping for cheesecake, Peach cobbler pie are delights that bring comfort to any table. The creamy texture of cheesecake combined with the sweet, juicy flavor of ripe peaches creates a harmonious blend that is sure to impress your family and friends. Whether you’re looking to create a light dessert for a summer gathering or a comforting treat for a chilly evening, this combination is seasonal and delicious. In this blog post, we’ll explore various ways to incorporate peaches into your cheesecake creations, ensuring that each bite is full of warmth and flavor. You may also find Creamy Rotel Pasta With Ground Beef For Cozy Weeknight Dinners useful.
Ingredients & Equipment
To make a delicious peach cheesecake or cobbler topping, here’s what you’ll need: You may also find Grilled Peaches With Balsamic Chicken useful.
Ingredients
- For the Cheesecake:
- 1 ½ cups graham cracker crumbs
- ½ cup unsalted butter, melted
- 2 cups cream cheese, softened
- 1 cup granulated sugar
- 3 large eggs
- 1 teaspoon vanilla extract
- 1 teaspoon lemon juice
- For the Peach Filling:
- 4 fresh peaches, peeled and sliced
- ½ cup granulated sugar
- 1 tablespoon cornstarch
- 1 tablespoon lemon juice
- ½ teaspoon cinnamon (optional)
Equipment
- 9-inch springform pan
- Mixing bowls
- Electric mixer
- Whisk
- Rubber spatula
- Sharp knife
- Baking tray
Using an electric mixer will make blending the ingredients a breeze, allowing for a smooth and creamy texture in your cheesecake.
Step-by-Step Instructions
Let’s dive into the process of making a flavorful peach-filled cheesecake and its delightful toppings.
Step 1: Prepare the Crust
Start by preheating your oven to 350°F (175°C). In a mixing bowl, combine the graham cracker crumbs with melted butter until well mixed. Press this mixture into the bottom of a 9-inch springform pan to create an even layer. Bake for about 10 minutes, then let it cool.
Step 2: Make the Cheesecake Filling
In a large mixing bowl, beat the softened cream cheese until smooth. Gradually add the sugar, mixing until combined. Add the eggs one at a time, ensuring they are fully incorporated. Finally, mix in the vanilla extract and lemon juice until smooth.
Step 3: Prepare the Peach Filling
In a separate bowl, combine the sliced peaches with sugar, cornstarch, lemon juice, and cinnamon (if using). Stir gently to coat the peaches evenly and set aside to let the flavors marry.
Step 4: Assemble and Bake
Pour half of the cheesecake filling into the cooled crust and spread it evenly. Layer the peach filling over the cheesecake and pour the remaining cheesecake mixture on top. Bake in the preheated oven for 50-60 minutes, or until the center is set and slightly jiggly.
Step 5: Cool and Serve
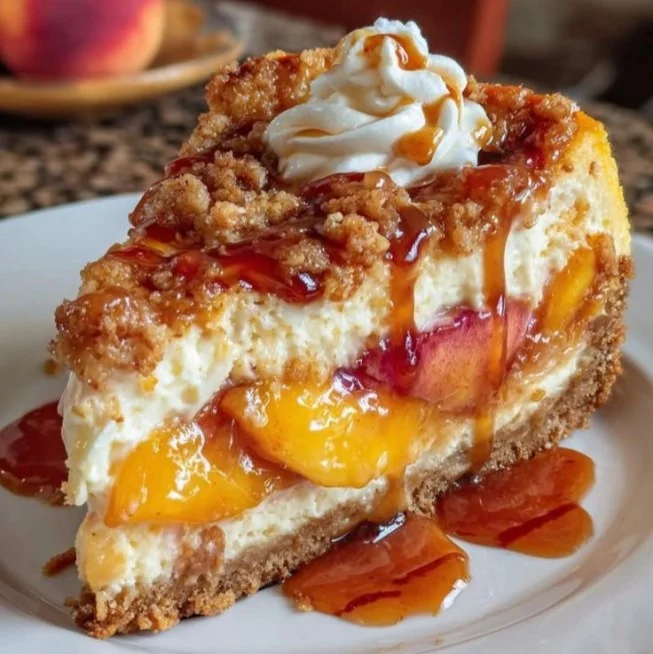
Once baked, turn off the oven and let the cheesecake cool in the oven with the door slightly ajar. This helps prevent cracking. After it has cooled to room temperature, refrigerate for at least 4 hours or overnight for the best flavor. Serve chilled, and consider topping with extra peach slices for a beautiful presentation.
For more comforting recipes to accompany your meal, check out this veggie pot pie soup!
Storage, Freezing & Make-Ahead Tips
To ensure your peach cheesecake stays fresh, store leftovers in an airtight container in the refrigerator. It is best consumed within 3-5 days. If you want to make it ahead of time, you can bake the cheesecake and keep it refrigerated for up to two days before serving. For longer storage, consider freezing your cheesecake. Wrap it tightly in plastic wrap and then in aluminum foil, and it can last for up to a month. Thaw in the refrigerator before serving.
How to Use / Serve This Dish
Peach cheesecake can be served on its own or paired with delightful toppings. Consider adding a dollop of whipped cream or a drizzle of peach syrup for extra sweetness. For a fresh twist, serve it alongside a simple fresh salad to balance out the richness of the cheesecake. Alternatively, for those who love a savory twist, grilled peaches might serve as an outstanding side.
FAQ Section
1. Can I substitute the fresh peaches with canned peaches?
Yes, canned peaches can work, but be sure to drain them well to avoid excess moisture in your cheesecake.
2. How long can I keep the cheesecake in the fridge?
The cheesecake can be kept for up to 5 days in the refrigerator when stored properly.
3. Can I use a different type of fruit?
Absolutely! This cheesecake is versatile, and you can experiment with other fruits like cherries or berries.
4. How do I prevent a cracked cheesecake?
Baking at a low temperature and allowing the cheesecake to cool gradually in the oven can help prevent cracks.
Conclusion
In celebrating the flavors of “Cheesecake recipes with peach filling | Peach topping for cheesecake, Cobbler topping for cheesecake, Peach cobbler pie,” the delightful blend of peach and creamy cheesecake offers a perfect dessert for any occasion. Its sweet, juicy filling and rich texture are sure to evoke warmth and comfort, allowing you to create beautiful memories around the table. For those looking to explore more creative peach desserts, try these delicious options: Peach Cobbler Cheesecake – I Heart Recipes and Peach Cobbler Cheesecake – Pies and Tacos. Enjoy baking and sharing these lovely recipes with your loved ones!
Peach Cheesecake
Ingredients
Method
- Preheat your oven to 350°F (175°C).
- In a mixing bowl, combine graham cracker crumbs with melted butter until well mixed.
- Press the mixture into the bottom of a 9-inch springform pan to create an even layer.
- Bake for about 10 minutes, then let it cool.
- In a large mixing bowl, beat the softened cream cheese until smooth.
- Gradually add the sugar, mixing until well combined.
- Add the eggs one at a time, ensuring they are fully incorporated.
- Finally, mix in the vanilla extract and lemon juice until smooth.
- In a separate bowl, combine sliced peaches with sugar, cornstarch, lemon juice, and cinnamon (if using).
- Stir gently to coat the peaches evenly and set aside.
- Pour half of the cheesecake filling into the cooled crust and spread it evenly.
- Layer the peach filling over the cheesecake.
- Pour the remaining cheesecake mixture on top.
- Bake in the preheated oven for 50-60 minutes, or until the center is set and slightly jiggly.
- Once baked, turn off the oven and let the cheesecake cool in the oven with the door slightly ajar.
- After it has cooled to room temperature, refrigerate for at least 4 hours or overnight for the best flavor.
- Serve chilled, optionally topping with extra peach slices.