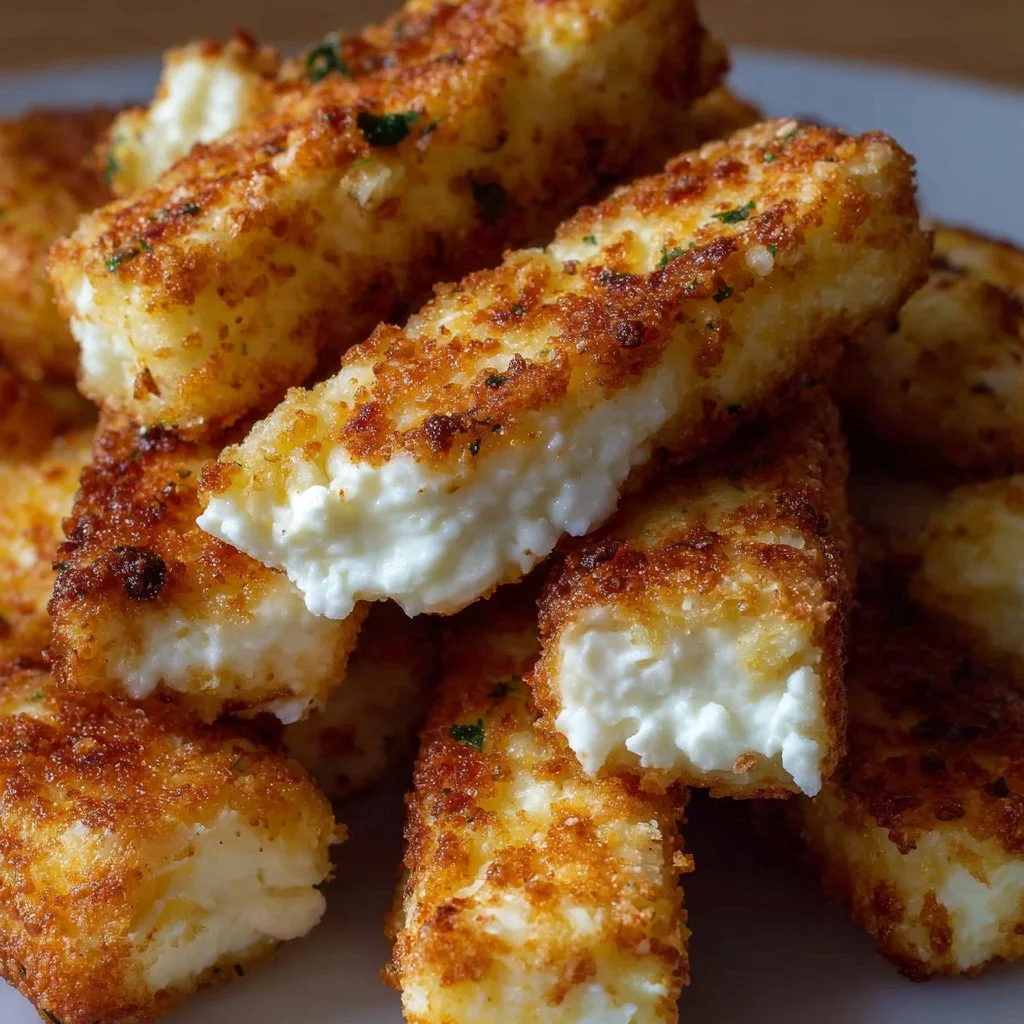
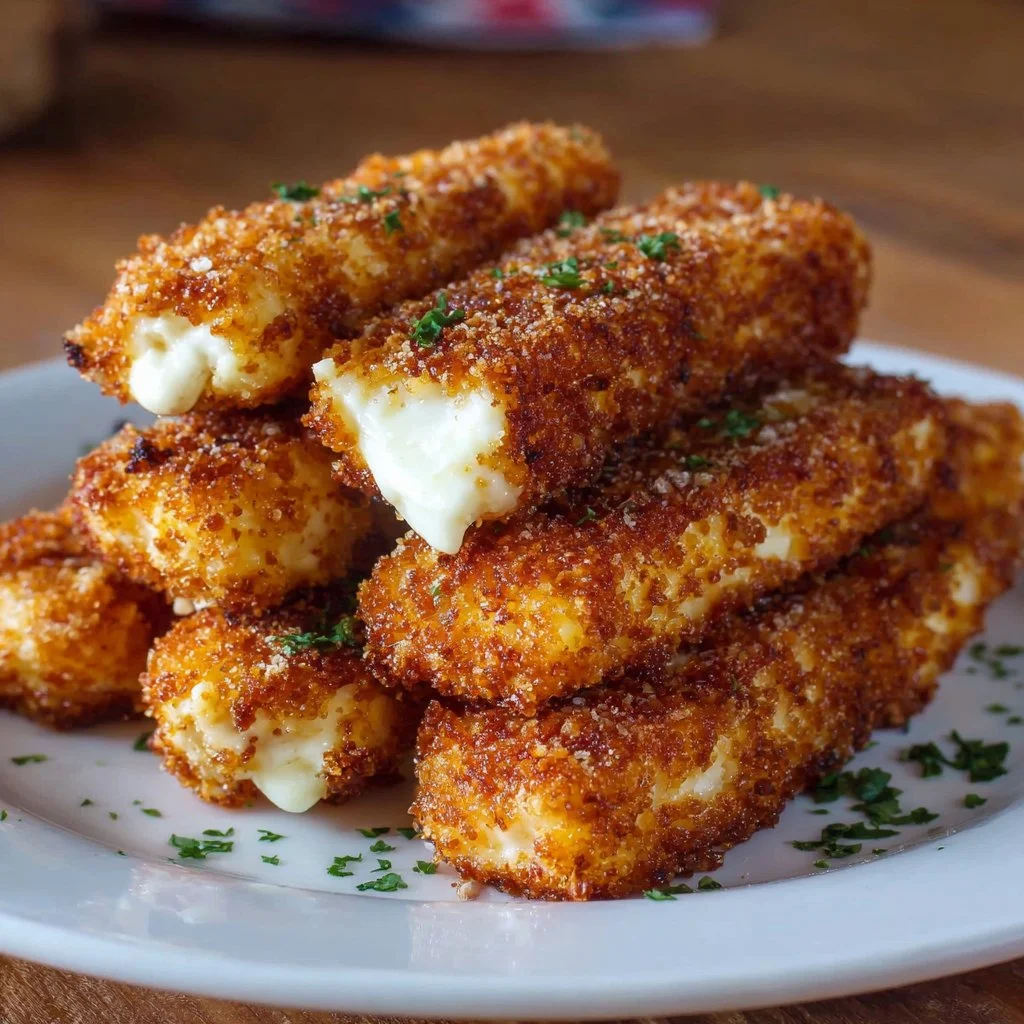
There’s something deeply comforting about finger foods that feel like a hug — warm, cheesy, and homemade. Cottage Cheese Cheese Sticks are an easy, seasonal treat that take the humble cottage cheese and turn it into golden, crispy sticks perfect for chilly afternoons or cozy gatherings. Made with simple pantry ingredients and a short bake time, these cheese sticks are great for fall and winter when we crave warm, savory snacks, yet light enough for spring appetizers too. If you enjoy cottage-cheese-forward bites, you might also love the playful twist found in cheesy muffin tin cottage cheese egg bites, which use many of the same pantry flavors.
Ingredients & Equipment
Ingredients
- 1 cup cottage cheese
- 1 cup shredded cheddar cheese
- 1/2 cup breadcrumbs
- 1 teaspoon garlic powder
- 1/2 teaspoon salt
- 1/4 teaspoon black pepper
Notes on ingredients
- Cottage cheese: Use full-fat for the creamiest texture and best flavor; low-fat works but yields a drier stick. If you like a smoother consistency, briefly pulse the cottage cheese in a blender before mixing.
- Shredded cheddar: Sharp cheddar gives the most savory, tangy bite. You can mix in a milder cheese (like Monterey Jack) for a mellower flavor.
- Breadcrumbs: Plain or panko breadcrumbs both work. Panko gives an extra-crisp exterior; if using seasoned breadcrumbs, reduce added salt slightly.
- Seasonings: Garlic powder keeps the flavor consistent; add 1/2 teaspoon of smoked paprika or a pinch of cayenne for a seasonal smoky or spicy note.
Equipment
- Mixing bowl (medium)
- Measuring cups and spoons
- Baking tray
- Parchment paper or silicone baking mat
- Baking sheet
- Optional: blender or food processor (for smoothing cottage cheese), cookie scoop or small spatula (for forming sticks), kitchen thermometer (if you want to check internal temperature)
Helpful tools
- A blender makes the texture smoother if you prefer a uniform interior.
- A silicone baking mat or parchment ensures easy release and less cleanup.
- A small cookie scoop helps portion evenly so sticks bake uniformly.
If you’re looking for a fresh, chilled cottage cheese snack to serve alongside these warm sticks, try the bright flavors in cucumber cottage cheese bites — they make a nice contrast.
Step-by-Step Instructions (with tips)
These directions will guide you from start to finish. Read through once before you begin so you have everything prepped.
- Preheat your oven to 400°F (200°C).
- In a medium bowl, combine the cottage cheese, shredded cheddar cheese, breadcrumbs, garlic powder, salt, and black pepper. Mix well until the ingredients are fully incorporated.
- Using your hands, form the mixture into small, stick-shaped pieces, about 3–4 inches long.
- Arrange the cheese sticks on a baking sheet lined with parchment paper.
- Bake for 12–15 minutes, or until the cheese sticks are golden-brown and crispy.
- Remove from the oven and let cool for a few minutes before serving.
Detailed tips and variations
- Forming the sticks: If the mixture feels too loose to shape, add an extra tablespoon or two of breadcrumbs, or chill the mixture for 15–20 minutes to firm up. If it’s too dry, stir in a teaspoon of milk or a small beaten egg to bind.
- Uniform size: Use a small ice-cream scoop or tablespoon to portion the mixture before shaping. This ensures even cooking and a consistent bake time.
- Baking versus air-frying versus frying:
- Oven-baked (recommended): Produces a reliably golden exterior and keeps the sticks relatively light. Use the 12–15 minute guideline and rotate the tray halfway through for even browning.
- Air-fryer option: Preheat your air fryer to 375°F (190°C). Arrange sticks in a single layer and air-fry for 8–10 minutes, checking for crispness.
- Pan-frying: Heat a thin layer of oil in a nonstick skillet over medium heat. Fry sticks 2–3 minutes per side until golden and crisp, then drain on paper towels. This yields the crispiest exterior but is less hands-off.
- Flavor boosts: Stir in 1–2 tablespoons finely chopped fresh herbs (chives, parsley, or dill) for brightness. Add 1/4 cup finely diced cooked bacon or ham for a smoky-meaty version. A teaspoon of Dijon mustard or a pinch of smoked paprika lifts the savory profile.
- Cheese swaps: Substitute half the cheddar with mozzarella for a stretchier interior, or use Gruyère for a nuttier, more complex bite.
- Make them gluten-free: Replace breadcrumbs with gluten-free panko or crushed gluten-free crackers.
Storage, Freezing & Make-Ahead Tips
Storing leftovers
- Refrigerate: After the cheese sticks cool completely, store them in an airtight container lined with paper towels to absorb any residual moisture. They’ll keep well in the fridge for 3–4 days.
- Reheating: Re-crisp in a 350°F (175°C) oven for 6–8 minutes or air-fry at 350°F for 3–4 minutes. Microwaving softens the crust, so it’s best avoided if you want crunch.
Freezing
- Flash-freeze first: Place the formed, uncooked cheese sticks on a tray in a single layer and freeze until solid (about 1–2 hours). Transfer frozen sticks to a freezer-safe bag or container.
- Bake from frozen: You can bake them directly from frozen; add an extra 4–6 minutes to the bake time and watch for goldenness.
- Freeze after baking: Baked and cooled sticks can also be frozen. Reheat from frozen in a preheated oven at 350°F for 8–12 minutes.
Make-ahead
- Prep the mixture a day ahead and keep it covered in the refrigerator. Form and bake just before serving, or form the sticks and keep them chilled for a few hours before baking.
- For parties: Double or triple the recipe and use two baking trays. Keep extras warm in a low oven (200°F/95°C) while you finish baking the rest.
Portioning advice
- This recipe makes a small batch — perfect as a snack or appetizer for 2–4 people. For larger crowds, multiply ingredients by 2–4 and bake in batches to ensure crispness.
How to Use / Serve This Dish
Serving ideas
- Dipping sauces: Serve warm with marinara, ranch, honey mustard, or a tangy yogurt-dill dip. A smoky chipotle aioli pairs wonderfully for a seasonal punch.
- Party platter: Add the cheese sticks to a board alongside cured meats, olives, roasted nuts, and sliced apples or pears for a cozy autumn spread.
- Kid-friendly snack: Pair with carrot sticks and fruit slices for a balanced after-school snack.
- Meal addition: Serve as a starter before a bowl of soup (tomato bisque or butternut squash are excellent fall choices), or tuck alongside a fresh salad for a light lunch.
Creative variations and pairings
- Stuffed center: For a gooey center, press a small cube of mozzarella or a dab of pesto into the center of each stick before sealing and baking.
- Seasonal herbs: In spring, brighten flavors with lemon zest and chives; in fall, stir in roasted garlic and thyme.
- Pairing with mains: These cheese sticks make an indulgent side for a barbecue night alongside a hearty mac and cheese; try pairing with a smoky twist like the bold flavors in BBQ chicken mac and cheese for a playful, satisfying meal.
FAQ
Q: Can I use ricotta instead of cottage cheese?
A: Ricotta has a smoother, looser texture and will produce softer sticks. If using ricotta, add an extra 1/3–1/2 cup breadcrumbs and chill the mixture so it firms up before shaping. For best results, drain any excess moisture from ricotta on a fine-mesh sieve or cheesecloth.
Q: How long do these cheese sticks last in the fridge?
A: Properly stored in an airtight container, baked cheese sticks will keep for 3–4 days. To re-crisp, use an oven or air fryer rather than a microwave.
Q: Are these sticks suitable for vegetarians?
A: Yes — the base recipe is vegetarian-friendly if you use vegetarian-friendly cheese (some cheeses use animal-derived rennet). Check your shredded cheddar label if strict vegetarian adherence is required.
Q: Can I make these dairy-free?
A: Dairy-free versions are trickier because cottage cheese provides moisture, tang, and structure. You can experiment with a firm dairy-free ricotta or blended silken tofu plus nutritional yeast for cheesiness, and use gluten-free crumbs as needed. Expect differences in texture and flavor.
Variations to Try
- Herb & Lemon: Add 2 teaspoons lemon zest and 2 tablespoons chopped parsley for a bright, spring-ready version.
- Spicy Jalapeño: Fold in 1 finely diced jalapeño and a pinch of cayenne. Serve with avocado crema.
- Mediterranean: Mix in 1 tablespoon chopped sun-dried tomatoes, 1 tablespoon chopped kalamata olives, and a pinch of oregano.
- Corny Arepa-style twist: If you love corn-based snacks, consider serving these with corn-forward sides or try a warm arepa pairing; the simple, cheesy comfort is reminiscent of arepas with cheese for a Latin-inspired table.
Conclusion
Cottage Cheese Cheese Sticks are a small, seasonal pleasure: familiar, comforting, and endlessly adaptable. Whether you bake them for a cozy night in, serve them at a fall gathering, or pack them as a warm snack for chilly afternoons, they bring homey flavor with minimal fuss. Try the variations and make-ahead tips above, and don’t be shy about making this recipe your own. If you make a batch, I’d love to hear how you flavored them — share your version or pass the recipe along to a friend who enjoys cozy, from-scratch snacks.
Cottage Cheese Cheese Sticks
Ingredients
Method
- Preheat your oven to 400°F (200°C).
- In a medium bowl, combine the cottage cheese, shredded cheddar cheese, breadcrumbs, garlic powder, salt, and black pepper. Mix well until fully incorporated.
- Using your hands, form the mixture into small stick-shaped pieces, about 3–4 inches long.
- Arrange the cheese sticks on a baking sheet lined with parchment paper.
- Bake for 12–15 minutes, or until the cheese sticks are golden-brown and crispy.
- Remove from the oven and let cool for a few minutes before serving.