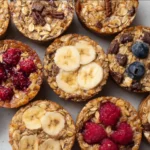
“Healthy Breakfast Cereal Bars,” I said to my friend the other morning as we sipped coffee, “these are the easiest thing to pack and love.” I remember testing the first batch on a rainy Saturday when I only had oats, almond butter, dried apricots, and a jar of honey, and the kitchen smelled like a warm hug for hours. These bars combine rolled oats, your choice of nut butter, honey or maple syrup, chewy dried fruit, crunchy nuts or seeds, a splash of vanilla, and just a pinch of salt. They are chewy, slightly golden, and built for busy mornings, lunchboxes, and mid-hike energy boosts. If you like simple swaps and honest ingredients, you are in the right place. These bars pair beautifully with other after-school snack ideas when you want variety without fuss.
Why You’ll Love This Recipe
- Practical and adaptable: swap nut butters, dried fruit, or seeds to suit preferences and pantry staples.
- Nourishing and filling: oats and nut butter provide sustained energy, ideal for busy mornings or a post-workout snack.
- Comforting textures: chewy centers with a slightly toasted edge deliver the same warm satisfaction as a homemade granola treat.
- Kid friendly and lunchbox-ready: they travel well and rarely cause fuss at snack time.
- Emotionally satisfying: they bring back the cozy vibe of homemade treats, perfect for sharing and gifting.
- Simple, one-bowl assembly: fewer dishes, less stress, more time for coffee and connection.
Ingredients Needed
- 2 cups rolled oats — old-fashioned rolled oats are best for structure; quick oats make a softer, denser bar.
- 1 cup nut butter — almond, peanut, or cashew work beautifully; choose a creamy style for easier mixing and pressability.
- 1/2 cup honey or maple syrup — honey gives a warm floral sweetness, maple syrup adds a deep, caramel-like note; both act as the binding syrup.
- 1/2 cup dried fruits — raisins, cranberries, or chopped apricots add chew, natural sweetness, and pockets of flavor; chop larger fruits like apricots for even distribution.
- 1/2 cup nuts or seeds — almonds, walnuts, or sunflower seeds offer crunch and healthy fats; chop nuts roughly if you like bite-sized texture.
- 1 tsp vanilla extract — a small amount intensifies sweetness and brings depth to the whole bar.
- 1/4 tsp salt — balances sweetness and lifts the other flavors; use fine sea salt or table salt.
Ingredients & Equipment Notes (Optional)
These bars are forgiving, so small swaps are fine. Use a rimmed baking sheet to line your 8×8 inch pan for easier pressing if parchment is short. A nonstick or silicone spatula helps incorporate sticky nut butter and syrup without scraping too hard. If your nut butter separates, stir it first until homogeneous; slightly warmed nut butter is easier to mix but avoid overheating the honey or nut butter together to keep texture right. If you like uniform bars, use a ruler to score the surface lightly before fully cooling.
Instructions – How to Make “Healthy Breakfast Cereal Bars”
- Preheat the oven to 350°F (175°C) and line an 8×8 inch baking pan with parchment paper.
Why it matters
Preheating ensures even baking from the moment the pan goes in, which helps create a gentle golden edge without over-drying the center.
Visual cues
The oven light should show a steady glow and the temperature should be up to 350°F before you place the pan inside.
Mini tips
If your oven runs hot, reduce to 325°F and add an extra 2 to 3 minutes of baking time, checking frequently.
- In a large bowl, mix together rolled oats, nut butter, honey, dried fruits, nuts, vanilla extract, and salt until fully combined.
Why it matters
Thorough mixing distributes the sweet binder and fat evenly, ensuring every bar holds together while still being tender.
Visual cues
The mixture should look glossy from the nut butter and honey or syrup and hold together when pressed between fingers.
Mini tips
Warm the nut butter slightly in the microwave for 10 to 15 seconds if it is very stiff; that makes stirring much easier. If the honey is very thick, a brief warm bath works wonders.
- Press the mixture evenly into the prepared baking pan.
Why it matters
Firm, even pressing removes air pockets and creates uniform thickness so bars bake consistently and slice cleanly.
Visual cues
The surface should be compact, with no loose crumbly bits on top. Edges can be slightly higher before baking to account for slight spreading.
Mini tips
Use an additional piece of parchment over the top and press with the flat bottom of a measuring cup for an even finish. Press firmly but not so hard that the mixture becomes oily on top.
- Bake in the preheated oven for about 15-20 minutes or until lightly golden.
Why it matters
Baking helps set the bars so they hold their shape after cooling and invites a subtle toasting that elevates the oat flavor.
Visual cues
Look for a light golden color around the edges and a slightly darker top sheen. Avoid deep browning; that means overbaked and dry.
Mini tips
Check at 12 minutes the first time you try this recipe; ovens vary and nuts can go from toasty to burnt quickly.
- Allow to cool completely in the pan before cutting into bars.
Why it matters
Cooling lets the natural sugars and nut butter firm up, so bars slice without crumbling and retain their chew.
Visual cues
The surface should be just set and no longer warm to the touch before slicing; ideally cool for at least 30 to 60 minutes.
Mini tips
For even slices, chill the pan for 20 minutes after it reaches room temperature, then use a sharp knife that you wipe between cuts.
- Store in an airtight container.
Why it matters
Airtight storage keeps moisture controlled and flavors fresh, preventing stale or overly soft bars.
Visual cues
Bars stored properly maintain a slightly glossy top and chewy interior; if they look dry, they may have been overbaked or stored without a lid.
Mini tips
Layer parchment between bars to prevent sticking. These bars also travel well in snack-sized sandwich bags.
Serving Suggestions & Storage Tips
Serving ideas:
- Cut bars into classic rectangles for a quick grab-and-go breakfast or into smaller bite-sized squares for a party platter.
- Top a warm bar with a smear of yogurt and fresh berries for a feel-good breakfast bowl.
- For a pre-run snack, eat half a bar with a banana for balanced carbs and protein.
Pairings:
- Pair with a cup of strong coffee or a latte for a morning ritual.
- Serve alongside a smoothie for added chew and sustained energy.
- For kids, pair a bar with an apple slices and a small milk carton for a balanced lunchbox.
Storage:
- At room temperature in an airtight container, these bars last about 5 to 7 days.
- Refrigerate for up to 2 weeks; the colder environment firms the bars and prolongs freshness.
- Freeze for up to 3 months. Wrap individual bars in parchment or plastic wrap then place in a freezer-safe bag for best results.
Reheating:
- To enjoy a freshly baked feel, microwave a single bar for 8 to 12 seconds until warm but not melted.
- For a toastier edge, lightly reheat in a 325°F oven or toaster oven for 4 to 6 minutes.
- If coming from the freezer, thaw in the refrigerator overnight or at room temperature for about 30 minutes, then warm if desired.
Helpful Notes & Variations
Substitutions:
- Rolled oats: swap for gluten-free rolled oats to make the bars gluten-free, but avoid instant oats if you want a chewier texture.
- Nut butter: sunflower seed butter or tahini make excellent nut-free swaps.
- Sweeteners: replace honey with maple syrup for a vegan option, or use a 1:1 liquid sweetener alternative such as brown rice syrup, though texture may vary.
Dietary adaptations:
- Vegan: use maple syrup instead of honey and ensure any add-ins are vegan.
- Nut-free: choose sunflower seed butter and sunflower seeds instead of tree nuts.
- Lower-sugar: reduce the syrup by a tablespoon or increase seeds slightly to maintain binding; the bars will be denser and may need a gentle chill to firm up.
Flavor add-ins:
- A sprinkle of cinnamon or a half teaspoon of cardamom lifts flavor subtly without overpowering.
- Mix in 1/4 cup mini chocolate chips after baking for a melty surprise, or fold in cacao nibs before pressing for a more bittersweet note.
- Toasted coconut flakes or a tablespoon of chia seeds add texture and interest.
Common mistakes and how to avoid them:
- Too dry or crumbly: not enough binder or overbaking is usually the cause. Add a tablespoon more nut butter or syrup and ensure you monitor oven time.
- Too soft and falling apart: underbaked or not cooled long enough. Allow full cooling and consider a short chill in the fridge.
- Uneven texture: pressing unevenly in the pan leads to some pieces being crisper than others. Use the flat bottom of a cup or a second sheet of parchment to press evenly.
For inspiration on other baked breakfast ideas that pair well with these bars, check out the delightful Berry Croissant Breakfast Bake which explores fruit-forward breakfast baking in a different format.
Conclusion
These homemade cereal bars are a tiny ritual of care that you can make in one afternoon and enjoy for days. They stand out because they are flexible, comforting, and truly made from pantry ingredients you can trust, and they let you control sweetness and texture. If you want a version with a chocolate twist, see a lovely chocolate-forward take at Healthy Cereal Bars with Chocolate. For another simple, wholesome approach to breakfast bars, explore the classic Healthy Breakfast Bars Recipe – Beaming Baker. Try a batch this weekend, tweak one small thing, and see how it becomes your signature bar. Happy baking.
Frequently Asked Questions
Can I make this recipe ahead of time?
Yes. These bars are ideal for batch cooking. Make them a day or two in advance for busy mornings, or prepare a double batch and freeze half. When made ahead, flavors meld and the bars often taste more cohesive. If you will be freezing, cut the bars first and wrap them individually so you can grab exactly what you need.
How should I store leftovers and how long do they last?
Store leftovers in an airtight container at room temperature for up to 5 to 7 days. For longer storage, refrigerate for up to 2 weeks or freeze for up to 3 months. Use parchment between layers to prevent sticking and keep bars tasting fresh. If using refrigerated storage, allow a few minutes at room temperature before serving for a softer bite.
What is the best way to reheat or serve this recipe after storage?
For a warm, just-baked mouthfeel, microwave a bar for 8 to 12 seconds. If you prefer a toasted edge, place bars in a 325°F oven or toaster oven for 4 to 6 minutes. When frozen, thaw overnight in the fridge or for 30 minutes at room temperature before warming. Serve alongside yogurt, fruit, or a smoothie for a balanced breakfast.
Can I adjust or substitute ingredients to fit my preferences?
Absolutely. Swap the nut butter for a seed butter for nut-free needs, use maple syrup to make the bars vegan-friendly, or try chopped dried apricots instead of raisins to change flavor profiles. If you remove sugary dried fruit, add an extra tablespoon of syrup to help bind the mixture. Small swaps are encouraged and part of the fun.
Do you have tips to ensure the best texture and flavor every time?
- Use old-fashioned rolled oats for the best chew and structure.
- Warm stiff nut butter slightly to make mixing easier.
- Press the mixture firmly and evenly into the pan to avoid air pockets.
- Watch the oven carefully; aim for light golden edges rather than deep browning.
- Cool completely before cutting to ensure clean slices. With these steps, you should get reliably tender, chewy bars with a pleasant crunch.
Healthy Breakfast Cereal Bars
Ingredients
Method
- Preheat the oven to 350°F (175°C) and line an 8×8 inch baking pan with parchment paper.
- In a large bowl, mix together rolled oats, nut butter, honey, dried fruits, nuts, vanilla extract, and salt until fully combined.
- Press the mixture evenly into the prepared baking pan.
- Bake in the preheated oven for about 15-20 minutes or until lightly golden.
- Allow to cool completely in the pan before cutting into bars.
- Store in an airtight container.