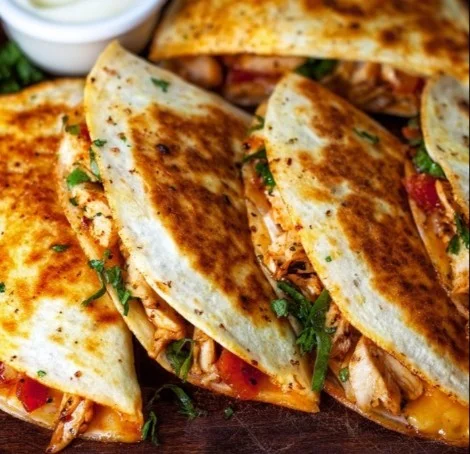
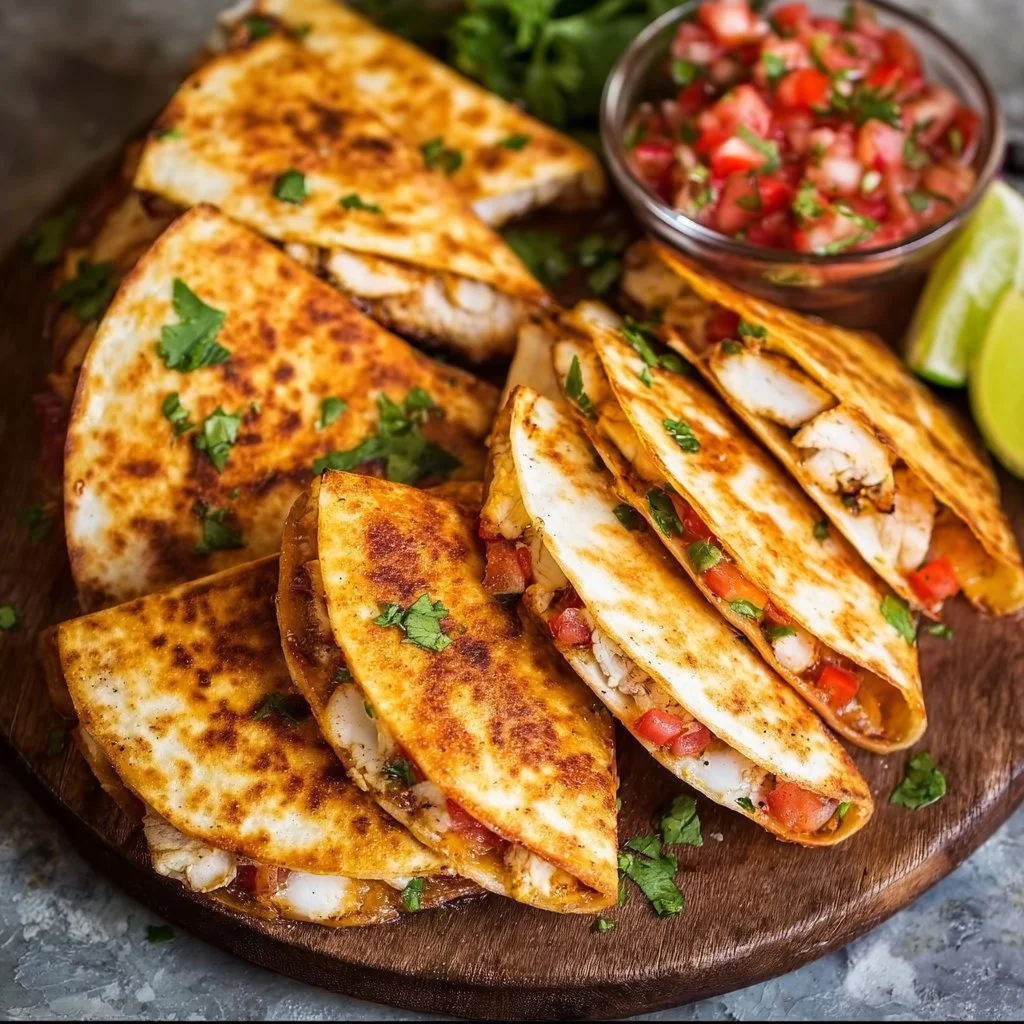
“Homemade Chicken Quesadillas,” I say with a grin, and you can probably hear the sizzle already. You know how some meals feel like a hug on a plate? That was the first time I mixed warm tortillas, salsa chicken, refried beans, melting cheese, and a whisper of oil in my pan and fed a tired family on a rainy Tuesday night. We laughed, passed wedges around, and the quiet that settled in the room told me I had nailed something simple and joyful. These quesadillas rely on five straightforward ingredients and small tricks to make the textures pop and the flavors sing, and if you love layered comfort, you might enjoy my spin as much as I do. If you want a sweet-spicy twist next time, I sometimes pull inspiration from a similar take on cheesy hot honey chicken quesadillas to experiment with glazes and heat.
Why You’ll Love This Recipe
- Simple ingredients that come together fast, perfect for busy weeknights or lazy weekends.
- Crowd-pleasing texture contrast: crisp golden exterior and gooey, creamy interior.
- Builds on pantry staples, so you can make a satisfying meal without a long shopping list.
- Emotionally warm and nostalgic; quesadillas have a way of turning a hurried evening into a shared moment.
- Flexible enough to adapt for picky eaters or bold flavor seekers, while staying reliably delicious.
Ingredients Needed
- Soft flour or corn tortillas – choose your favorite size, about 8 inches works well for wedges. Look for pliable tortillas that will fold without cracking.
- Salsa chicken – pre-cooked shredded chicken tossed with your favorite salsa; this is the main flavorful protein. If using leftover roasted chicken, stir it with a few tablespoons of salsa before layering.
- Refried beans – smooth or chunky, these add creaminess and help the filling bind so slices hold together. Warm them slightly for easy spreading.
- Grated cheese – a melty blend like cheddar, Monterey Jack, or a Mexican blend gives the best stretch and flavor. Use freshly grated cheese for faster melting.
- Cooking oil – a neutral oil with a high smoke point (vegetable, canola, or light olive oil) for the skillet to achieve an even golden crust.
Ingredients & Equipment Notes (Optional)
- Tortillas: If your tortillas are refrigerated, let them come to room temperature to prevent cracking while folding. For extra crispiness, use just-warmed tortillas.
- Salsa chicken: You can use store-bought salsa cooked into shredded chicken, rotisserie chicken mixed with salsa, or quickly simmer shredded chicken in salsa to infuse flavor.
- Refried beans: Canned is fine; heat and season with a pinch of cumin or garlic powder if desired. If you have leftover homemade beans, they add charm.
- Cheese: Pre-shredded cheese is convenient but may contain anti-caking agents that slow melting. Freshly shred a block for best melt.
- Skillet: A heavy-bottom skillet, cast iron if available, helps with even browning. A nonstick pan also works well for easy flipping.
- Spatula: Use a wide, sturdy spatula to flip folded quesadillas without losing filling.
Instructions – How to Make “Homemade Chicken Quesadillas”
- Heat a skillet over medium heat and add a little oil.
- Why it matters: The oil helps the tortilla crisp up evenly and prevents sticking.
- Visual cues: You should see a thin shimmer of oil and a slight wisp of steam as it warms. Do not let it smoke.
- Mini tip: Wipe excess oil with a paper towel if it pools; you want a light coating, not a shallow fry.
- Place a tortilla in the skillet and layer half with salsa chicken, refried beans, and cheese.
- Why it matters: Layering the ingredients on half the tortilla makes folding easy and keeps the filling centered for even melting.
- Visual cues: Spread a thin layer of refried beans as the base, then a modest mound of salsa chicken, and finish with a generous sprinkle of cheese so it melts through. Avoid overstuffing to prevent splitting.
- Mini tip: Warm the refried beans for 20 to 30 seconds in the microwave or in a small pan so they spread smoothly. A chilled filling will slow melting.
- Fold the tortilla over and cook until golden brown on both sides and cheese is melted.
- Why it matters: Browning creates flavor through the Maillard reaction and gives you that satisfying crunch. Melting ensures the filling holds together when cut.
- Visual cues: Look for an even golden-brown color and small, browned specks; the cheese will begin to ooze at the edges when it’s ready.
- Mini tip: Press down gently with your spatula while cooking to encourage contact between the tortilla and pan. Flip carefully and cook the other side until equally golden.
- Repeat with remaining tortillas and fillings.
- Why it matters: Making them in batches keeps them crisp and prevents sogginess from stacking too soon.
- Visual cues: Each finished quesadilla should be uniformly colored and slightly puffed where steam has lifted the layers.
- Mini tip: Keep finished quesadillas warm in a single layer on a baking sheet in a 200 F oven if cooking multiple batches for family or guests.
- Cut into wedges and serve.
- Why it matters: Cutting right after a short rest helps the quesadilla maintain shape while allowing steam to settle so cheese is still melty but not runaway.
- Visual cues: The cheese should be stringy when you lift a wedge, and the beans should be creamy, not runny.
- Mini tip: Use a sharp knife or a pizza cutter for clean edges. A quick wipe of the blade between cuts keeps slices neat.
After you follow these steps and have a rhythm, the process feels almost meditative. If you like crispier, thinner snacks, consider trying techniques from other handheld favorites like crispy chicken taquitos to experiment with rolling and frying methods.
Serving Suggestions & Storage Tips
Serving ideas
- Serve wedges hot with sides like sour cream, guacamole, and extra salsa for dipping. A squeeze of lime brightens the whole plate.
- For a fresh contrast, add a simple slaw or chopped tomato and cilantro salad on the side. The acidity cuts through the richness.
- Make a platter with a variety of salsas, from mild to spicy, so everyone customizes their bite.
Pairings
- Bright, crunchy sides work well: corn salad, cucumber radish salad, or a tossed green salad.
- For a heartier meal, pair quesadillas with a cup of black beans or a light rice dish. If you enjoy international comfort, try a mildly spiced rice inspired by family favorites like those in weeknight recipes similar to Asian crockpot orange chicken for a playful cross-check in meal planning.
Storage
- Short term: Place cooled quesadilla wedges in an airtight container with parchment between layers to prevent sticking. Refrigerate up to 3 days.
- Long term: Freeze individual wedges in a single layer on a sheet tray until firm, then transfer to a freezer bag for up to 1 month. Label with the date.
Reheating
- Oven or toaster oven: Place wedges on a baking sheet at 350 F for 8 to 12 minutes until heated through and crisp. This restores the crunch best.
- Skillet: Reheat over medium-low heat with a splash of oil, flipping gently until warmed and crisp. Cover briefly if the cheese needs to soften.
- Microwave: Quick but may make the tortilla soft. Microwave on medium for 30 to 45 seconds then finish in a hot skillet for crispness.
Helpful Notes & Variations
Substitutions
- Tortilla swap: Use whole wheat, multi-grain, or corn tortillas for different textures and flavors. Corn gives a heartier, more rustic bite.
- Cheese options: Try pepper jack for heat, Oaxaca for a stretchy melt, or a blend of sharp cheddar and Monterey Jack for tang and stretch.
- Bean choices: If you prefer, use mashed black beans seasoned with cumin and garlic instead of refried beans for a chunkier texture.
Dietary adaptations
- Vegetarian: Replace salsa chicken with a robust vegetable filling like sautéed peppers, onions, and spinach, or seasoned roasted sweet potato.
- Dairy-free: Use a dairy-free shredded cheese or omit cheese and add a smear of avocado for creaminess. The beans help bind the ingredients.
- Gluten-free: Choose certified gluten-free corn tortillas and check the labels on pre-made refried beans and salsa for hidden gluten.
Flavor add-ins
- Fresh herbs: Cilantro or green onion added after cooking brightens the flavors.
- Spices: Stir a pinch of smoked paprika, ground cumin, or chili powder into the refried beans to add depth.
- Heat: Add chopped pickled jalapenos or a few spoonfuls of a spicy salsa to the chicken for a kick.
Common mistakes and how to avoid them
- Overfilling: Too much filling causes the tortilla to split and messy slices. Keep a modest amount on one half.
- Cold fillings: Chilled ingredients slow melting and can make the interior uneven. Warm refried beans and salsa chicken slightly first.
- Too much oil: Excess oil leads to greasy quesadillas. Use a light coating on the skillet and blot if needed.
- Crowding the pan: Cook in batches so each quesadilla has room to brown evenly.
If you enjoy experimenting, you can borrow ideas from rich, saucy dishes and adjust seasoning profiles the same way a favorite butter chicken dish shifts with cream and aromatics; for ideas on balancing rich sauces and spices, see this straightforward recipe for quick easy homemade butter chicken, which can inspire spice balances for your fillings.
Conclusion
This Homemade Chicken Quesadillas recipe stands out because it is both simple and deeply satisfying. With just tortillas, salsa chicken, refried beans, cheese, and a touch of oil, you build layers of texture and flavor that feel both nostalgic and fresh. These quesadillas are easy to scale for a family dinner, adaptable for dietary needs, and reliable enough to make on a weeknight yet good enough to serve to friends. For a classic take on the classic that inspired many home cooks, check out this Best Chicken Quesadilla Recipe – Delish for additional technique notes, and if you want another approachable version with clear step-by-step guidance, take a look at this Chicken Quesadilla Recipe {Simple to Make} | Ask Chef Dennis. Give these quesadillas a try tonight and tell me which small tweak made them perfect for you.
Frequently Asked Questions
Can I make this recipe ahead of time?
Yes. You can assemble quesadillas up to the point of cooking and refrigerate them covered for a few hours before cooking. For best texture, cook them fresh when possible. If preparing for later, individually wrap and freeze cooked wedges, then reheat from frozen for convenience.
How should I store leftovers and how long do they last?
Store leftovers in an airtight container in the refrigerator for up to 3 days. If freezing, place cooled wedges in a single layer on a tray to freeze quickly, then transfer to a freezer-safe bag for up to 1 month. Label with the date.
What is the best way to reheat or serve this recipe after storage?
The oven or a toaster oven at 350 F for about 8 to 12 minutes brings back the best crispness. A skillet over medium-low heat works well for a quick reheat and to restore crunch. Microwaving is fastest but can soften the tortilla; follow with a quick pan-sear to crisp the exterior.
Can I adjust or substitute ingredients to fit my preferences?
Absolutely. Swap tortillas for corn or gluten-free varieties, change the cheese to milder or spicier options, or replace refried beans with mashed black beans. You can also replace salsa chicken with seasoned vegetables for a vegetarian version.
Do you have tips to ensure the best texture and flavor every time?
Warm your fillings slightly so cheese melts evenly. Use a modest amount of filling to avoid splitting the tortilla. Cook in a hot but not smoking skillet with a light coating of oil for a golden, crispy exterior. Finish with a short rest before cutting to let steam settle and keep wedges intact.
Homemade Chicken Quesadillas
Ingredients
Method
- Heat a skillet over medium heat and add a little oil.
- Place a tortilla in the skillet and layer half with salsa chicken, refried beans, and cheese.
- Fold the tortilla over and cook until golden brown on both sides and cheese is melted.
- Repeat with remaining tortillas and fillings.
- Cut into wedges and serve.